A simple project
In a previous article, I detailed how I setup a CI/CD pipeline on a very simple side project using GitLab, Portainer and Docker Swarm.
3 stages are defined in this pipeline :
- the first one runs some tests on the Node.js code
- the second builds a Docker image and publishes it in a Gitlab registry
- the last stage deploys the new image on Docker Swarm using Portainer’s webhook feature
The Docker image built during the process is based on nginx:1.14 and is deployed right away without any verification of its entrails. This could be dangerous so let’s see how we can improve that.
Adding an image scanning stage to the pipeline
There are several image scanning solutions out there, commercial and open sources. In this article, we’ll go with Clair and clair-scanner, 2 open source tools.
The following documentation from GitLab provided all the instructions to add an additional stage dedicated to the image scanning, http://docs.gitlab.com/ce/ci/examples/container_scanning.html, it basically runs a Clair server that provides the existing CVEs and then the clair-scanner binary checks each layer of the image that was built during the previous stage of the pipeline.
I’ve added the additional content to the .gitlab-ci.yml file of the project.
image_scanning:
  stage: scan
  image: docker:stable
  services:
  - docker:dind
  variables:
    DOCKER_DRIVER: overlay2
  allow_failure: true
  script:
  - docker run -d --name db arminc/clair-db:latest
  - docker run -p 6060:6060 --link db:postgres -d --name clair --restart on-failure arminc/clair-local-scan:v2.0.1
  - apk add -U wget ca-certificates
  - docker pull $CONTAINER_IMAGE:$CI_BUILD_REF
  - wget http://github.com/arminc/clair-scanner/releases/download/v8/clair-scanner_linux_amd64
  - mv clair-scanner_linux_amd64 clair-scanner
  - chmod +x clair-scanner
  - touch clair-whitelist.yml
  - while( ! wget -q -O /dev/null http://docker:6060/v1/namespaces ) ; do sleep 1 ; done
  - retries=0
  - echo "Waiting for clair daemon to start"
  - while( ! wget -T 10 -q -O /dev/null http://docker:6060/v1/namespaces ) ; do sleep 1 ; echo -n "." ; if [ $retries -eq 10 ] ; then echo " Timeout, aborting." ; exit 1 ; fi ; retries=$(($retries+1)) ; done
  - ./clair-scanner -c http://docker:6060 --ip $(hostname -i) -r gl-container-scanning-report.json -l clair.log -w clair-whitelist.yml $CONTAINER_IMAGE:$CI_BUILD_REF || true
  - cat gl-container-scanning-report.json
  artifacts:
    paths: [gl-container-scanning-report.json]
  only:
  - master
Note: I’ve only done some minor modifications to the stage defined in the documentation so it fits the version of my GitLab runner (needed when it comes to the artifact upload)
With this new stage added, let’s see how it goes by running a new pipeline. The screenshot below shows part of the output of this new the image_sanning stage.

We can see at the top that each layer of the image is analyzed.
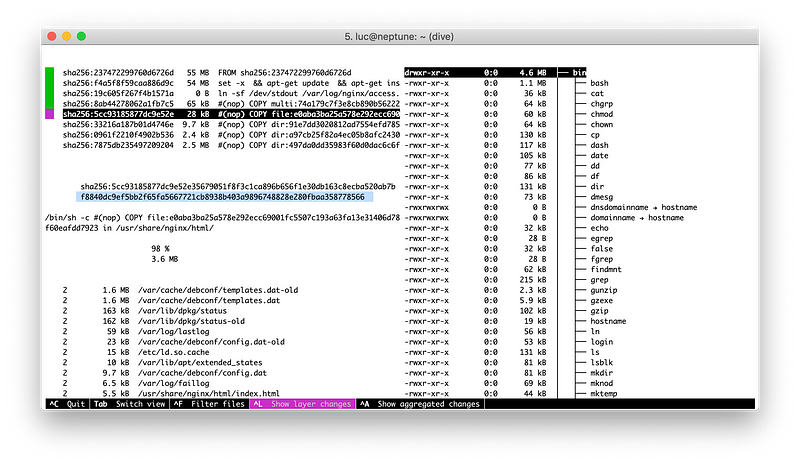
Note: if you want to know more about the internals of an image and explore each layer in a cool way, I highly recommend to have a look at dive.
Coming back to the GitLab output we can see 100 vulnerabilities are detected. That’s a lot! Are they dangerous? Well, judging by some of the entries within the Severity column, Critical / High, they might be.
We have a lot of 100 vulnerabilities… now what?
Well, except if you are a security guy, chances are that those vulnerabilities won’t talk to you that much. Knowing an application has vulnerabilities can raise a lot of questions though…
- Am I safe to run the application as it is?
- Which vulnerabilities can I ignore and which ones must I consider seriously?
- My application is not user-facing, that should be safe to go with all those CVEs, right ? Even for the Critical ones ?
- Will my boss know if I just ignore all those CVEs ? 🙂
- Are there any simple things I could do to mitigate the potential risks?
In some cases, there are actually some simple steps that can help a lot as we’ll see below.
Check the base image first
The example I’m considering is a simple web site published with the official nginx:1.14 image, the last stable at the date of writing this post. As the Dockerfile uses the multi-stage build, the final image does not contain a lot of unnecessary Node.js stuff used to build the web assets. The Dockerfile is the following one.
FROM node:8.12.0-alpine AS build
COPY . /build
WORKDIR /build
RUN npm i
RUN node clean.js
RUN ./node_modules/mustache/bin/mustache upcoming_events.json index.mustache > index.html
RUN ./node_modules/mustache/bin/mustache past_events.json past.mustache > past.html
FROM nginx:1.14.0
COPY --from=build /build/*.html /usr/share/nginx/html/
COPY events.json /usr/share/nginx/html/
COPY css /usr/share/nginx/html/css
COPY js /usr/share/nginx/html/js
COPY img /usr/share/nginx/html/img
The multi-stage build is already a good starting point as it helps to reduce the attack surface of the image. But still, the final nginx:1.14 image is based on Debian, so let’s change that and use nginx:1.14-alpine instead.
Note: Alpine Linux is a small distribution, it’s focused on security and exposes a very small attack surface. Using a base image built from Alpine would probably be a good move, we’ll check this out.
The second part of our multi-stage Dockerfile is now replaced with the following.
FROM nginx:1.14-alpine
COPY --from=build /build/*.html /usr/share/nginx/html/
COPY events.json /usr/share/nginx/html/
COPY css /usr/share/nginx/html/css
COPY js /usr/share/nginx/html/js
COPY img /usr/share/nginx/html/img
Let’s now trigger a new build and see how it goes…
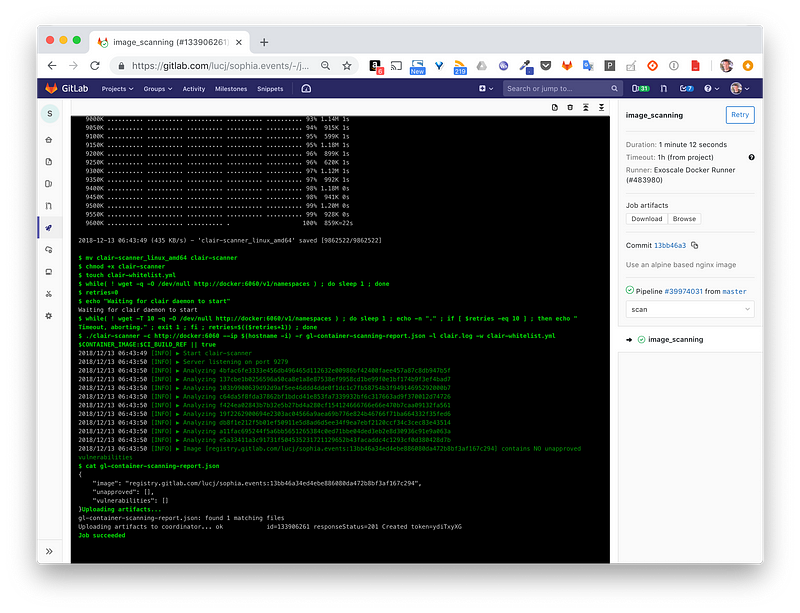
Well, it went pretty good according to the screenshot above. The scanning stage now reports… 0 vulnerabilities!
Summary
This short post illustrates that adding a simple image scanning stage in an existing CI/CD pipeline is not that complicated. This provides additional information such as the number and IDs of the vulnerabilities an image contains. From this information, it’s still difficult to know what to do with them but using a base image built from Alpine can then be the first step to enhance the security of an application without knowing a lot on this CVE thing.
This article originated from http://medium.com/lucjuggery/adding-cve-scanning-to-a-ci-cd-pipeline-d0f5695a555a
Luc Juggery is a Tigera guest blogger. He is a software engineer with 15+ years of experience in big companies and startups. He has been in the startup ecosystem since 6+ years and co-founder of 2 startups located in Sophia-Antipolis.
————————————————-
Free Online Training
Access Live and On-Demand Kubernetes Tutorials
Calico Enterprise – Free Trial
Solve Common Kubernetes Roadblocks and Advance Your Enterprise Adoption
Join our mailing list
Get updates on blog posts, workshops, certification programs, new releases, and more!