In this blog post, I will focus on configuring OpenEBS as a persistent storage option on the open-source self-managed OpenShift Origin and deploy a stateful workload (MongoDB) both from CLI and custom catalog template using OpenEBS storage classes.
What is OpenShift Origin?
OpenShift Origin is the upstream community project used in all deployment models provided by Red Hat OpenShift such as OpenShift Online, OpenShift Dedicated, and OpenShift Container Platform. Red Hat OpenShift is an enterprise container application platform that is based on a core of Docker container packaging, Kubernetes container cluster management and the OpenShift Origin project itself.
First, having more than one option sounds confusing, but they clearly differentiate from each other. Here is the summary of all available deployment options to start with OpenShift.
-
- OpenShift Origin is a distribution of Kubernetes optimized for continuous application development and multi-tenant deployment. Origin is open source and all source code for the Origin project is available under the Apache License v2.0 on GitHub. Website and documentation for the Origin project are under www.openshift.org. It is completely free, you can deploy Origin on baremetal, in a VM or on a cloud. This is the option I will focus on this article.
-
- OpenShift Online is Red Hat’s public cloud application development and hosting service. Starter plan is free to use and includes 1 project, 1GiB memory, 1GiB terminating memory and 1GiB storage. Pro Plan costs $50/month and includes 10 projects, 2GiB memory, 2GiB terminating memory and 2GiB storage. Details are available here.
-
- OpenShift Dedicated is Red Hat’s managed private cluster offering, built around a core of application containers powered by Docker, with orchestration and management provided by Kubernetes, on a foundation of Red Hat Enterprise Linux. It’s available on the Amazon Web Services (AWS) and Google Cloud Platform (GCP) marketplaces. A complete OpenShift 3 cluster, configured for high availability (HA) with a minimum of 5 masters, infrastructure nodes and 4 application nodes managed by Red Hat costs $48k. Details on OpenShift pricing are available here.
- OpenShift Container Platform (formerly OpenShift Enterprise) is Red Hat’s on-premise private PaaS product.
Prerequisites
Hardware
- Minimum two nodes. Recommended four or more (Baremetal, VMs or cloud instances)
Software components used
- CentOS 7.x
- OpenShift Origin 3.7+
- OpenShift-Ansible (master branch used for installation)
- OpenEBS 0.5.1
Note: Make sure the following package dependencies are installed: python, wget, git, net-tools, bind-utils, iptables-services, bridge-utils, bash-completion, kexec-tools, sos, psacct, docker-1.12.6, ansible, pyOpenSS, httpd-tool
Install OpenShift Origin
Follow instructions from OpenShift Origin Latest Documentation to deploy a multi-node Origin cluster. If you are deploying it for the first time it may be a bit complicated. I plan to post my notes, steps on getting minimum requirements satisfied and have a successful deployment after this post.
Verify OpenShift Origin deployment
Execute the following commands to verify successful installation.
#oc get nodes
Number of nodes you see maybe different in your case, but status should looks similar to below showing nodes ready.
# oc get nodes
NAME STATUS AGE VERSION
oonode1 Ready 2d v1.7.6+a08f5eeb62
oonode2 Ready 2d v1.7.6+a08f5eeb62
oonode3 Ready 2d v1.7.6+a08f5eeb62
oonode4 Ready 2d v1.7.6+a08f5eeb62
Configure access permissions
Create a new admin user with cluster-admin role/permissions and assing password using the following commands:
#oc adm policy add-cluster-role-to-user cluster-admin admin –as=system:admin
# htpasswd /etc/origin/master/htpasswd admin
Login as the admin user and you will be using default project.
#oc login -u admin
Output:
# oc login -u admin
Authentication required for http://oonode1:8443 (openshift)
Username: admin
Password:
Login successful.You have access to the following projects and can switch between them with ‘oc project <projectname>’:* default
kube-public
kube-service-catalog
kube-system
logging
management-infra
openshift
openshift-ansible-service-broker
openshift-infra
openshift-node
openshift-template-service-broker
openshift-web-consoleUsing project “default”.
Provide access to the host volumes which is needed by the OpenEBS volume replicas by updating the default security context (scc). If you miss this step your replicas will fail to deploy.
#oc edit scc restricted
Now set allowHostDirVolumePlugin: true and save changes. The file should look like below:
# Please edit the object below. Lines beginning with a ‘#’ will be ignored,
# and an empty file will abort the edit. If an error occurs while saving this file will be
# reopened with the relevant failures.
#
allowHostDirVolumePlugin: true
allowHostIPC: false
allowHostNetwork: false
allowHostPID: false
allowHostPorts: false
allowPrivilegedContainer: false
allowedCapabilities: []
allowedFlexVolumes: []
apiVersion: v1
defaultAddCapabilities: []
fsGroup:
type: MustRunAs
groups:
– system:authenticated
kind: SecurityContextConstraints
metadata:
annotations:
kubernetes.io/description: restricted denies access to all host features and requires
pods to be run with a UID, and SELinux context that are allocated to the namespace. This
is the most restrictive SCC and it is used by default for authenticated users.
creationTimestamp: 2018-01-20T19:39:18Z
name: restricted
resourceVersion: “68274”
selfLink: /api/v1/securitycontextconstraints/restricted
uid: 9abddec5-fe19-11e7-8d06-005056873c08
priority: null
readOnlyRootFilesystem: false
requiredDropCapabilities:
– KILL
– MKNOD
– SETUID
– SETGID
runAsUser:
type: MustRunAsRange
seLinuxContext:
type: MustRunAs
supplementalGroups:
type: RunAsAny
users: []
volumes:
– configMap
– downwardAPI
– emptyDir
– hostPath
– persistentVolumeClaim
– projected
– secret
Save changes.
Install OpenEBS on Origin
There are few easy ways to install OpenEBS. You can either apply the operator and storageclasses direct from the URL or clone the repo and execute from the local copy. I prefer to clone a local copy, but i’ll also give you the other option if you prefer.
Clone the latest OpenEBS files and sample application specs using the below command on your OpenShift master node:
# git clone http://github.com/openebs/openebs.git

# cd openebs/k8s
Apply the file two yaml files below:
# oc apply -f openebs-operator.yaml
# oc apply -f openebs-storageclasses.yaml
Alternative way – If you choose not to copy from the repo you can apply the yaml file direct from the URL below:
# oc apply -f http://openebs.github.io/charts/openebs-operator.yaml
Verify OpenEBS deployment
Verify that the OpenEBS provisioner and API server are created successfully and running.
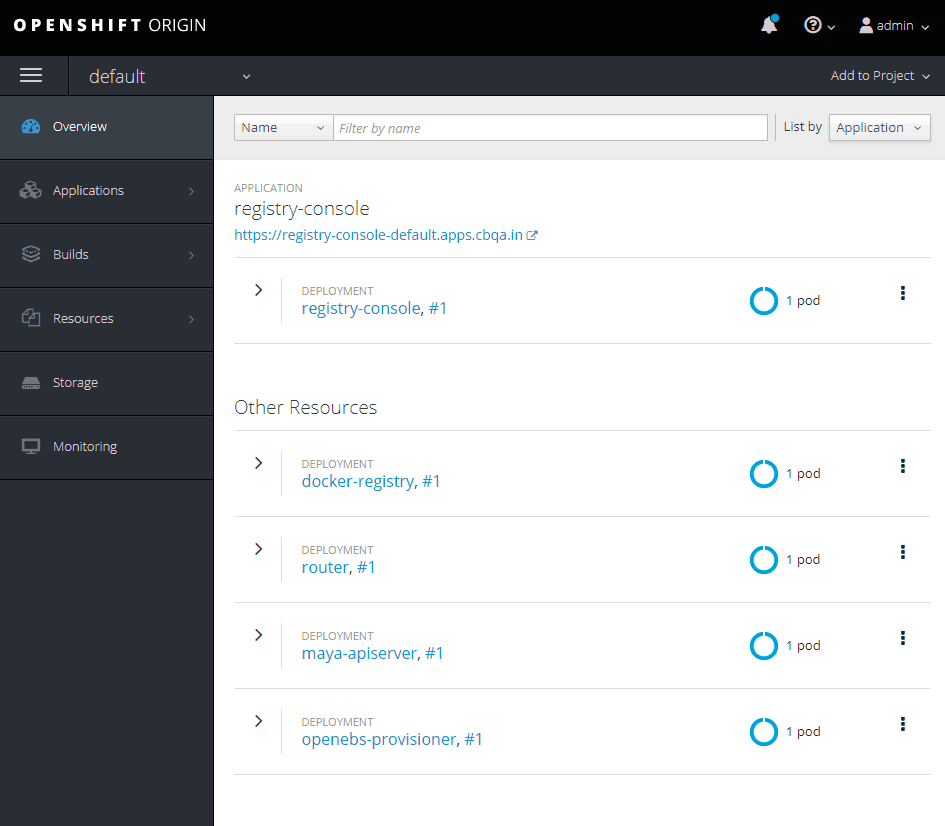
# oc get deployments
NAME DESIRED CURRENT UP-TO-DATE AVAILABLE AGE
maya-apiserver 1 1 1 1 2d
openebs-provisioner 1 1 1 1 2d
Check pods to confirm maya-apiserver and openebs-provisioner.
# oc get pods
NAME READY STATUS RESTARTS AGE
docker-registry-1-b5r7t 1/1 Running 0 2d
maya-apiserver-3053842955-xbx8w 1/1 Running 0 2d
openebs-provisioner-2499455298-46brm 1/1 Running 0 2d
registry-console-1-mrpc9 1/1 Running 0 2d
router-1-bf775 1/1 Running 3 2d
Check services to confirm maya-apiserver exists.
# oc get service
NAME CLUSTER-IP EXTERNAL-IP PORT(S) AGE
docker-registry 172.30.113.229 <none> 5000/TCP 2d
kubernetes 172.30.0.1 <none> 443/TCP,53/UDP,53/TCP 2d
maya-apiserver-service 172.30.17.113 <none> 5656/TCP 2d
registry-console 172.30.148.98 <none> 9000/TCP 2d
router 172.30.229.239 <none> 80/TCP,443/TCP,1936/TCP 2d
Check service accounts for openebs-maya-operator:
# oc get sa
NAME SECRETS AGE
builder 2 2d
default 3 2d
deployer 2 2d
openebs-maya-operator 2 2d
registry 3 2d
router 2 2d
# oc get clusterrole openebs-maya-operator
\NAME
openebs-maya-operator
# oc get clusterrolebindings openebs-maya-operator
NAME ROLE USERS GROUPS SERVICE ACCOUNTS SUBJECTS
openebs-maya-operator /openebs-maya-operator default/openebs-maya-operator, default/default
And finally verify OpenEBS default storage classes.
# oc get sc
NAME TYPE
openebs-cassandra openebs.io/provisioner-iscsi
openebs-es-data-sc openebs.io/provisioner-iscsi
openebs-jupyter openebs.io/provisioner-iscsi
openebs-kafka openebs.io/provisioner-iscsi
openebs-mongodb openebs.io/provisioner-iscsi
openebs-percona openebs.io/provisioner-iscsi
openebs-redis openebs.io/provisioner-iscsi
openebs-standalone openebs.io/provisioner-iscsi
openebs-standard openebs.io/provisioner-iscsi
openebs-zk openebs.io/provisioner-iscsi
After few easy steps we are now ready to deploy workloads on persistent storage provided by OpenEBS. I’ll cover both CLI and Catalog installation through the OpenShift Web Console.
Install Percona on OpenEBS using OC CLI
Use OpenEBS as persistent storage for a Percona DB deployment by selecting the openebs-percona storage class in the persistent volume claim. I will use the sample file available in the openebs repo which I cloned locally in the previous steps.
View the Percona deployment yaml.
# cd openebs/k8s/demo/percona


# cat demo-percona-mysql-pvc.yaml
—
apiVersion: v1
kind: Pod
metadata:
name: percona
labels:
name: percona
spec:
containers:
– resources:
limits:
cpu: 0.5
name: percona
image: percona
args:
– “–ignore-db-dir”
– “lost+found”
env:
– name: MYSQL_ROOT_PASSWORD
value: k8sDem0
ports:
– containerPort: 3306
name: percona
volumeMounts:
– mountPath: /var/lib/mysql
name: demo-vol1
volumes:
– name: demo-vol1
persistentVolumeClaim:
claimName: demo-vol1-claim
—
kind: PersistentVolumeClaim
apiVersion: v1
metadata:
name: demo-vol1-claim
spec:
storageClassName: openebs-percona
accessModes:
– ReadWriteOnce
resources:
requests:
storage: 5G
As you can see in the yaml file above, storageClassName is set to openebs-percona which has 2 replicas.
Now, apply the file.
#oc apply -f demo-percona-mysql-pvc.yaml
Finally, verify that Percona is deployed and OpenEBS controller and replica are running.
# oc get pods
NAME READY STATUS RESTARTS AGE
docker-registry-1-b5r7t 1/1 Running 0 2d
maya-apiserver-3053842955-xbx8w 1/1 Running 0 2d
openebs-provisioner-2499455298-46brm 1/1 Running 0 2d
percona-1378140207-5q2gb 1/1 Running 0 15mh
pvc-c7a24dc8-ffc7-11e7-a7cd-005056873c08-ctrl-1719480235-xf4t5 2/2 Running 0 15m
pvc-c7a24dc8-ffc7-11e7-a7cd-005056873c08-rep-1550141838-ldm59 1/1 Running 0 15m
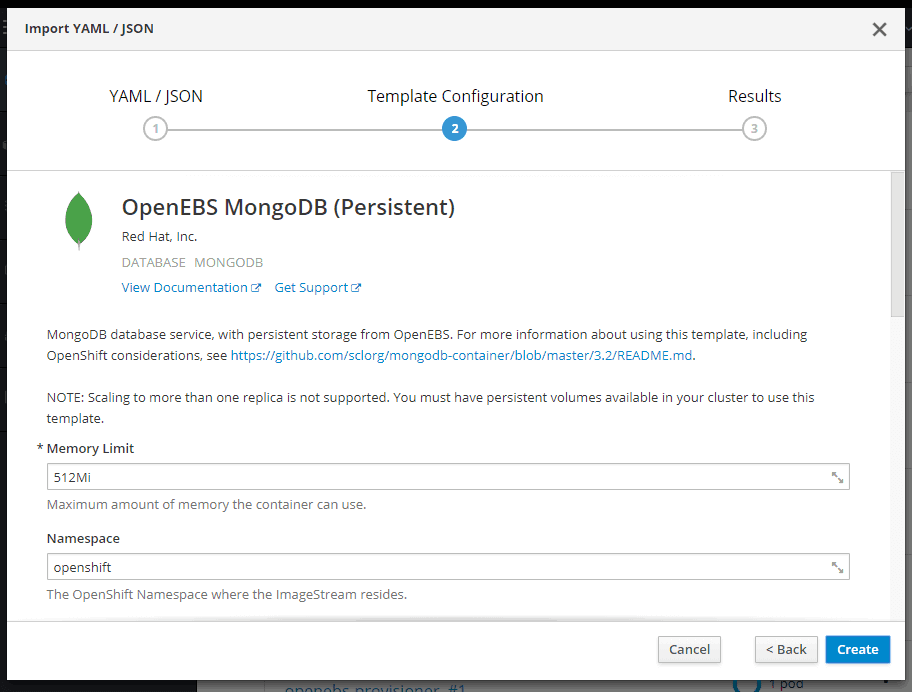
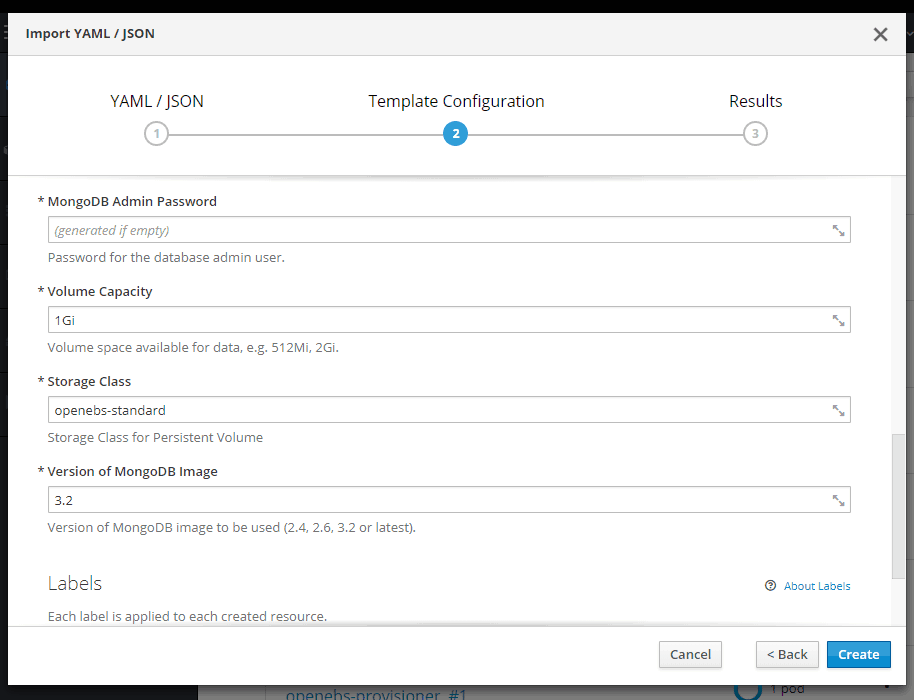
Install MongoDB on OpenEBS using the OpenShift Web Console
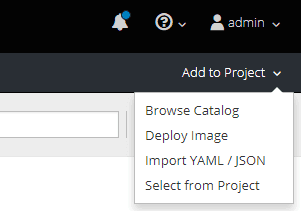
Login to the OpenShift Web Console using the admin credentials we have created earlier.
Click on Add to Project button and select Import YAML / JSON.
Copy the content of of http://raw.githubusercontent.com/openebs/openebs/master/k8s/openshift/examples/v3.7/db-templates/openebs-mongodb-persistent-template.json file and paste into Import YAML / JSON window.
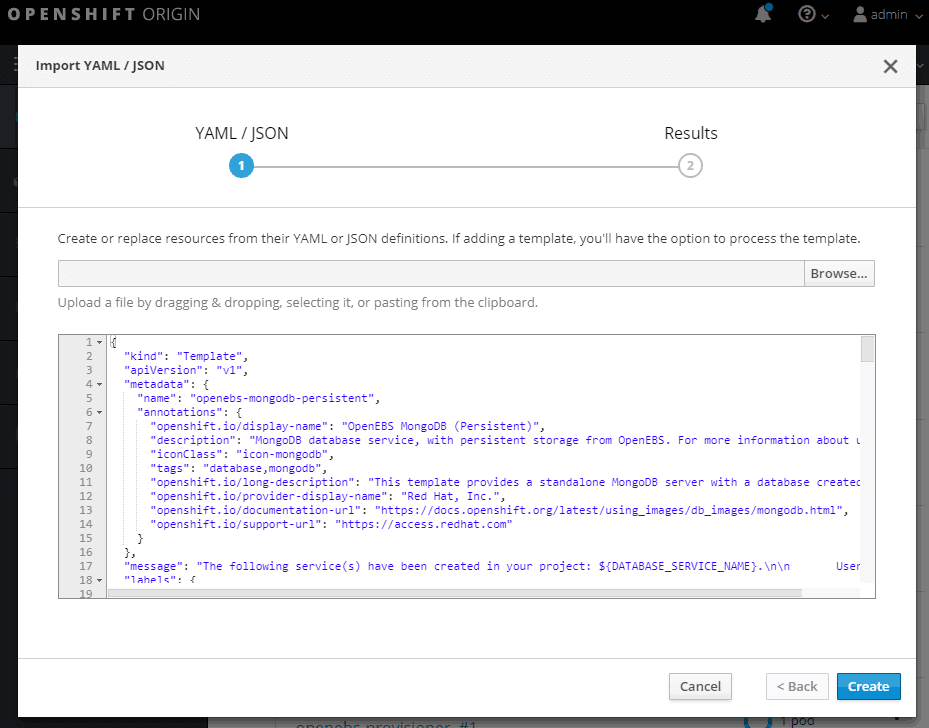
Click on Create button, select Save template and click Continue.
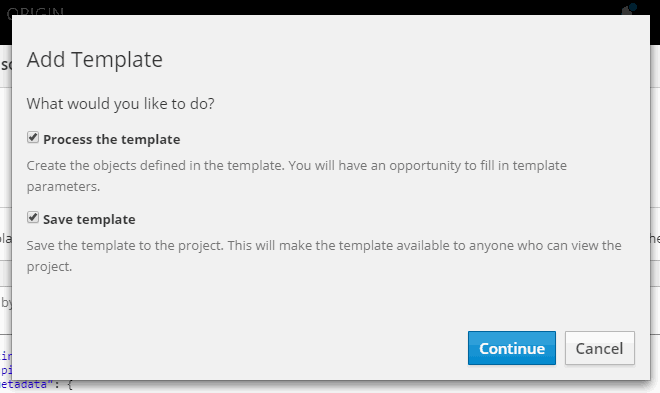
On the Template Configuration window make sure Storage Class is openebs-standard and click on Create.
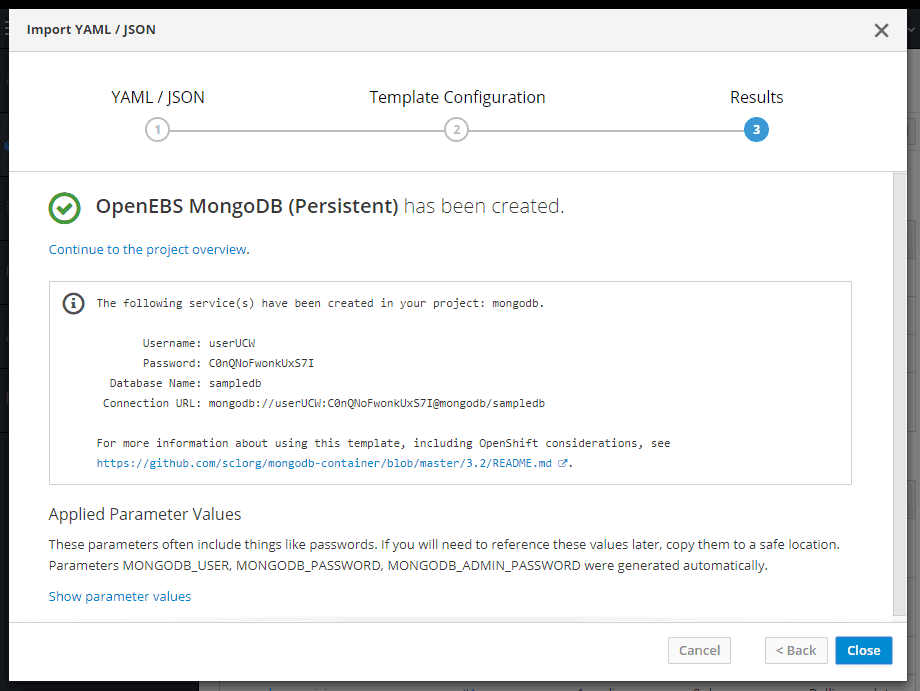
You have successfully deployed a persistent MongoDB.
Frequently asked OpenEBS questions
How does storage HA work for stateful workloads?
High Availability storage (HA storage) is a storage system that is continuously operational. Redundancy is the key feature of HA storage as it allows data to be kept in more than one place while ensuring data protection and consistency.
An OpenEBS Jiva Volume is a controller deployed during the OpenEBS installation. Volume replicas are defined by the parameter we set above. The controller is an iSCSI target while the replicas play the role of a disk. The controller exposes the iSCSI target while the actual data is written. The controller and each replica run inside a dedicated container.
An OpenEBS Jiva Volume controller exists as a single instance, but there can be multiple instances of OpenEBS Jiva volume replicas. Persistent data is synchronized between replicas.
OpenEBS Jiva Volume HA is based on various scenarios as explained in the following sections.
NOTE: Each replica is scheduled in a unique K8s node, and a K8s node never has two replicas of one OpenEBS volume.
What happens when an OpenEBS volume controller pod crashes?
Kubernetes automatically re-schedules the controller as a new Kubernetes pod.
Policies are in place that ensures faster rescheduling.
What happens when a K8s node that hosts OpenEBS volume controller goes offline?
The controller is automatically re-scheduled as a new Kubernetes pod.
Policies are in place that ensures faster rescheduling.
If Kubernetes node is unavailable, the controller gets scheduled on one of the available nodes.
What happens when an OpenEBS volume replica pod crashes for reasons other than node not-ready and node unreachable?
The replica is automatically re-scheduled as a new Kubernetes pod.
The replica may or may not be re-scheduled on the same K8s node.
There is data loss with this newly scheduled replica if it gets re-scheduled on a different K8s node.
What happens when a K8s node that hosts OpenEBS volume replica goes offline?
There is no storage downtime as the other available replica displays inputs/outputs.
Policies are in place that does not allow re-scheduling of crashed replica (as the replica is tied to a node’s resources) to any other node.
This article originated from http://containerized.me/how-to-install-openebs-on-openshift/
————————————————-
Free Online Training
Access Live and On-Demand Kubernetes Tutorials
Calico Enterprise – Free Trial
Solve Common Kubernetes Roadblocks and Advance Your Enterprise Adoption
Join our mailing list
Get updates on blog posts, workshops, certification programs, new releases, and more!