
This guest blog post is by Reza Ramezanpour. Reza is a user group researcher and advocate for Project Calico. His previous experience includes being a co-founder of a startup company, ARPI, where he developed embedded IT based technologies to create smart city solutions. He is also certified by Australian computer society as a Computer network and system engineer.
Introduction
In this blog post I’d like to walk you through why monitoring can be beneficial for your cluster, how you can enable Calico monitoring information, and how to create a user friendly visual representation for it. Along the way I’ll try to explain why we should use monitoring in our infrastructure and how monitoring does its magic.
What is monitoring?
Within the context of IT, monitoring can be viewed as an interpreter between the underlying technology and user experience side of your business. This translation enables you to gain a better perspective about your IT infrastructure, whether it is working as expected, and measure its value in your business.
How monitoring does it?
Most applications or services have the ability to share some amount of information in real time to broadcast their status. Numerical status fields are often referred to as “Metrics” and are the essential part of any monitoring framework. Applications such as Prometheus or Grafana can use these metrics to conjure user friendly representations.
Let’s start our Journey by examining how Calico components work. Each Calico node runs an instance of Felix which acts as the brain of Calico.
First create a namespace to group all the monitoring components we will install.
~$ kubectl apply -f -<<EOF
apiVersion: v1
kind: Namespace
metadata:
  name: calico-monitoring
  labels:
    app:  ns-calico-monitoring
    role: monitoring
EOF
Calico as a cloud native security solution implements Prometheus metric standards. This protocol publishes data in key/value pairs via HTTP Protocol. In order to enable Felix metrics you can use `calicoctl` to modify the related Calico setting.
~$ calicoctl patch felixConfiguration default --patch '{"spec": {"prometheusMetricsEnabled": true}}'This modification enables a http service for all the nodes in your cluster to listen on port 9091 for incoming connections, and publish the required metrics that can be consumed by your monitoring framework. Prometheus can store these metrics as a time series database and gives you tools to query the metrics in various ways. However, there are some steps that should be taken in order to access the metrics via Prometheus.
Here you create permission to allow `calico-prometheus-user` to read metrics published by Felix and generate a base kubernetes configmap for your Prometheus instance.
kubectl apply -f - <<EOF
apiVersion: rbac.authorization.k8s.io/v1beta1
kind: ClusterRole
metadata:
  name: calico-prometheus-user
rules:
- apiGroups: [""]
  resources:
  - endpoints
  - services
  - pods
  verbs: ["get", "list", "watch"]
- nonResourceURLs: ["/metrics"]
  verbs: ["get"]
---
apiVersion: v1
kind: ServiceAccount
metadata:
  name: calico-prometheus-user
  namespace: calico-monitoring
---
apiVersion: rbac.authorization.k8s.io/v1beta1
kind: ClusterRoleBinding
metadata:
  name: calico-prometheus-user
roleRef:
  apiGroup: rbac.authorization.k8s.io
  kind: ClusterRole
  name: calico-prometheus-user
subjects:
- kind: ServiceAccount
  name: calico-prometheus-user
  namespace: calico-monitoring
---
apiVersion: v1
kind: ConfigMap
metadata:
  name: prometheus-config
  namespace: calico-monitoring
data:
  prometheus.yml: |-
    global:
      scrape_interval:   15s
      external_labels:
        monitor: 'tutorial-monitor'
    scrape_configs:
    - job_name: 'prometheus'
      scrape_interval: 5s
      static_configs:
      - targets: ['localhost:9090']
    - job_name: 'felix_metrics'
      scrape_interval: 5s
      scheme: http
      kubernetes_sd_configs:
      - role: endpoints
      relabel_configs:
      - source_labels: [__meta_kubernetes_service_name]
        regex: felix-metrics-svc
        replacement: $1
        action: keep
    - job_name: 'typha_metrics'
      scrape_interval: 5s
      scheme: http
      kubernetes_sd_configs:
      - role: endpoints
      relabel_configs:
      - source_labels: [__meta_kubernetes_service_name]
        regex: typha-metrics-svc
        replacement: $1
        action: keep
EOF
Now that you have all the necessary components to run your monitoring framework it is time to create the Prometheus pod and link it to the configuration and permission.
kubectl apply -f - <<EOF
apiVersion: v1
kind: Pod
metadata:
  name: prometheus-pod
  namespace: calico-monitoring
  labels:
    app: prometheus-pod
    role: monitoring
spec:
  serviceAccountName: calico-prometheus-user
  containers:
  - name: prometheus-pod
    image: prom/prometheus
    resources:
      limits:
        memory: "128Mi"
        cpu: "500m"
    volumeMounts:
    - name: config-volume
      mountPath: /etc/prometheus/prometheus.yml
      subPath: prometheus.yml
    ports:
    - containerPort: 9090
  volumes:
  - name: config-volume
    configMap:
      name: prometheus-config
EOF
At this point you have got a working instance of Prometheus connected to Felix collecting all available Calico metrics in your cluster.
Understanding raw data can be a daunting task, Prometheus supports showing collected data in different forms via its expression browser. This feature has the ability to manipulate the data and create tables or charts but it’s not the best solution since it was mainly developed to address debugging needs.
Grafana, another great cloud native open source project could be a better option to visualize this information. In order to create a visualization you will have to configure Grafana to tell it where the data is stored and how it can be accessed.
Let’s create service for Prometheus and configure the Grafana datastore via a kubernetes configmap to point to it.
kubectl apply -f - <<EOF
apiVersion: v1
kind: Service
metadata:
  name: prometheus-dashboard-svc
  namespace: calico-monitoring
spec:
  selector:
      app:  prometheus-pod
      role: monitoring
  ports:
  - port: 9090
    targetPort: 9090
EOF
---
apiVersion: v1
kind: ConfigMap
metadata:
  name: grafana-config
  namespace: calico-monitoring
data:
  prometheus.yaml: |-
    {
        "apiVersion": 1,
        "datasources": [
            {
               "access":"proxy",
                "editable": true,
                "name": "calico-demo-prometheus",
                "orgId": 1,
                "type": "prometheus",
                "url": "http://prometheus-dashboard-svc.calico-monitoring.svc:9090",
                "version": 1
            }
        ]
    }
EOF
Since Grafana can contain sensitive information it would be better to provide limited access for it. One of the ways that you can manage this in Kubernetes is by port-forwarding, using `kubectl` to map a local port from your computer and redirect it to a specific port in your cluster.
kubectl port-forward pod/grafana-pod 3000:3000 -n calico-monitoringNote: the default username password for Grafana is `admin`.
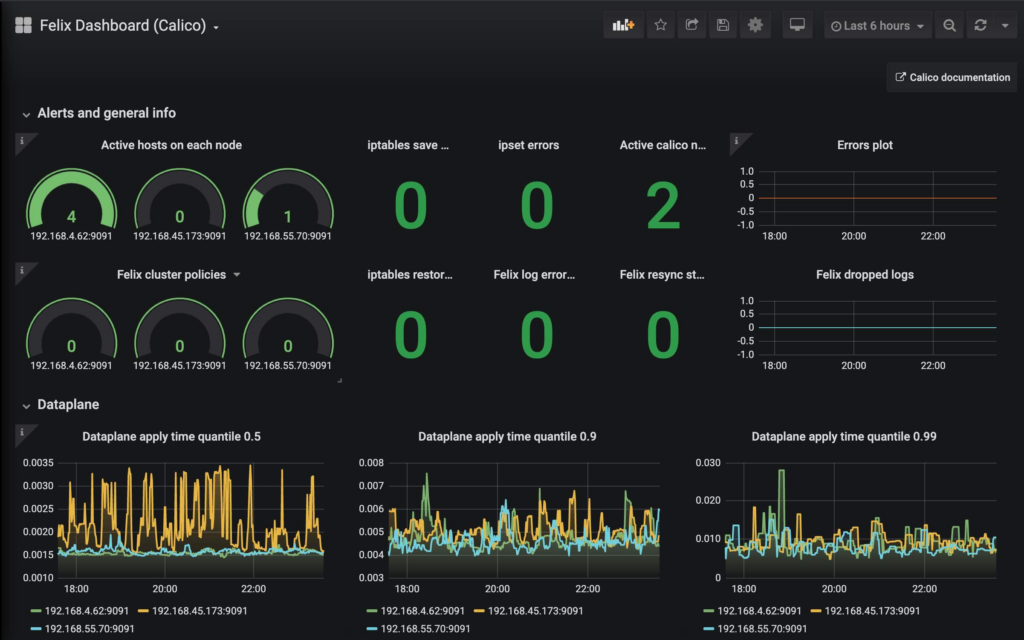
Fire Up your favorite browser and navigate to https://www.tigera.io your dashboard awaits you!
Conclusion
In this blog post I wanted to show you how you can use monitoring frameworks to gain a better perspective about your Calico implementation. I would also like to mention that there are lots more metrics that Calico provides, and Kubernetes itself can be configured to provide metrics you might incorporate too. You can customize or create your own dashboards depending on your needs relatively easily.
If you like to know more about monitoring I would suggest following these links:
If you enjoyed this blog then you may also like:
- Introducing the Calico eBPF dataplane
- Free online training at projectcalico.org/events or subscribe to Calico Essentials for personalized training & workshops
- Learn about Calico Enterprise