So Easy Even Your Boss Can Do It!
This post demonstrates a *basic* example of how to build a deep learning model with Keras, serve it as REST API with Flask, and deploy it using Docker and Kubernetes. This is NOT a robust, production example. This is a quick guide for anyone out there who has heard about Kubernetes but hasn’t tried it out yet. To that end, I use Google Cloud for every step of this process. The reason is simple — I didn’t feel like installing Docker and Kubernetes on my Windows 10 Home laptop. Google Cloud works great. The additional benefit to you all following along is reproducing my steps should be much easier as you can run everything using the exact specifications I used. Also, if you’re worried about the cost, don’t. Google provides several hundred dollars of free credit to new accounts and I didn’t even scratch the surface of that for everything I’m about to show you.
Why Kubernetes for ML and Data Science
Kubernetes, and its broader new buzzword, cloud-native, are taking the world by storm. Don’t worry — you are right to be skeptical. We’ve all seen the tech hype bubble turn into a veritable tsunami of jargon with AI, Big Data, and The Cloud. It’s yet to be seen if the same will happen with Kubernetes.
But with your data science dilettante guiding you today, I have no understanding nor interest in the transformative reasons to use Kubernetes. My motivation is simple. I want to deploy, scale, and manage a REST API that serves up predictions. As you will see, Kubernetes makes this exceedingly easy.
Let’s get to it.
Quick Outline
- Create your environment with Google Cloud
- Serve a Deep Learning model as an API using Keras, Flask, and Docker
- Deploy said model with Kubernetes
- Bask in the glory of your newfound knowledge
Step 1 —Create Environment With Google Cloud
I use a small VM on Google Compute Engine to build, serve, and dockerize a deep learning model. There is no requirement that you do this as well. I tried to install the latest version of Docker CE (Community Edition) on my Windows 10 laptop. It failed. I decided *spending* (just using free Google Cloud credit) was a better use of my time than figuring out how to install Docker. The choice is yours.
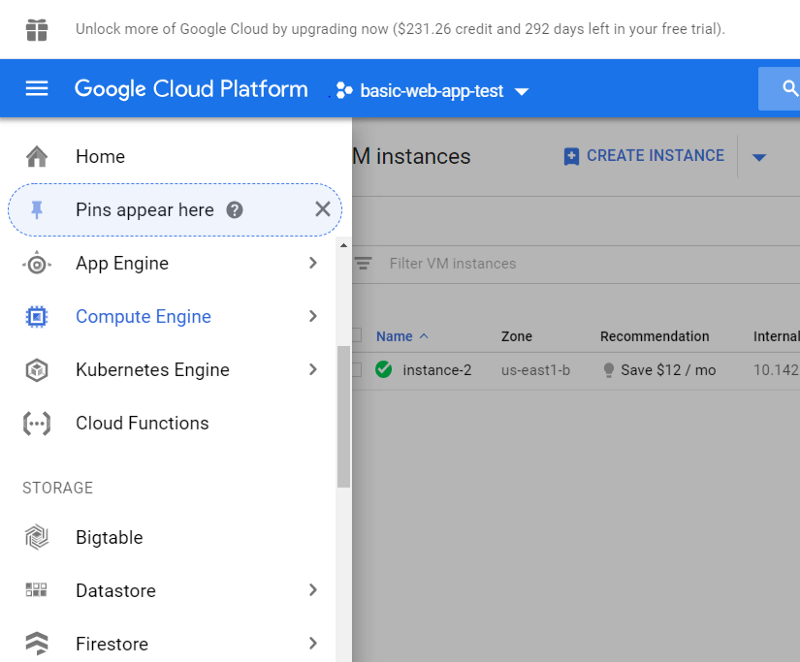
To start a Google Cloud VM, open up the ribbon on the left side of your screen. Select Compute Engine.
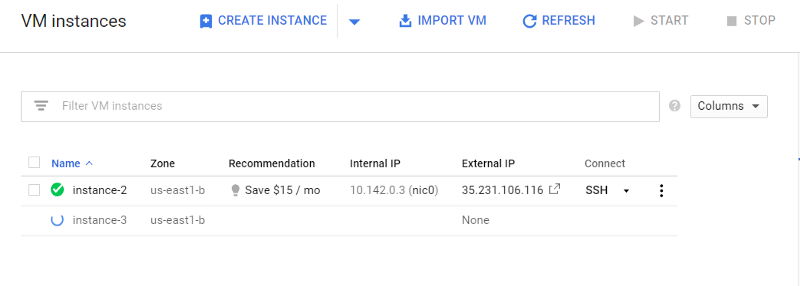
Then choose “Create Instance”. You can see in the photo below that I have one instance already running.

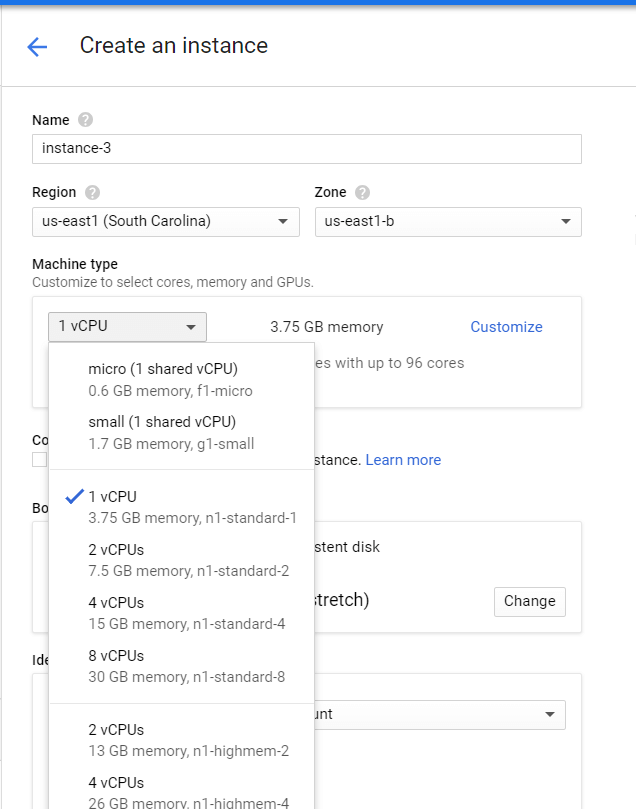
The next step is to select the compute size we want to use. The default (read: cheapest) settings should work just fine, but given that we only need this VM for ~1 hour at most, I chose 4vCPUs with 15GBs of memory.
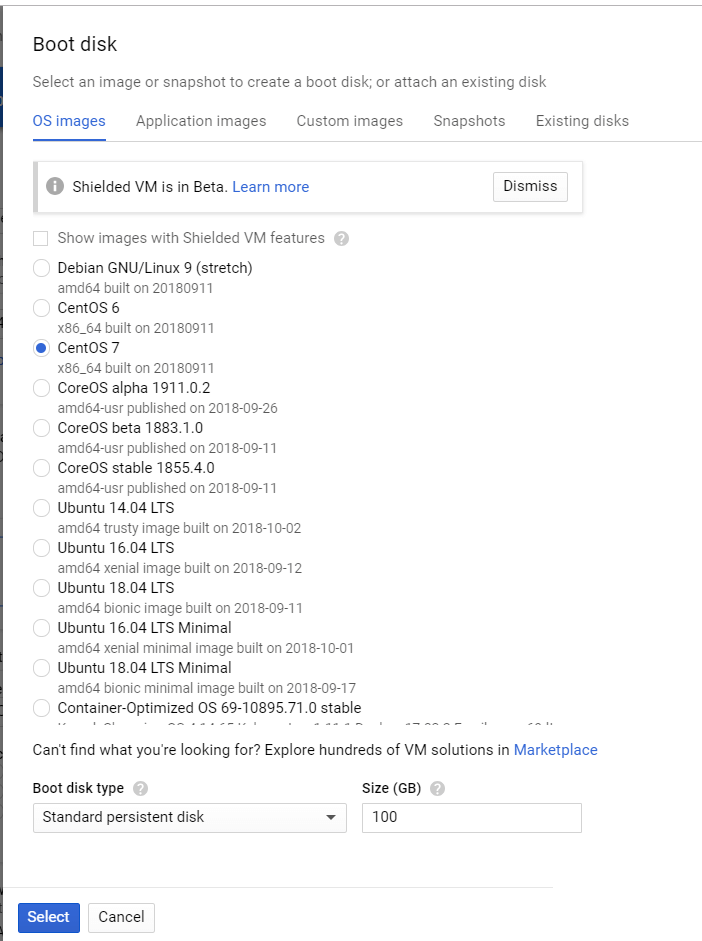
Next I choose the operating system and disk space I want to use. Select “Boot Disk” to edit the defaults. I choose Centos 7 for my operating system and increase the amount of disk from 10GB to 100GB. My choice of operating system (Centos) is not required. I would recommend increasing the disk size beyond 10GBs, however, as the Docker containers we create are ~1GB each.
The final step before we create the VM is to set our Firewall rules to allow HTTP/S. Full transparency, I’m not sure if this step is required. I will show you how to edit the firewall settings to test our API on the VM before we deploy it to Kubernetes. So checking these boxes is not sufficient — there is more work to be done. I just haven’t gone back to try this tutorial again without checking them.
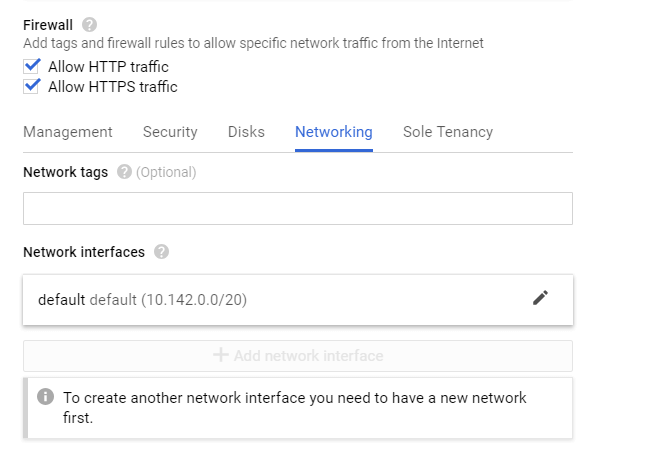
Not sure if this step is required
Now click “Create”. Bravo! The hard part is basically done!
Step 2 — Build a Deep Learning model using Keras
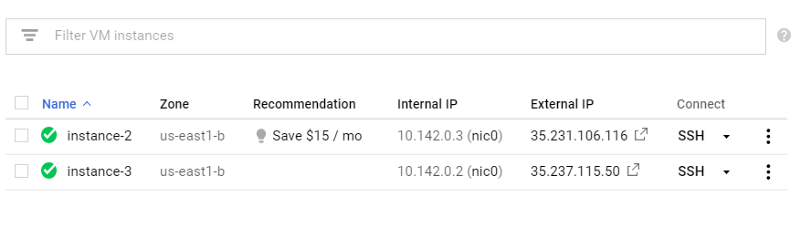
Now, let’s SSH into our VM and start building our model. The easiest way to do this is to simply click the SSH icon next to your VM (below). This opens a terminal in your browser.
- Remove the existing version of Docker
sudo yum remove docker docker-client docker-client-latest docker-common docker-latest docker-latest-logrotate docker-logrotate docker-selinux docker-engine-selinux docker-engine
Note that if you choose an operating system other than Centos 7, these commands will vary.
2. Install the latest version of Docker
sudo yum install -y yum-utils device-mapper-persistent-data lvm2
sudo yum-config-manager — add-repo http://download.docker.com/linux/centos/docker-ce.repo
sudo yum install docker-ce
3. Start Docker and run test script
sudo systemctl start docker
sudo docker run hello-world
If you see an output that looks like the message below, you are all set.
Hello from Docker!
This message shows that your installation appears to be working correctly.To generate this message, Docker took the following steps: 1. The Docker client contacted the Docker daemon. 2. The Docker daemon pulled the "hello-world" image from the Docker Hub.    (amd64) 3. The Docker daemon created a new container from that image which runs the    executable that produces the output you are currently reading. 4. The Docker daemon streamed that output to the Docker client, which sent it    to your terminal.
4. Create our deep learning model
We are going to copy a script written by Adrian Rosebrock. Adrian created an excellent short tutorial on how to build a deep learning model with Keras and serve it with Flask. You can read the tutorial in depth here.
I had to make two key edits to Adrian’s script to get it to run. If you don’t care about Docker and Tensorflow specifics, feel free to skip these next two paragraphs.
The first thing I changed relates to Docker. The default flask behavior when running an app locally is to serve the app on local host (127.0.0…). This causes a problem when running inside of a Docker container. The solution is simple. When calling app.run() specify the url as 0.0.0.0 like app.run(host='0.0.0.0'). Now our app is available on localhost as well as on the external IP.
The next issue relates to Tensorflow. When I ran Adrian’s original script I was not able to call the model successfully. I read this Github issue, and made the subsequent changes to the code.
global graph
graph = tf.get_default_graph()
...
with graph.as_default():
    preds = model.predict(image)
To be completely honest, I have no idea why this works. But it does. So let’s get this thing running.
First, let’s create a new directory called keras-app and move into that directory
mkdir keras-app
cd keras-app
Now let’s create a file a called app.py. You can use your text editor of choice. I prefer to use vim. To create and open app.py type:
vim app.py
From inside of your file, hit the “i” key to enter insert mode. Now you are ready to paste in the following code.
Once you have copied the above code, you exit edit mode by hitting the “Esc” key.
You then save and close the file by typing :x
5. Create a requirements.txt file
Now back to business. We’re going to run this code inside of a Docker container. So in order to do that we need to first create a requirements.txt file. This file will contain the packages our code needs to run, e.g., keras, flask, and others. This way no matter where we ship our Docker container, the underlying server will be able to install our code’s required dependencies.
Just as before, create and open a file called requirements.txt with vim by typing vim requirements.txt
Copy the following into requirements.txt and save and close as you did before
keras
tensorflow
flask
gevent
pillow
requests
6. Create a Dockerfile
Great! Now let’s create our Dockerfile. This is the file that Docker will read to build and run our project
FROM python:3.6
WORKDIR /app
COPY requirements.txt /app
RUN pip install -r ./requirements.txt
COPY app.py /app
CMD ["python", "app.py"]~
Here’s what is going on. We are instructing Docker to download a base image of Python 3. Once completed, we ask Docker to use the Python package manager pip to install the packages detailed in requirements.txt
After that, we then tell Docker to run our script via python app.py
7. Build the Docker container
We’re are moving right along. Now let’s build and test our app.
To build our Docker container, run:
sudo docker build -t keras-app:latest .
This instructs Docker to build a container for the code located in our current working director keras-app
This command will take a minute or two to complete. What’s going on behind the scenes is Docker is pulling down an image of Python 3.6 and installing the packages listed in requirements.txt.
8. Run the Docker container
Now let’s run our Docker container to test our app:
sudo docker run -d -p 5000:5000 keras-app
A quick note about the numbers, 5000:5000 — here we are telling Docker to make port 5000 externally available and to forward our local app to that port (which is also running on port 5000 locally)
Check the status of your container by running sudo docker ps -a.You should see something like this (below)
[gustafcavanaugh@instance-3 ~]$ sudo docker ps -a
CONTAINER ID        IMAGE               COMMAND             CREATED             STATUS                    PORTS                    NAMES
d82f65802166        keras-app           "python app.py"     About an hour ago   Up About an hour          0.0.0.0:5000->5000/tcp   nervous_northcutt
9. Test our model
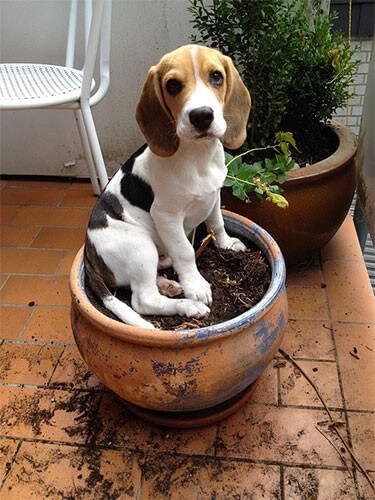
With our model running, now it is time to test it. This model accepts as input a photo of a dog and returns the dog’s breed. In Adrian’s repo he provides an example image and we’ll use the same.
From a terminal run:
curl -X POST -F [email protected] 'http://localhost:5000/predict'
Make sure that “dog.jpg” is in your current directory (or provide the appropriate path to the file)
You should see a result like:
{"predictions":[{"label":"beagle","probability":0.987775444984436},{"label":"pot","probability":0.0020967808086425066},{"label":"Cardigan","probability":0.001351703773252666},{"label":"Walker_hound","probability":0.0012711131712421775},{"label":"Brittany_spaniel","probability":0.0010085132671520114}],"success":true}
We can see that our model correctly classified the dog as a beagle. Bravo! You have successfully run a trained a deep learning model with Keras, served it with Flask, and wrapped it with Docker. The hard part is over. Now let’s deploy this container with Kubernetes
Step 3 — Deploy model with Kubernetes
This next section moves quickly.
1. Create a Docker Hub account (if you don’t have one)
The first thing we do is upload our model to Docker Hub. (If you don’t have a Docker Hub account, create one now — don’t worry, it’s free). The reason we do this is that we won’t physically move our container to our Kubernetes cluster. Instead, we will instruct Kubernetes to install our container from a centrally hosted server, i.e., Docker Hub.
2. Login to your Docker Hub account
Once you have created your Docker Hub account, log in from the command line via sudo docker login. You’ll need to supply your username and password just as if you were logging into the website.
If you see a message like this:
Login Succeeded
Then you were able to login successfully. Now let’s move to the next step.
3. Tag your container
We need to tag our container before we can upload it. Think of this step as giving our container a name.
First, run sudo docker images and locate the image id for our keras-app container.
The output should look something like this:
REPOSITORY TAG IMAGE ID CREATED SIZE keras-app latest ddb507b8a017 About an hour ago 1.61GB
Now let’s tag our keras-app. Be sure to follow my formatting and replace the values for image id and docker hub id with your specific values.
#Format
sudo docker tag <your image id> <your docker hub id>/<app name>
#My Exact Command - Make Sure To Use Your Inputs
sudo docker tag ddb507b8a017 gcav66/keras-app
4. Push our container to Docker Hub
Now we can push our container. From the shell run:
#Format
sudo docker push <your docker hub name>/<app-name>
#My exact command
sudo docker push gcav66/keras-app
Now if you navigate back to Docker Hub’s website, you should see your keras-app repository. Well done! We’re ready for the final stretch.
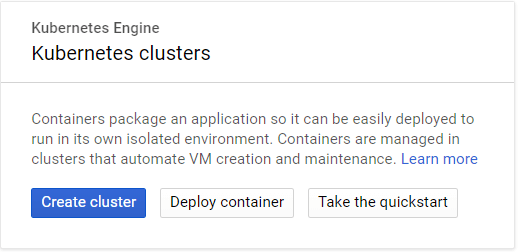
5. Create a Kubernetes Cluster
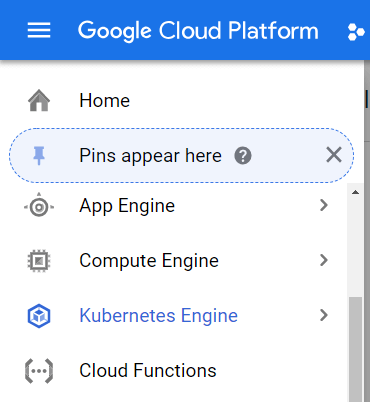
From the Google Cloud home screen, select Kubernetes Engine
Then create a new Kubernetes cluster
Next we’ll customize the size of the nodes in our cluster. I’ll select 4vCPUs with 15 GBs of RAM. You can try this with a smaller cluster. Remember, the default settings spin up 3 nodes, so your cluster will have 3X the resources of what your provision, i.e., in my case 45 GBs of Ram. I’m being a bit lazy and choosing a larger size as we won’t have our kubernetes cluster running for very long.

After that, just click Create. It will take a minute or two for you cluster to spin up.
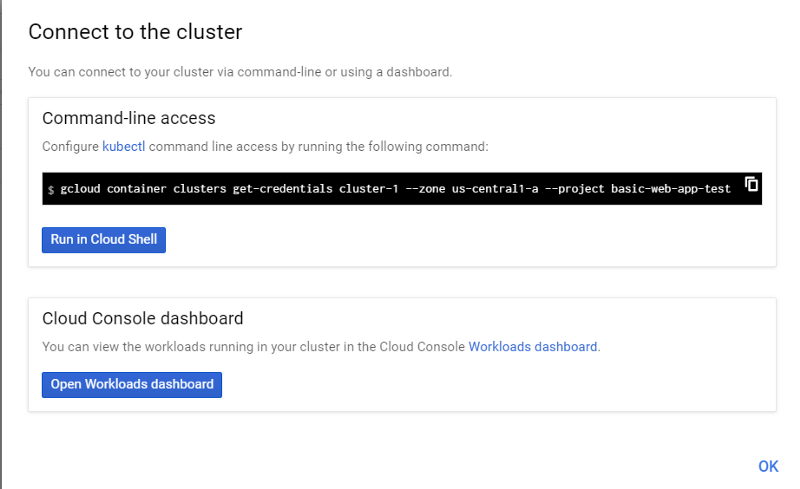
Now let’s connect to the cluster. Click Run in Cloud Shell to bring up the console for the Kubernetes cluster. Note that this is a separate shell environment from your VM where you created and tested your Docker container. We could install Kubernetes on VMs, but Google’s Kubernetes service automates that for us.
Now we run our docker container in Kubernetes. Note that the image tag is just pointing to our hosted docker image on Docker Hub. In addition, we’ll specify with --port that we want to run our app on port 5000.
kubectl run keras-app --image=gcav66/keras-app --port 5000
In Kubernetes, containers all run inside of pods. We can verify that our pod is running by typing kubectl get pods . If you see something like this below, you’re all set.
gustafcavanaugh@cloudshell:~ (basic-web-app-test)$ kubectl get pods
NAME                         READY     STATUS    RESTARTS   AGE
keras-app-79568b5f57-5qxqk   1/1       Running   0          1m
Now that our pod is alive and running, we need to expose our pod on port 80 to the outside world. This means that anyone visiting the IP address of our deployment can access our API. It also means we don’t have to specify a pesky port number after our url like we did before (say goodbye to :5000).
kubectl expose deployment keras-app --type=LoadBalancer --port 80 --target-port 5000
We’re almost there! Now, we determine the status of our deployment (and the URL that we need to call our API) by running kubectl get service . Again, if the output of that command looks like what I have below, you’re doing great.
gustafcavanaugh@cloudshell:~ (basic-web-app-test)$ kubectl get service
NAME         TYPE           CLUSTER-IP     EXTERNAL-IP     PORT(S)        AGE
keras-app    LoadBalancer   10.11.250.71   35.225.226.94   80:30271/TCP   4m
kubernetes   ClusterIP      10.11.240.1    <none>          443/TCP        18m
Grab that cluster-ip for your keras application because now is the moment of truth. Open your local terminal (or wherever you have dog photo handy) and run the following command to call the API curl -X POST -F [email protected] 'http://<your service IP>/predict' .
Feast your eyes on the results!
As you can see below, the API correctly returns the label of beagle for the picture.
$ curl -X POST -F [email protected] 'http://35.225.226.94/predict'
{"predictions":[{"label":"beagle","probability":0.987775444984436},{"label":"pot","probability":0.0020967808086425066},{"label":"Cardigan","probability":0.001351703773252666},{"label":"Walker_hound","probability":0.0012711131712421775},{"label":"Brittany_spaniel","probability":0.0010085132671520114}],"success":true}
Step 4 — Wrapping up
In this tutorial we served a deep learning model as a REST API using Keras and Flask. We then put that application inside of a Docker container, uploaded the container to Docker Hub, and deployed it with Kubernetes. With just two commands Kubernetes deployed our app and exposed it to the world. Clap yourself on the back — you should be proud.
Now, there are many improvements we could make to this project. For starters, we should change the python web server running our flask app from our local python server to something production-grade like gunicorn. We should also explore the scaling and management features of Kubernetes, which we barely touched on. Finally, we might try building a kubernetes environment from scratch.
This article originated from http://medium.com/analytics-vidhya/deploy-your-first-deep-learning-model-on-kubernetes-with-python-keras-flask-and-docker-575dc07d9e76
————————————————-
Free Online Training
Access Live and On-Demand Kubernetes Training
Calico Enterprise – Free Trial
Network Security, Monitoring, and Troubleshooting
for Microservices Running on Kubernetes
Join our mailing list
Get updates on blog posts, workshops, certification programs, new releases, and more!