Enabling GitOps for network policies
“How do I enable GitOps for my network policies?” That is a common question we hear from security teams. Getting started with Kubernetes is relatively simple, but moving production workloads to Kubernetes requires alignment from all stakeholders – developers, platform engineering, network engineering, security.
Most security teams already have a high-level security blueprint for their data centers. The challenge is in implementing that in the context of a Kubernetes cluster and workload security. Network policy is a key element of Kubernetes security. Network policy is expressed as an YAML configuration, and works very well with GitOps.
We will do a 3 part blog series covering GitOps for network policies. In part 1 (this part), we cover the overview and getting started with a working example tutorial. In part 2, we will extend the tutorial to cover an enterprise-wide decentralized security architecture. In the final part, we will delve into policy assurance with examples. Note that all policies in Tigera Secure (network policy, RBAC, Threat detection, Logging configuration, etc.) are enforced as YAML configuration files, and can be enforced via a GitOps practice.
GitOps benefits
By adopting GitOps, security teams benefit as follows.
- Take your policies with you. Kubernetes cluster creation from code is fairly common. It is much easier and less error-prone to push your Git-based policies to a new cluster.
- You can do change monitoring using pull requests. This will also be easy to integrate with your existing systems, instead of writing integrations from scratch. If something goes wrong, you can simply roll back to an earlier commit.
- You can lock down who can deploy security policies. If you lock it down to only a single git user, that will be easy to control. Everybody else can push their policy changes into Git via pull request.
- Your GitOps tool can ensure that it will override any accidental or malicious change at runtime. This solves a major compliance concern. Git becomes the source of truth for your security policies.
- It would be much easier to manage if no user could create a security policy from kubectl. Then you can enable de-centralized security by creating specific users for different services, and giving them rights to only deploy policies. Developers and DevOps teams are very comfortable with the git pipeline.
Implementing GitOps
The following diagram illustrates how to do GitOps for Security policies.

There are 2 different ways to implement GitOps:
- Have an external entity connect and deploy to Kubernetes from GitHub. You need to open up access to Kubernetes from the external user.
- Have a Kubernetes controller deploy the policies by syncing with Git. You can lock down the rights of the controller (RBAC), and it is much easier to manage such a setup.
Tutorial
There are a number of GitOps tools, i.e. jenkins, spinnaker, argo CD, weave flux, tekton pipeline, etc. We will use argo CD as the example GitOps tool in our tutorial. For security policy deployment use case, one can lock down argo CD as with the following configuration.
- Cluster role permitted only for specific security tasks (network policy, network set).
- Segment into separate repo’s for each team. If you decide to have different teams (security, compliance, service owners) maintain their own policies and sync via argo CD, then you can easily do that.
- Readonly access to GitHub. Argo CD does not need any write access as it is not required to update the policies and hence no need to sync the Git.
- Disable access to the image registry. Image registry access is needed if argo CD is deploying an application and needs to pull and image. Given that all security policies are configurations, this is not needed.
- Adjust the sync/pull frequency. By default, argo CD is configured to sync every 5min. You can change it to once every hour or day as needed.
Let us go ahead and deploy argo CD (continuous deployment) tool into our cluster. Follow this getting started page to know about argo CD. Also, make sure to have Calico installed in your cluster. In the example below, we will use GitHub as the policy repo. For any other Git repo configuration, refer to argo CD documentation.
Installation
Install Argo CD and CLI. Refer to this gist for the detailed log.
### Install argo CD
[centos@ip-172-31-8-215 argocd]$ kubectl create namespace argocd
[centos@ip-172-31-8-215 argocd]$ kubectl apply -n argocd -f https://raw.githubusercontent.com/argoproj/argo-cd/stable/manifests/install.yaml
### Download argocd cli from: http://github.com/argoproj/argo-cd/releases/latest
### Expose argo CD server using a NodePort.
[centos@ip-172-31-8-215 argocd]$ kubectl patch svc argocd-server -n argocd -p '{"spec": {"type": "NodePort"}}'
### Login into the cluster and change the default password for admin user. Argo CD UI is ready to use.
Application Configuration and Sync
Argo CD user interface is quite intuitive.
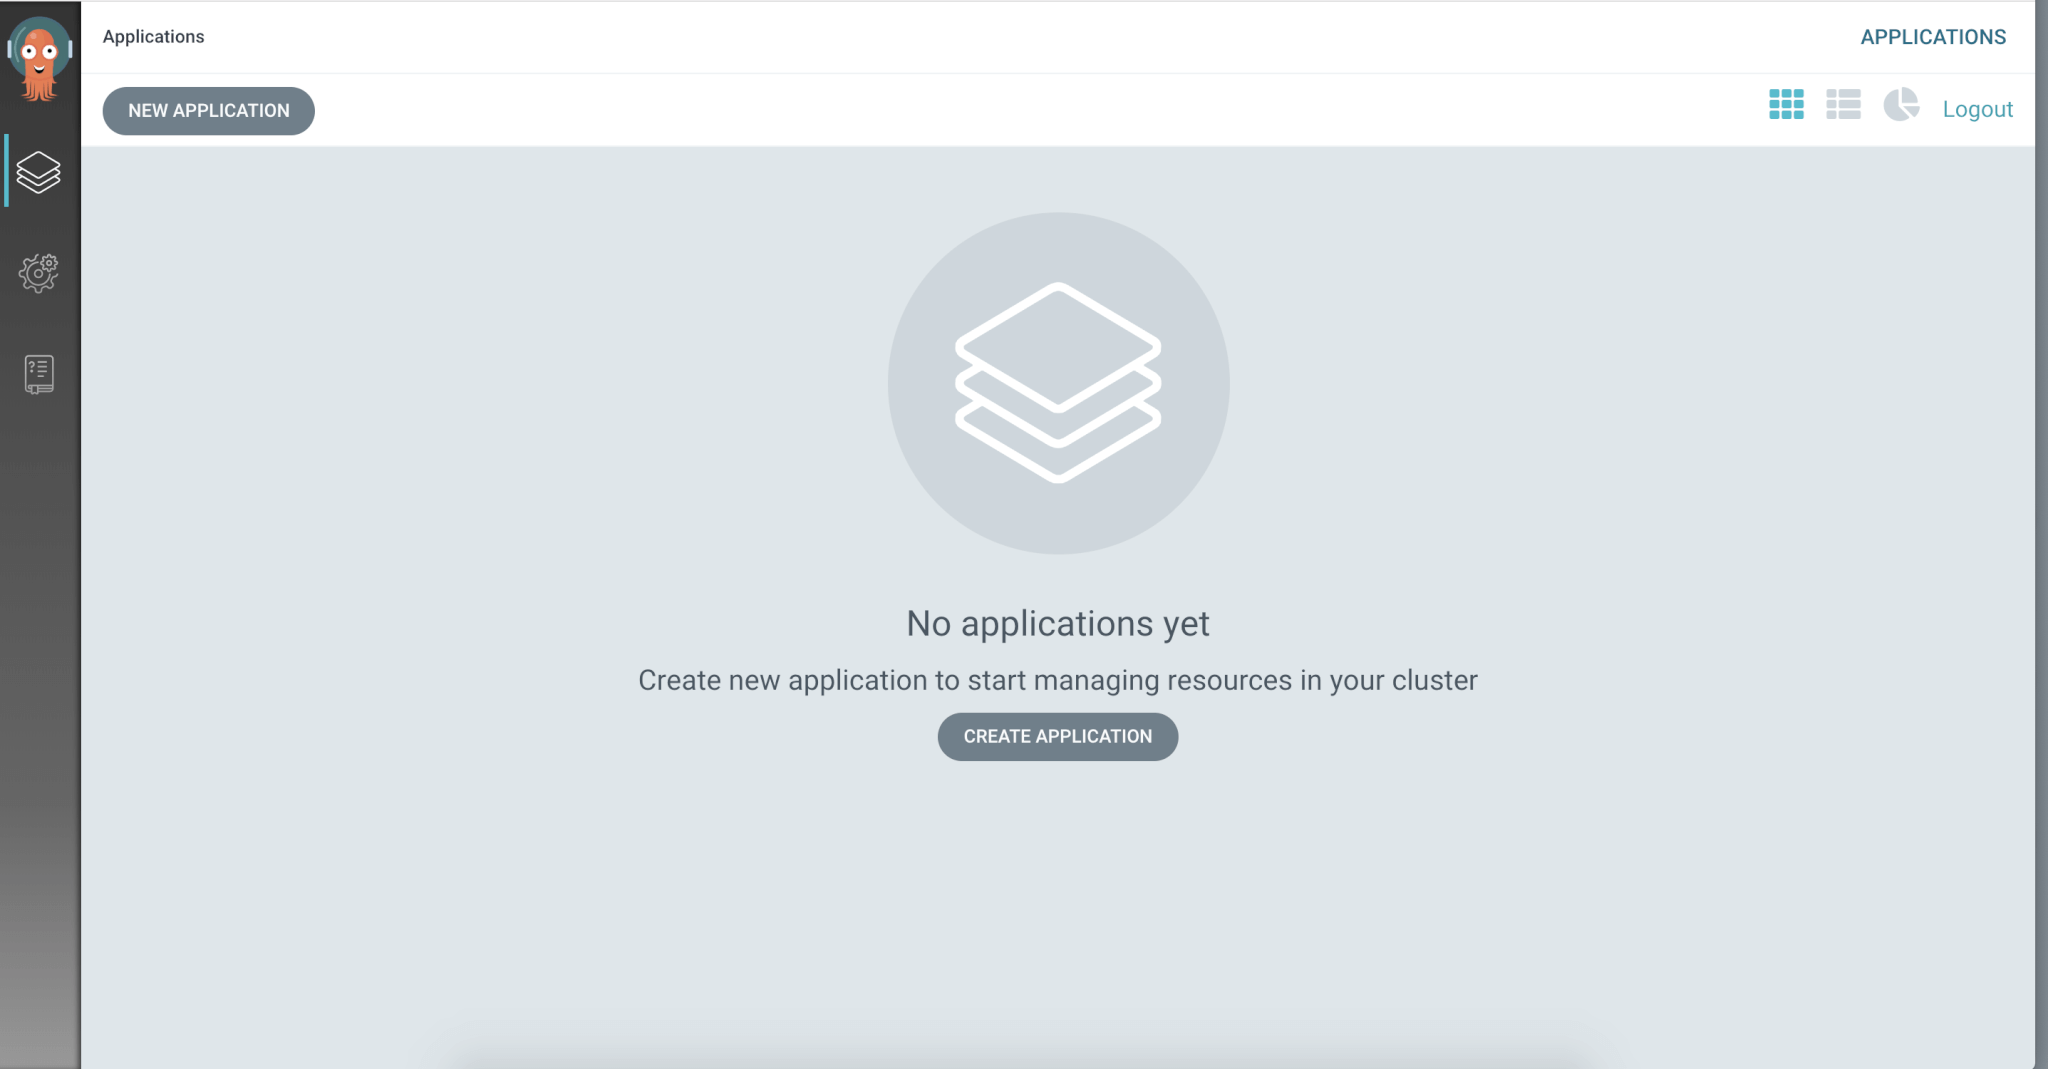
Follow through the settings and add your GitHub repo via https.
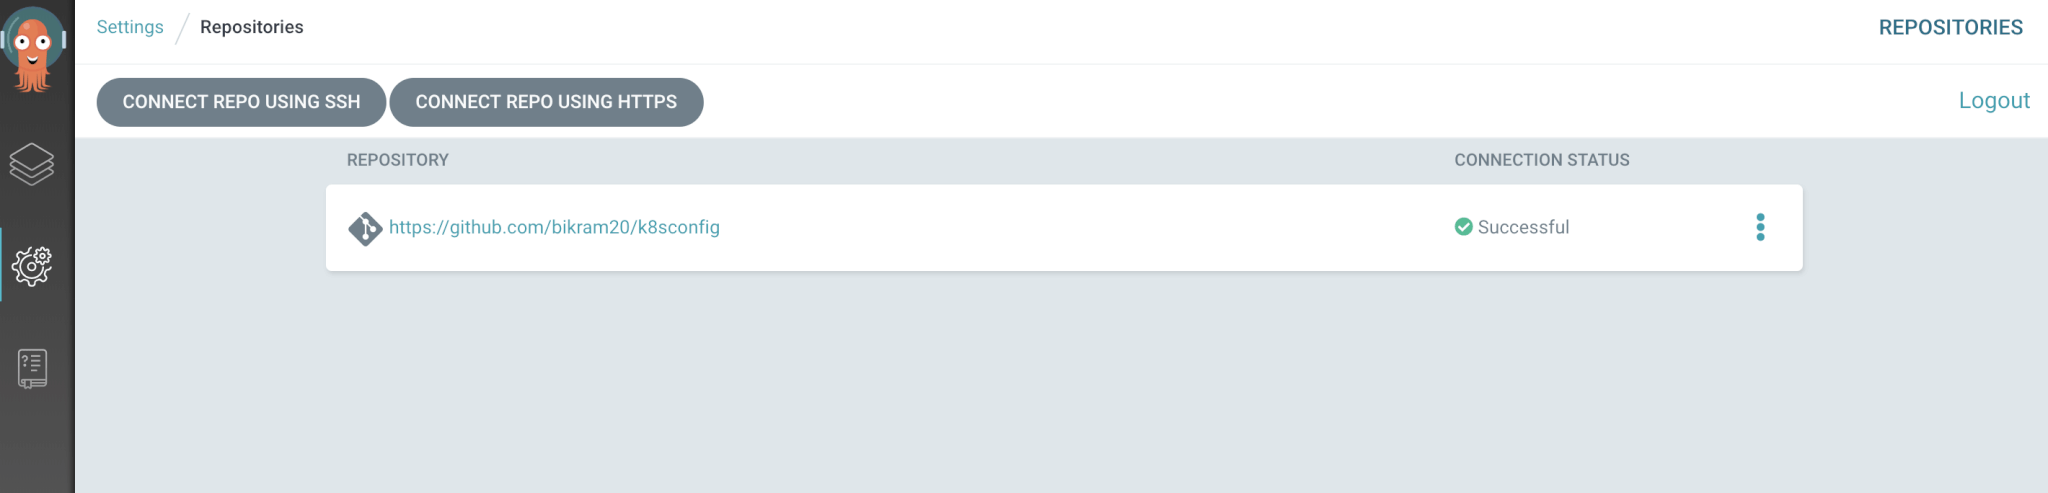
Now, let us add the policy folder to sync.
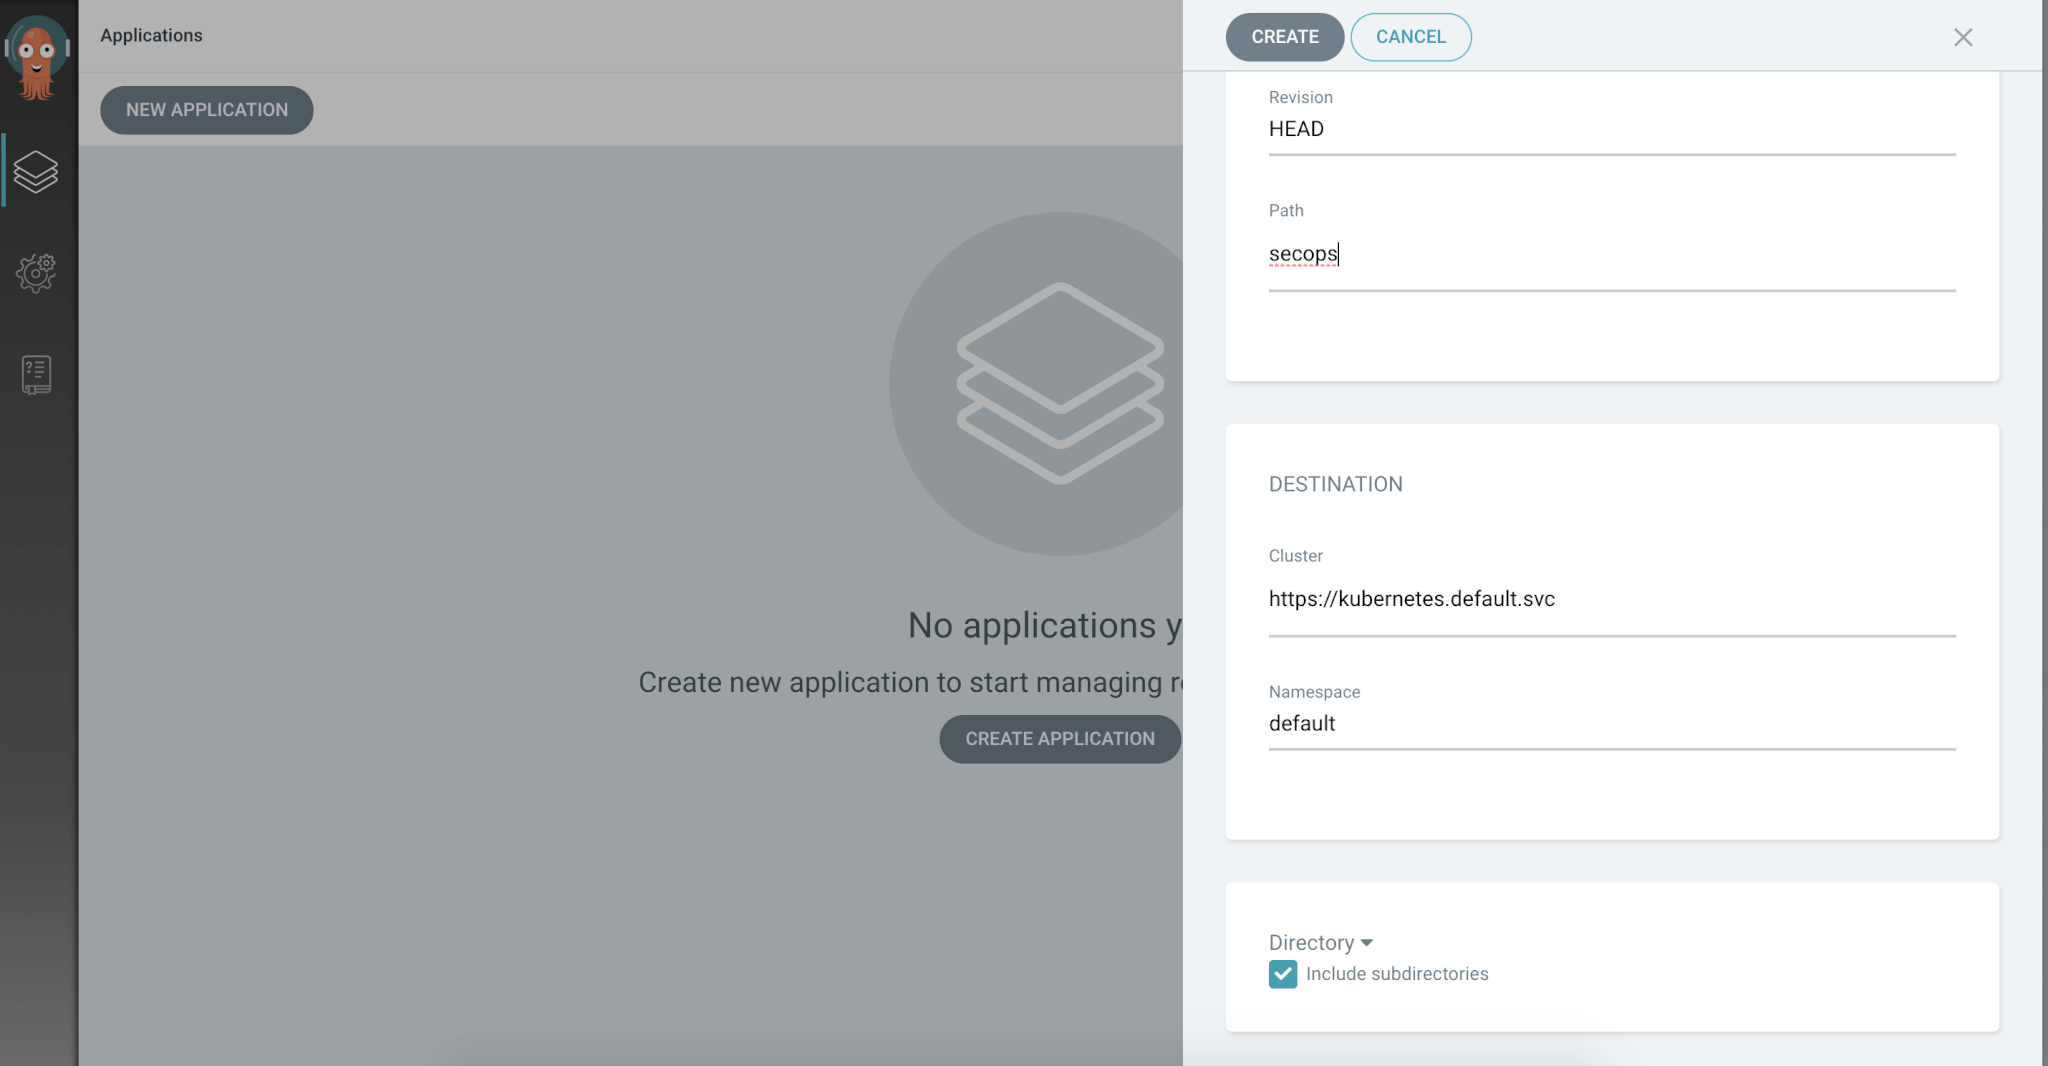
Note that you can do the same using argo CD CLI.
[centos@ip-172-31-8-215 ~]$ argocd app create secops-demo
--repo http://github.com/bikram20/k8sconfig.git
--path secops
--dest-server http://kubernetes.default.svc
--dest-namespace default
--project default
--sync-policy automated
--auto-prune
--self-heal
--directory-recurse
--upsert
application 'secops-demo' created
[centos@ip-172-31-8-215 ~]$ argocd app get secops-demo
Name:               secops-demo
Project:            default
Server:             http://kubernetes.default.svc
Namespace:          default
URL:                http://10.101.75.252/applications/secops-demo
Repo:               http://github.com/bikram20/k8sconfig.git
Target:
Path:               secops
Sync Policy:        Automated (Prune)
Sync Status:        Synced to  (229dcf6)
Health Status:      Healthy
GROUP              KIND           NAMESPACE    NAME              STATUS  HEALTH   HOOK  MESSAGE
networking.k8s.io  NetworkPolicy  policy-demo  access-nginx      Synced  Unknown        networkpolicy.networking.k8s.io/access-nginx created
networking.k8s.io  NetworkPolicy  policy-demo  default-deny-new  Synced  Unknown        networkpolicy.networking.k8s.io/default-deny-new created
[centos@ip-172-31-8-215 ~]$ kg networkpolicy -n policy-demo
NAME               POD-SELECTOR   AGE
access-nginx       run=nginx2     16s
default-deny-new   <none>         16s
[centos@ip-172-31-8-215 ~]$
At this time, even if you delete or modify the policies, argo CD is will enforce back the original policies from Git. This takes away the worry to having monitor the inadvertent deletion to policies after you’ve deployed.
[centos@ip-172-31-8-215 ~]$ krm networkpolicy -n policy-demo access-nginx  default-deny-new
networkpolicy.extensions "access-nginx" deleted
networkpolicy.extensions "default-deny-new" deleted
[centos@ip-172-31-8-215 ~]$ kg networkpolicy -n policy-demo
NAME               POD-SELECTOR   AGE
access-nginx       run=nginx2     6s
default-deny-new   <none>         6s
[centos@ip-172-31-8-215 ~]$
Also argo CD will be in sync with the source of truth (Git). Let us add some other calico resources (ipset, for example). Argo CD automatically sync the new resources (ipsets) from Git.
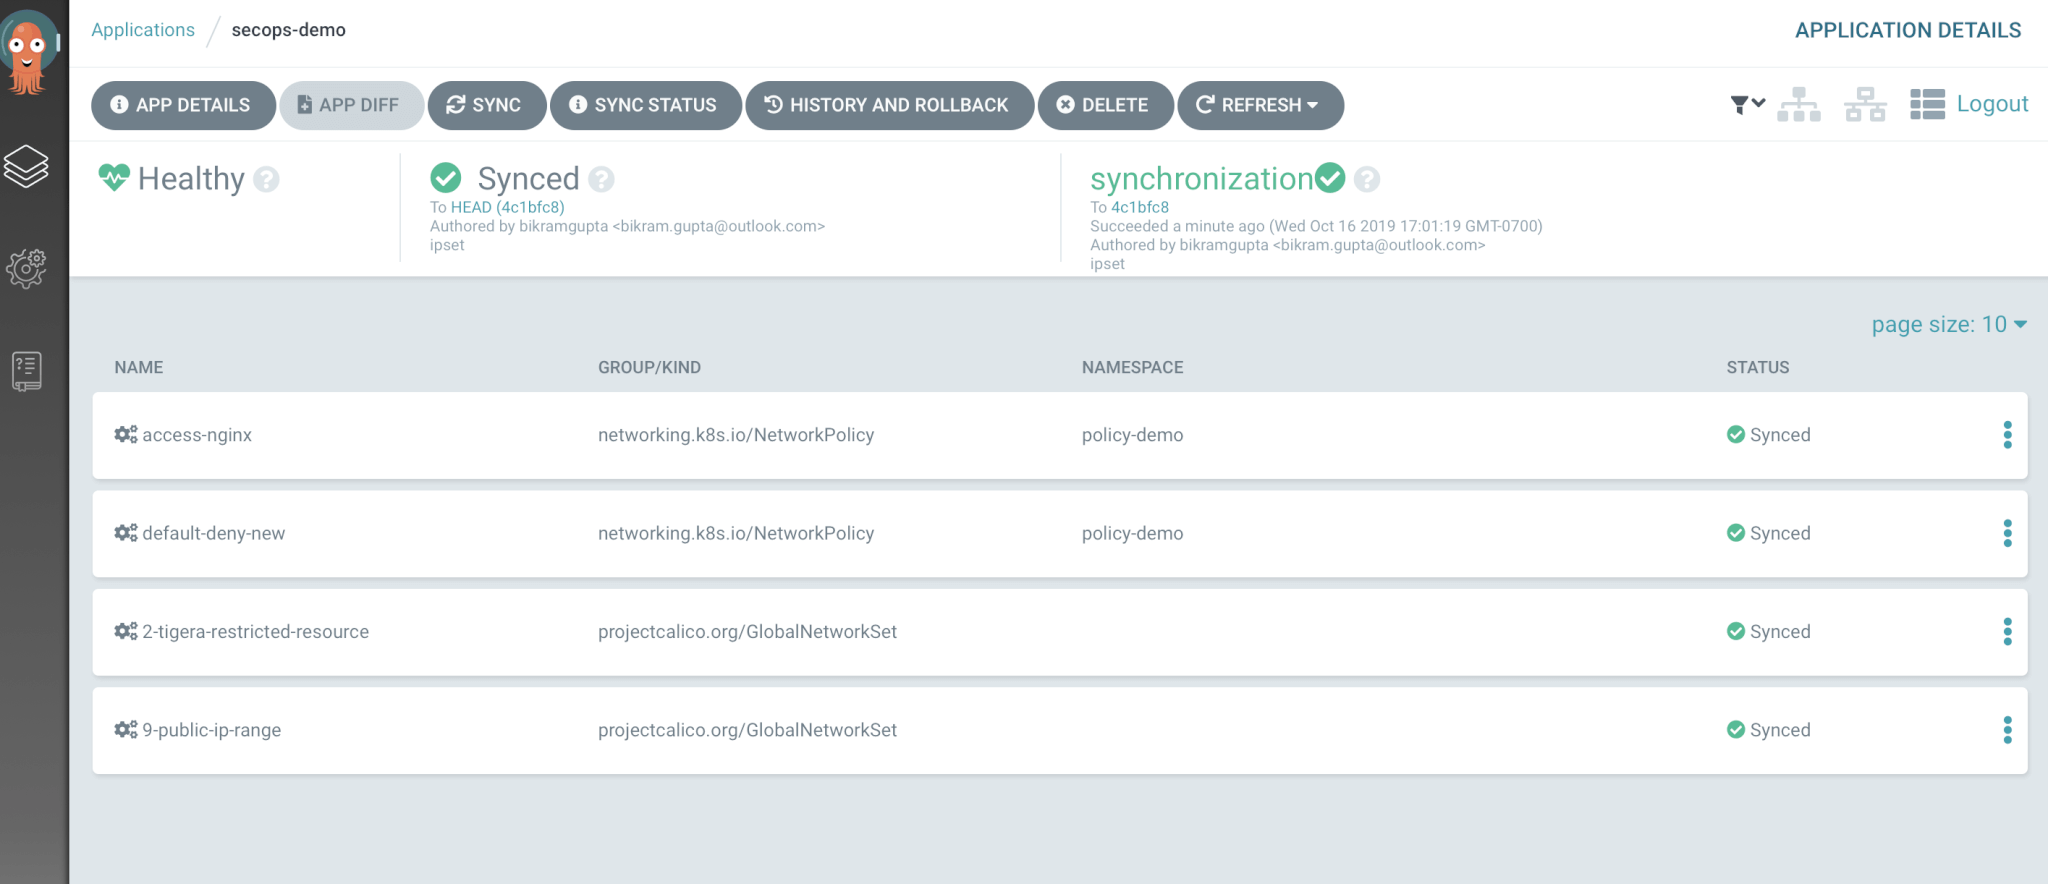
If you modify any policy, then Argo CD syncs that back to original. This prevents any unintentional or malicious changes to policies.
We recommend keeping your security policies simple and readable in Git. One security policy per file makes it maintainable. You can organize the policies in a folder hierarchy for readability. Also, ensure you monitor the logs of your GitOps tool and have a process in place to ensure that the changes are deployed to the cluster.
Hope you found this useful. In the next post, we will share a blueprint for enabling decentralized security using GitOps and Tigera Secure.