Introduction
The rapid adoption of Kubernetes has created an agile attitude toward IT resources. Developers can now easily request the resources that they require in order to innovate better and faster iteration of microservice development. Such an environment can be challenging for older approaches to security and a single security team taking sole responsibility for security can be a daunting task that is at odds with the desired agility. However, with Calico RBAC integration it is possible to securely shift-left some of the responsibility for security to developers by giving them the ability to manage their own network policy within higher level constraints set by the security team.
In this blog post we will provide a hands-on step-by-step guide on how to use Calico’s integration with Kubernetes RBAC (Role-based access control) to create different groups of users and assign each group with different capabilities to shape the cluster security. We will experiment with both Kubernetes network policy and Calico global network policy, and explore ways to assign limited or full access to specific users in a security context.
Before we begin
If you want to follow all the steps in this blog post yourself make sure you have a running Kubernetes cluster equipped with Calico CNI.
There are a few applications that need to be installed on your machine as well.
- Install kubectl
- Install calicoctl (3.18.0+)
**Note**: If you already have a calicoctl installed on your system, make sure its version is 3.18.0 or above. You can validate this using the `calicoctl version` command.
How to
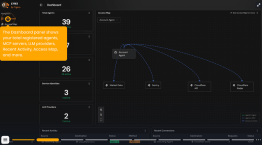
This blog post will implement the roles described by the following image:

Create security namespace
In Kubernetes, namespaces provide a scope for resource names. Namespaces can also be used to divide resources between users in a cluster.
Use the following command to create a namespace for security team.
kubectl create namespace security
Create service account
Now that we have a security namespace let’s create a user called `security-member` and assign him to our `security`.
kubectl create serviceaccount security-member --namespace security
**Note**: In this tutorial we are using token based authentication with service accounts because of its simplicity. This is not recommended in a production environment and you should replace token based approach with other means of authentication such as K8s OpenID or Certificate based user authentication .(You can learn more about other available authentication options here)
Export user kubeconfig settings
In order to authenticate a token based user we have to present a token which is stored as a secret object in Kubernetes when that user is created.
The following command will export our user secret name and store it in the `SECRET` environment variable.
SECRET=`kubectl get serviceaccount security-member --namespace security --output jsonpath="{.secrets[].name}"`
Now that we know our user token name we can export the token using the following command and store it in a `TOKEN` environment variable.
TOKEN=`kubectl get secret $SECRET --namespace security --output jsonpath="{.data.token}" | base64 -D`
We will also need our API server IP address and port in order to create a context for our kubeconfig file. Following command will extract the IP and PORT number of our Kubernetes API server and store it in the `API_SERVER` environment variable.
API_SERVER=`kubectl config view --output jsonpath="{.clusters[].cluster.server}"`
Since minikube API Server uses SSL we have to use ca certificate information to communicate with API server.
kubectl get secret $SECRET --namespace security --output jsonpath="{.data.ca.crt}" | base64 -D > ca.crt
Now that we have all the required information to generate a kubeconfig file we can create a cluster using the following command:
kubectl config set-cluster minikube-cluster
 --embed-certs=true
 --server=$API_SERVER
 --certificate-authority=./ca.crt
Create user and assign the token to it.
kubectl config set-credentials security-member --token=$TOKEN
Create a context and associate our newly generated cluster and user with that context.
kubectl config set-context security-context
 --cluster=minikube-cluster
 --user=security-member
 --namespace=default
Verify security user account connectivity
Since our new user has no assigned roles, it can not access any resources in our cluster. We can easily verify this by using some simple `get` commands.
**Note**: `–context` argument can change the current context temporarily if there are multiple contexts in the kubeconfig file. This argument is supported by both `calicoctl` and `kubectl`.
kubectl --context security-context get networkpolicies --all-namespaces
kubectl --context security-context get pods --all-namespaces
calicoctl --context security-context get globalnetworkpolicy
You should see a `Forbidden` error as the result of executing above commands.
Create required roles for security staff
Kubernetes roles are divided into two categories
- Role
- ClusterRole
Both objects can contain a set of permissions. The difference is that a Role is constrained to a namespace but a ClusterRole permissions are scoped across the whole of the cluster.
We can create K8s resources by executing kubectl create command.
Permission resources should be under apiVersion: rbac.authorization.k8s.io/v1 tree, this API Group in charge of authorization decisions.
Our role needs to affect the entire cluster and we can achieve it by using kind: ClusterRole.
Since rbac.authorization.k8s.io is a vast tree with multiple branches we have to make sure our permissions are part of the `crd.projectcalico.org` api group, such behaviour can be achieved using apiGroups: ["crd.projectcalico.org"] syntax. It is important to do the same for apiGroups: ["networking.k8s.io"] since users must have this permission in order to manipulate network policies via `kubectl`.
Now that we have figured out most of our permission structures it is time to address which resources should be affected by our permissions. In the Calico api group we have two network resources named `networkpolicies` and `globalnetworkpolicies`, In K8s api group we have `networkpolicies`.
We have all the chips in place. However, we need to tell our K8s what these permissions should allow. This can be achieved using `verbs` in our manifest, `verbs` directly interact with HTTP methods that are passed to K8s API server. Available possibilities are `get`, `list`, `create`, `update` and `delete`. (If you like to know more about verbs you can click here)
Now let’s create our roles by putting everything together.
kubectl create -f - <<EOF
apiVersion: rbac.authorization.k8s.io/v1
kind: ClusterRole
metadata:
  name: security-calico
rules:
- apiGroups: ["crd.projectcalico.org"]
  resources:
    - networkpolicies
    - globalnetworkpolicies
  verbs:
    - get
    - list
    - create
    - update
    - delete
---
apiVersion: rbac.authorization.k8s.io/v1
kind: ClusterRole
metadata:
  name: security-k8s
rules:
- apiGroups: ["networking.k8s.io"]
  resources:
    - networkpolicies
  verbs:
    - get
    - list
    - create
    - update
    - delete
EOF
Bind security-member to cluster roles
In order to assign roles to users, we will have to create a bind object. There are two important fields in a bind object.
- Subjects: Refers to the object that this bind will affect.
- roleRef: Refers to K8sRoles that should be used as effective permissions.
In the following command, the first section will create a `ClusterRoleBinding` with the name `security-member-k8s-role-binder` that affects a service account for the user `security-member` in the namespace `security` by assigning available sets of permissions defined in the `ClusterRole` `security-k8s`.
kubectl create -f - <<EOF
apiVersion: rbac.authorization.k8s.io/v1
kind: ClusterRoleBinding
metadata:
  name: security-member-k8s-role-binder
subjects:
- kind: ServiceAccount
  name: security-member
  namespace: security
roleRef:
  kind: ClusterRole
  name: security-k8s
  apiGroup: rbac.authorization.k8s.io
---
apiVersion: rbac.authorization.k8s.io/v1
kind: ClusterRoleBinding
metadata:
  name: security-member-calico-role-binder
subjects:
- kind: ServiceAccount
  name: security-member
  namespace: security
roleRef:
  kind: ClusterRole
  name: security-calico
  apiGroup: rbac.authorization.k8s.io
EOF
Verify security-member permissions
Now that we have the necessary permissions in place for our `security-member` we should be able to access policy objects using his credentials. However, since we have not configured any `globalnetworkpolicies` or `networkpolicies` at the moment our query will come back with an empty result set.
kubectl --context security-context get networkpolicies -A
calicoctl --context security-context get globalnetworkpolicies
calicoctl --context security-context get networkpolicies
You should see a result similar to
No resources found
or
NAME
Bind security to ClusterRoles
Although it may seem fun to do binding for each user individually, normally we would like to group users together in order to make management and maintenance more efficient.
In K8s, RBAC Groups are used to associate similar users to certain permissions. In this example, our group will include every service account who are members of “security” namespace.
kubectl apply -f - <<EOF
apiVersion: rbac.authorization.k8s.io/v1
kind: ClusterRoleBinding
metadata:
  name: sec-team-k8s-role-binder
subjects:
- kind: Group
  name: system:serviceaccounts:security
  apiGroup: rbac.authorization.k8s.io
roleRef:
  kind: ClusterRole
  name: security-k8s
  apiGroup: rbac.authorization.k8s.io
---
apiVersion: rbac.authorization.k8s.io/v1
kind: ClusterRoleBinding
metadata:
  name: sec-team-calico-role-binder
subjects:
- kind: Group
  name: system:serviceaccounts:security
  apiGroup: rbac.authorization.k8s.io
roleRef:
  kind: ClusterRole
  name: security-calico
  apiGroup: rbac.authorization.k8s.io
EOF
Let’s remove earlier bindings that we created to eliminate the possibility of overlapping.
kubectl delete clusterrolebinding security-member-calico-role-binder
kubectl delete clusterrolebinding security-member-k8s-role-binder
At this point any user who is assigned to the security namespace will be able to manipulate both calicoctl global network policies and K8s network policies.
Security policies
Network policy is the primary tool for securing a Kubernetes network. It allows you to easily restrict the network traffic in your cluster so only the traffic that you want to flow is allowed. Policies are delicate resources they should be precise or the outcome might cause havoc.
Let’s breakdown policies that are going to be implemented by the security team.
**Note**: Although these are valid manifests, they are not production ready. Please consider reading this section completely before applying any of these policies.
- Calico GlobalNetworkPolicy
- apply to all pods
- allow ingress from metrics collector on port 9898
We can easily create global network policy resources by using calicoctl create -f .
Our manifest should be of Kind: GlobalNetworkPolicy it is also required to assign a name for our policy which can be done by using metadata keyword.
In order to target policy direction inbound or outbound we have to use Types keyword and follow it by direction keywords (Ingress and Egress) that this policy is going to affect.
After we added the direction we need to specify exactly what is going to happen for traffic traveling in that direction in our case we need to permit - action: Allow inbound Ingress metrics traffic when they want to reach Ports: 9898.
**Important**: Calico by default permits all traffic inbound and outbound if there is no policy configured to match that traffic.
**Note**: You don’t have to copy this policy, a fully deployable policy can be found further in the document.
Our manifest should contain these informations:
apiVersion: projectcalico.org/v3
kind: GlobalNetworkPolicy
metadata:
  name: global-allow-metric-collector
Spec:
  types:
  - Ingress
  ingress:
  - action: Allow
    protocol: TCP
    destination:
      ports:
      - "9898"
Recommendations
- This policy should also have permit for it’s return traffic, first Egress policy added to the cluster will make this policy drop all return traffics.
Example :
- Egress
egress:
  - action: Allow
    protocol: TCP
    destination:
      ports:
      - "9898"
- Calico GlobalNetworkPolicy
- apply to all pods
- deny cluster egress except for pods labeled
- cluster-egress:allowed
This time we have to limit our policy to pods that do not have a `cluster-egress=allowed` label. Calico `selector` provides a great deal of flexibility to limit effects of a policy, in our case we can add selector: cluster-egress != 'allowed' attribute to target pods that do not have the `cluster-egress=allowed` label, != selector matches resources that do not have `cluster-egress` as the key and `allowed` as value. (If you like to learn more about selectors click here)
apiVersion: projectcalico.org/v3
kind: GlobalNetworkPolicy
metadata:
  name: global-limit-cluster-egress
Spec:
  selector: cluster-egress == 'allowed'
  types:
  - Egress
  egress:
    action: Allow
Recommendations
- This policy will allow Egress if pod is using the required label. However, since it is using a lazy matching criteria it might permit more than what was expected. As an example this policy will let pods that are labeled
cluster-egress == 'allowed'to contact all network resources which can cause security vulnerabilities.
Example:
egress:
   action: Allow
   notNets:
   - 192.168.0.0/16 # POD CIDR
   - 172.16.0.0/24  # NODE CIDR
By adding `notNets` attribute to our egress section we can exclude these two ranges that form our POD and NODE CIDR from this policy. This will allow correctly labeled workloads to communicate with everything except K8s Pods and Nodes which should be permitted in case by case manner.
- Calico GlobalNetworkPolicy
- apply to all pods
- allow egress DNS to kube-dns
- deny all other traffic
apiVersion: projectcalico.org/v3
kind: GlobalNetworkPolicy
metadata:
  name: global-allow-egress-dns-pods
Spec:
  types:
  - Egress
  egress:
  - action: Allow
    protocol: UDP
    destination:
      namespaceSelector: projectcalico.org/name == 'kube-system'
      ports:
      - 53
Recommendations
- By adding a selector this policy can only send udp packets to DNS pods not the entire `kube-system` namespace .
Example:
egress:
  destination:
    selector: k8s-app == 'kube-dns'
**Important**: Calico and K8s use `kube-system` and `calico-system` namespaces to install services vital to the health of clusters, when these two namespaces are not protected by individual network policies the way these work which can result in a disruption of services. You can exclude these namespaces by using the following negative namespaceSelector in your policies. (If you are interested, more information can be found at this link.)
Example:
namespaceSelector: has(projectcalico.org/name) && projectcalico.org/name not in {"kube-system", "calico-system"}
Finalized policies
calicoctl create --context security-context -f - <<EOF
apiVersion: projectcalico.org/v3
kind: GlobalNetworkPolicy
metadata:
  name: global-allow-metric-collector
Spec:
  namespaceSelector: has(projectcalico.org/name) && projectcalico.org/name not in {"kube-system", "calico-system"}
  order: 900
  types:
  - Ingress
  - Egress
  ingress:
    - action: Allow
      protocol: TCP
      destination:
        ports:
        - 9898
  egress:
    - action: Allow
      protocol: TCP
      destination:
        ports:
        - 9898
---
apiVersion: projectcalico.org/v3
kind: GlobalNetworkPolicy
metadata:
  name: global-limit-cluster-egress
Spec:
  namespaceSelector: has(projectcalico.org/name) && projectcalico.org/name not in {"kube-system", "calico-system"}
  selector: cluster-egress == 'allowed'
  order: 901
  types:
  - Egress
  egress:
  - action: Allow
    destination:
      notNets:
      - 192.168.0.0/16 # POD CIDR
      - 172.16.0.0/24  # NODE CIDR
---
apiVersion: projectcalico.org/v3
kind: GlobalNetworkPolicy
metadata:
  name: global-allow-egress-dns-pods
Spec:
  order: 2000
  namespaceSelector: has(projectcalico.org/name) && projectcalico.org/name not in {"kube-system", "calico-system"}
  types:
  - Egress
  egress:
  - action: Allow
    protocol: UDP
    destination:
      selector: k8s-app == 'kube-dns'
      namespaceSelector: projectcalico.org/name == 'kube-system'
      ports:
        - 53
EOF
Backend team and members
Now that we have our global network policies in place and security users are assigned with their required permissions it is time to move on to our backend team.
Our backend team requires limited permission scoped to its own namespace, using K8s network policies we can achieve such permissions.
Create backend namespace
Similar to `security-member` we have to create a namespace.
kubectl create namespace be-dev-team
Create a member in BE namespace
Now that we have our namespace let’s create the service account for our `be-dev-team` member.
kubectl create serviceaccount be-dev-member --namespace be-dev-team
Just like the `security-member` cluster context that we created earlier, let’s create a new cluster context for the `be-dev-member` and add it to the kubeconfig file.
SECRET=`kubectl get serviceaccount be-dev-member --namespace be-dev-team --output jsonpath="{.secrets[].name}"`
API_SERVER=`kubectl config view --output jsonpath="{.clusters[].cluster.server}"`
kubectl get secret $SECRET --namespace be-dev-team --output jsonpath="{.data.ca.crt}" | base64 -D > ca.crt

kubectl config set-cluster minikube-cluster
 --embed-certs=true
 --server=$API_SERVER
 --certificate-authority=./ca.crt

kubectl config set-credentials be-dev-member --token=$TOKEN

kubectl config set-context be-dev
 --cluster=minikube-cluster
 --user=security-member
 --namespace=default
Roles and bindings
Members of `be-dev-team` should only be able to craft policies that can affect their own namespace.
kubectl create -f - <<EOF
apiVersion: rbac.authorization.k8s.io/v1
kind: Role
metadata:
  name: be-dev-team-k8s
  namespace: be-dev-team
rules:
- apiGroups: ["networking.k8s.io"]
  resources:
    - networkpolicies
  verbs:
    - get
    - list
    - create
    - update
    - delete
---
apiVersion: rbac.authorization.k8s.io/v1
kind: RoleBinding
metadata:
  name: be-dev-team-role-binder
  namespace: be-dev-team
subjects:
- kind: Group
  name: system:serviceaccounts:be-dev-team
  apiGroup: rbac.authorization.k8s.io
roleRef:
  kind: Role
  name: be-dev-team-k8s
  apiGroup: rbac.authorization.k8s.io
EOF
Network policy
Backend team will be using K8s network policies to apply required changes to their own namespace.
- Kubernetes NetworkPolicy:Namespace BE
- apply to backend pods in BE namespace
- allow ingress on port 443 from front-end pods
- allow egress to to database pods on port 27017
kubectl --context be-dev create -f - <<EOF
kind: NetworkPolicy
apiVersion: networking.k8s.io/v1
metadata:
  name: be-security-policy
  namespace: be-dev-team
spec:
  podSelector: {}
  policyTypes:
  - Ingress
  - Egress
  ingress:
  - from:
    - namespaceSelector:
        matchLabels:
          team: fe
    ports:
      - port: 443
  egress:
  - to:
    - namespaceSelector:
        matchLabels:
          team: database
    ports:
      - port: 27017
EOF
Conclusion
Calico RBAC integration can provide a flexible approach to network security. If you require a greater deal of control and flexibility, Calico Enterprise offers a hierarchical network policy model that pushes RBAC and network policies even further.
If you enjoyed this blog then you may also like:
- Free online training at projectcalico.org/events or subscribe to Calico Essentials for personalized training and workshops
- Learn about Calico Enterprise