
Microservices are loosely coupled software that provides flexibility and scalability to a cloud environment. However, securing this open architecture from vulnerabilities and malicious actors can be challenging without a service mesh.
This blog post will demonstrate how you can create an Istio and Calico integration to establish a service mesh that will manipulate HTTP traffic in the application layer. This Istio-Calico integration provides a unified way to write security policies interacting with applications and implement restrictions without disturbing the entire system.
What’s a service mesh?
A service mesh is a software layer that sits between the microservices that form your workload. After deploying and enabling a service mesh system for your workloads, an injector will add a sidecar container to each. These sidecars then collect and manipulate information via the rules you provide, allowing you to secure your cluster on an application level without requiring any change inside your software.
Without a service mesh, to ensure communication integrity and confidentiality between workloads, you must modify each to embed encryption methods. On top of that, gathering insight into the events that are happening in the application layer will require modifying the workload application itself, which all requires a good amount of time and effort.
Istio is a CNCF-incubated project that provides features such as security, observability, and traffic management by providing a service mesh solution for Kubernetes and utilizing the power of Envoy proxy. Calico integrates perfectly with Envoy and Istio, which allows you to use Calico security policies and write application layer rules that can be enforced via Envoy.
The following image illustrates how the Calico application layer policy (ALP) communicates with the envoy proxy:
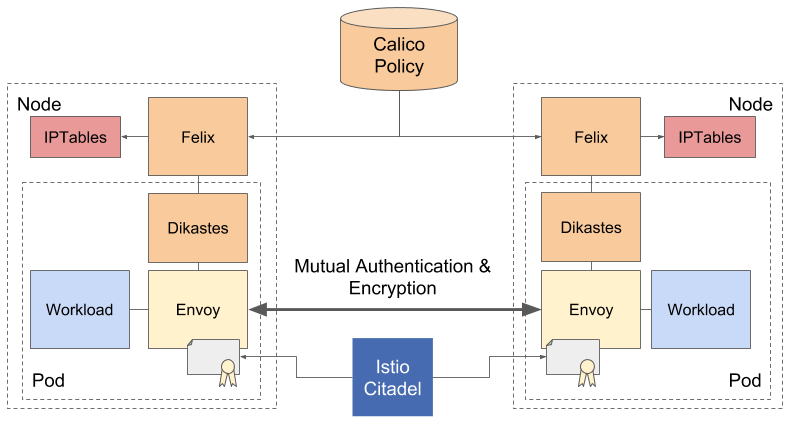
Calico and Istio integration
Before we dive in, please ensure you have a Kubernetes environment equipped with Calico and a Linux workstation. If you are new to Kubernetes or want to set up a new Kubernetes environment to follow this tutorial, check out our comprehensive Kubernetes installation guide.
Microservices demo
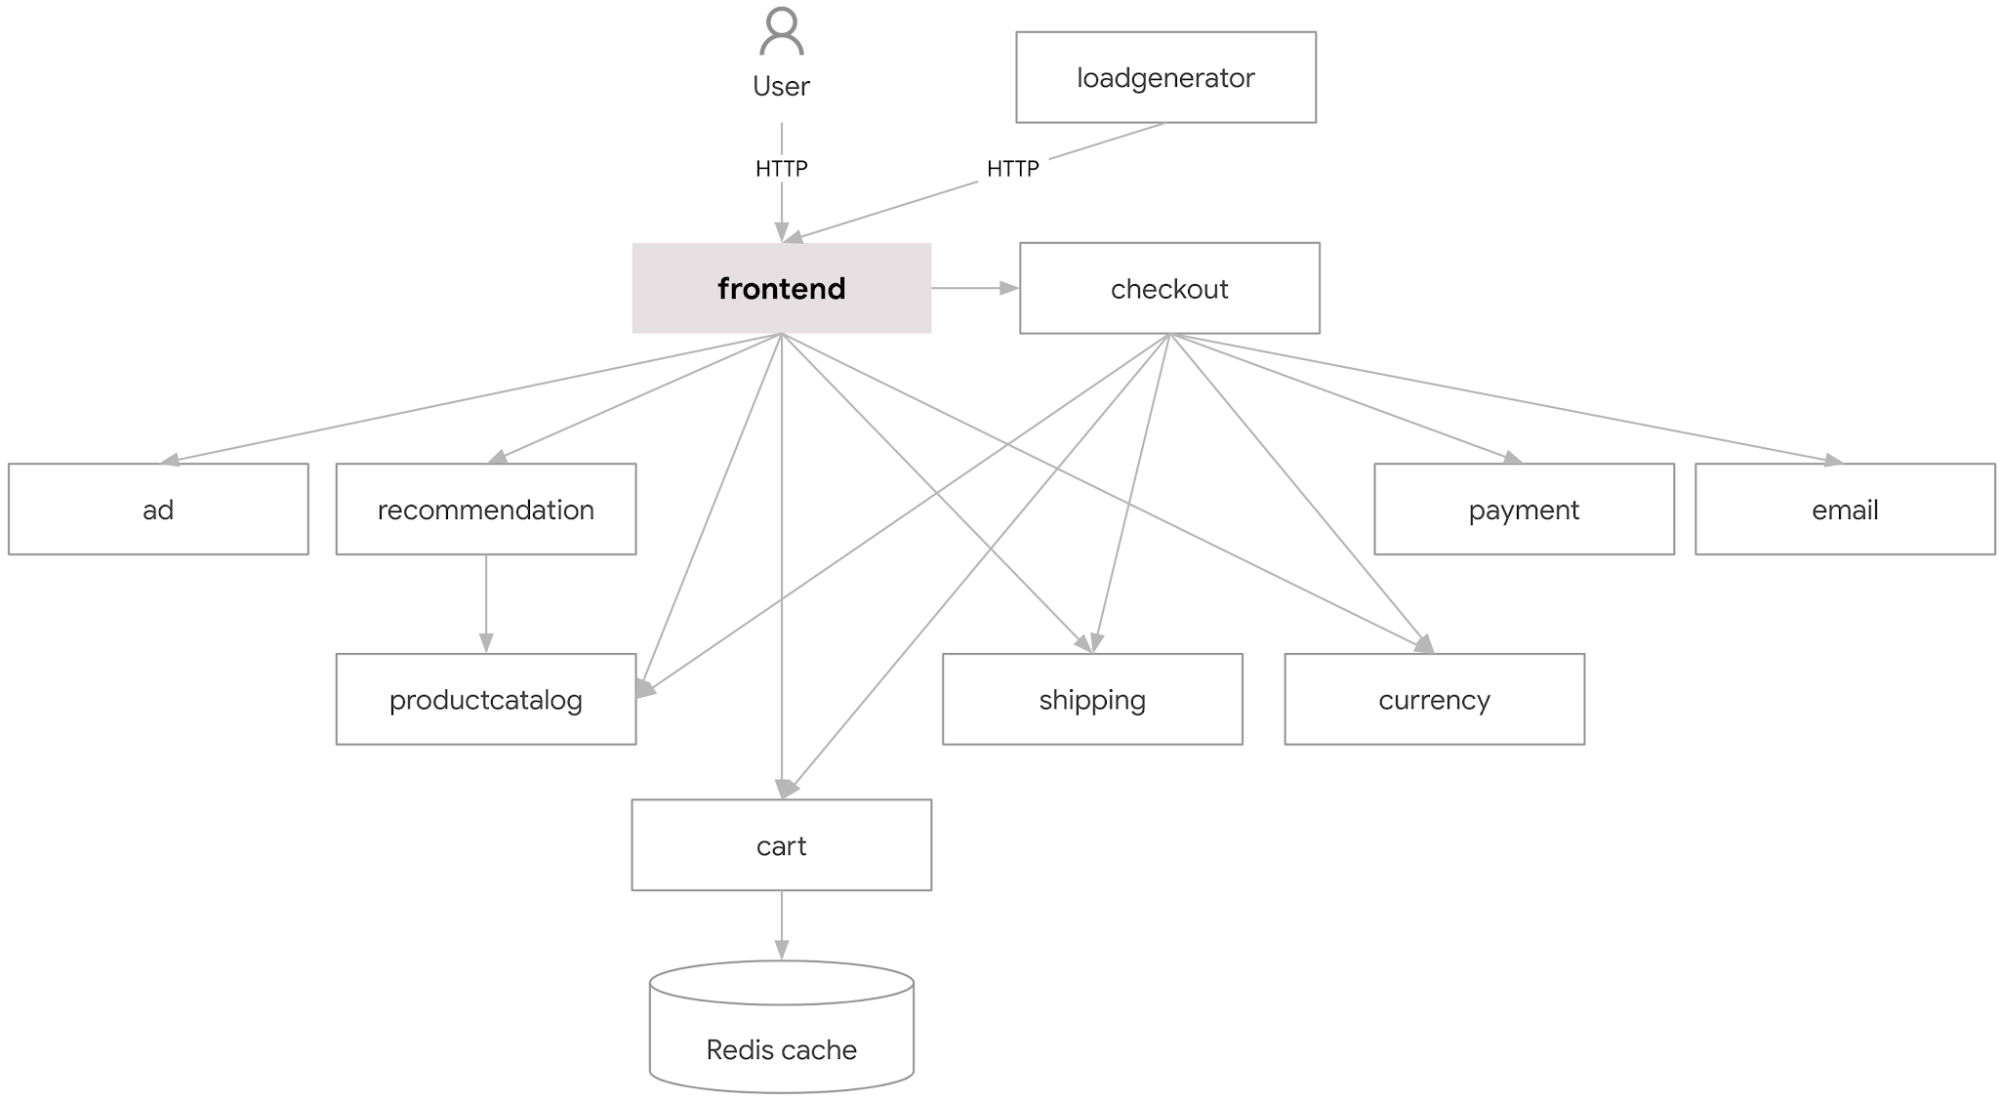
Let’s start the journey by deploying an application into our cluster. Online Boutique is a cloud-first microservices demo application that Google uses to demonstrate cloud technologies. Online Boutique consists of an 11-tier microservices application. The application is a web-based e-commerce app where users can browse items, add them to the cart, and purchase them.
Use the following command to deploy the Google microservices demo:
kubectl create -f https://raw.githubusercontent.com/GoogleCloudPlatform/microservices-demo/main/release/kubernetes-manifests.yaml
Installing Istio
There are multiple ways to install Istio. In this blog post, we will use the , ist ioctl command line binary. ist ioctl is a versatile standalone binary tool that can be used to install, configure, manage, and troubleshoot an Istio implementation.
Note: Check out the Istio installation guides if you want to know more about the installation methods that Istio offers.
Use the following command to download Istio istioctl:
curl -L https://git.io/getLatestIstio | ISTIO_VERSION=1.15.2 sh -
Browse into the Istio folder:
cd istio-1.15.2
Use the following command to install Istio in your cluster:
./bin/istioctl install
PeerAuthentication
Istio injects sidecar containers into your cluster workloads to establish a service mesh. These containers will intercept and change how your workloads usually talk to each other. For example, by default, Istio uses a permissive mode that allows both unencrypted and encrypted communications to be established.
For this tutorial, let’s override this default behavior and enforce mutual transport layer security (mTLS) for our service mesh components. This change will only permit communications between workloads that send encrypted requests and responses to each other.
Use the following command to enforce mTLS by creating a peer authentication rule:
kubectl create -f - <<EOF
apiVersion: security.istio.io/v1beta1
kind: PeerAuthentication
metadata:
  name: default-strict-mode
  namespace: istio-system
spec:
  mtls:
    mode: STRICT
EOF
Application layer policy
Calico ALP provides an integration layer based on a Unix domain socket that can communicate with the Envoy proxy. However, since this configuration is disabled by default, we have to enable it manually.
Use the following command to enable Calico’s nodeagent integrations:
kubectl patch FelixConfiguration default --type=merge --patch='{"spec": {"policySyncPathPrefix": "/var/run/nodeagent"}}'
Sidecar injector
Nodeagent is just a way for Felix (the brain of Calico) and Istio to communicate, and it doesn’t do anything on its own. To give you a better view, Istio uses multiple webhooks to communicate with the Kubernetes admission controller to gather information about the cluster. When a pod with the required service mesh label is about to be created, Istio adds a container drawn from the istio-sidecar-proxy template.
To establish the Istio-Calico integration, we have to patch this template and add nodeagent information to the injection. This allows Calico to add its sidecar container to the service mesh and synchronize its policies with Istio via the nodeagent socket.
Use the following command if you wish to take a closer look at the istio-sidecar-injector configurations:
kubectl get configmap -n istio-system istio-sidecar-injector -o yaml
In order to provide seamless integration between Calico and Istio, we need to modify this configmap and add a Calico dikastes container.
Use the following command to download the modified version of the istio-sidecar-injector from the official Calico documentation website:
curl https://raw.githubusercontent.com/projectcalico/calico/de3a7ecfd07ca700564025a18dba1ee9f3761ad9/manifests/alp/istio-inject-configmap-1.15.yaml -o istio-inject-configmap.yaml
Use the following command to patch the current istio-sidecar-injector configmap to establish Calico integrations with Istio:
kubectl patch configmap -n istio-system istio-sidecar-injector --patch "$(cat istio-inject-configmap.yaml)"
Calico service mesh authorization
Now that we have modified the sidecar injection template, it is time to create an Istio ServiceEntry for dikastes to communicate with Istio automatically.
Use the following command to deploy the service entry:
kubectl apply -f https://raw.githubusercontent.com/projectcalico/calico/v3.24.1/manifests/alp/istio-app-layer-policy-envoy-v3.yaml
Routing the traffic with Istio
Similar to any other deployment in Kubernetes, we have to deploy a service to route the client requests to our application endpoints. Istio offers support for Kubernetes ingress resources but delivers another set of CustomResourceDefinitions (CRDs) that can provide more control over the traffic.
For example, Istio VirtualService is a CRD that defines routing rules based on the host address and protocol, and each rule can be routed to an Istio Gateway afterwards.
Use the following command to create two `VirtualService` CRDs to target the frontend deployment pods:
kubectl create -f -<<EOF
apiVersion: networking.istio.io/v1alpha3
kind: VirtualService
metadata:
  name: frontend-ingress
spec:
  hosts:
  - "*"
  gateways:
  - frontend-gateway
  http:
  - route:
    - destination:
        host: frontend
        port:
          number: 80
---
apiVersion: networking.istio.io/v1alpha3
kind: VirtualService
metadata:
  name: frontend
spec:
  hosts:
  - "frontend.default.svc.cluster.local"
  http:
  - route:
    - destination:
        host: frontend
        port:
          number: 80
EOF
A Gateway resource is a load balancer at the edge of your service mesh that can be used for ingress or egress HTTP or TCP connections, but unlike Kubernetes ingress, it doesn’t include any traffic routing configurations.
Use the following command to create a Gateway:
kubectl apply -f -<<EOF
apiVersion: networking.istio.io/v1alpha3
kind: Gateway
metadata:
  name: frontend-gateway
spec:
  selector:
    istio: ingressgateway # use Istio default gateway implementation
  servers:
  - port:
      number: 80
      name: http
      protocol: HTTP
    hosts:
    - "*"
EOF
If you’d like to learn about Istio routing, check out our Istio routing basics blog post.
Determining the ingress IP and ports
In a cloud provider, Istio Gateway resources can acquire an EXTERNAL-IP, which clients can use to communicate with the application endpoint.
Use the following command to examine the istio-ingressgateway service:
kubectl get svc -n istio-system istio-ingressgateway
You should see a result similar to the following:
NAME                   TYPE           CLUSTER-IP      EXTERNAL-IP   PORT(S)                                      AGE

istio-ingressgateway   LoadBalancer   10.96.248.150   <pending>     15021:30022/TCP,80:30795/TCP,443:32445/TCP   20s

istiod                 ClusterIP      10.96.116.14    <none>        15010/TCP,15012/TCP,443/TCP,15014/TCP        157m
Copy the EXTERNAL-IP into a browser to visit your Online Boutique homepage.
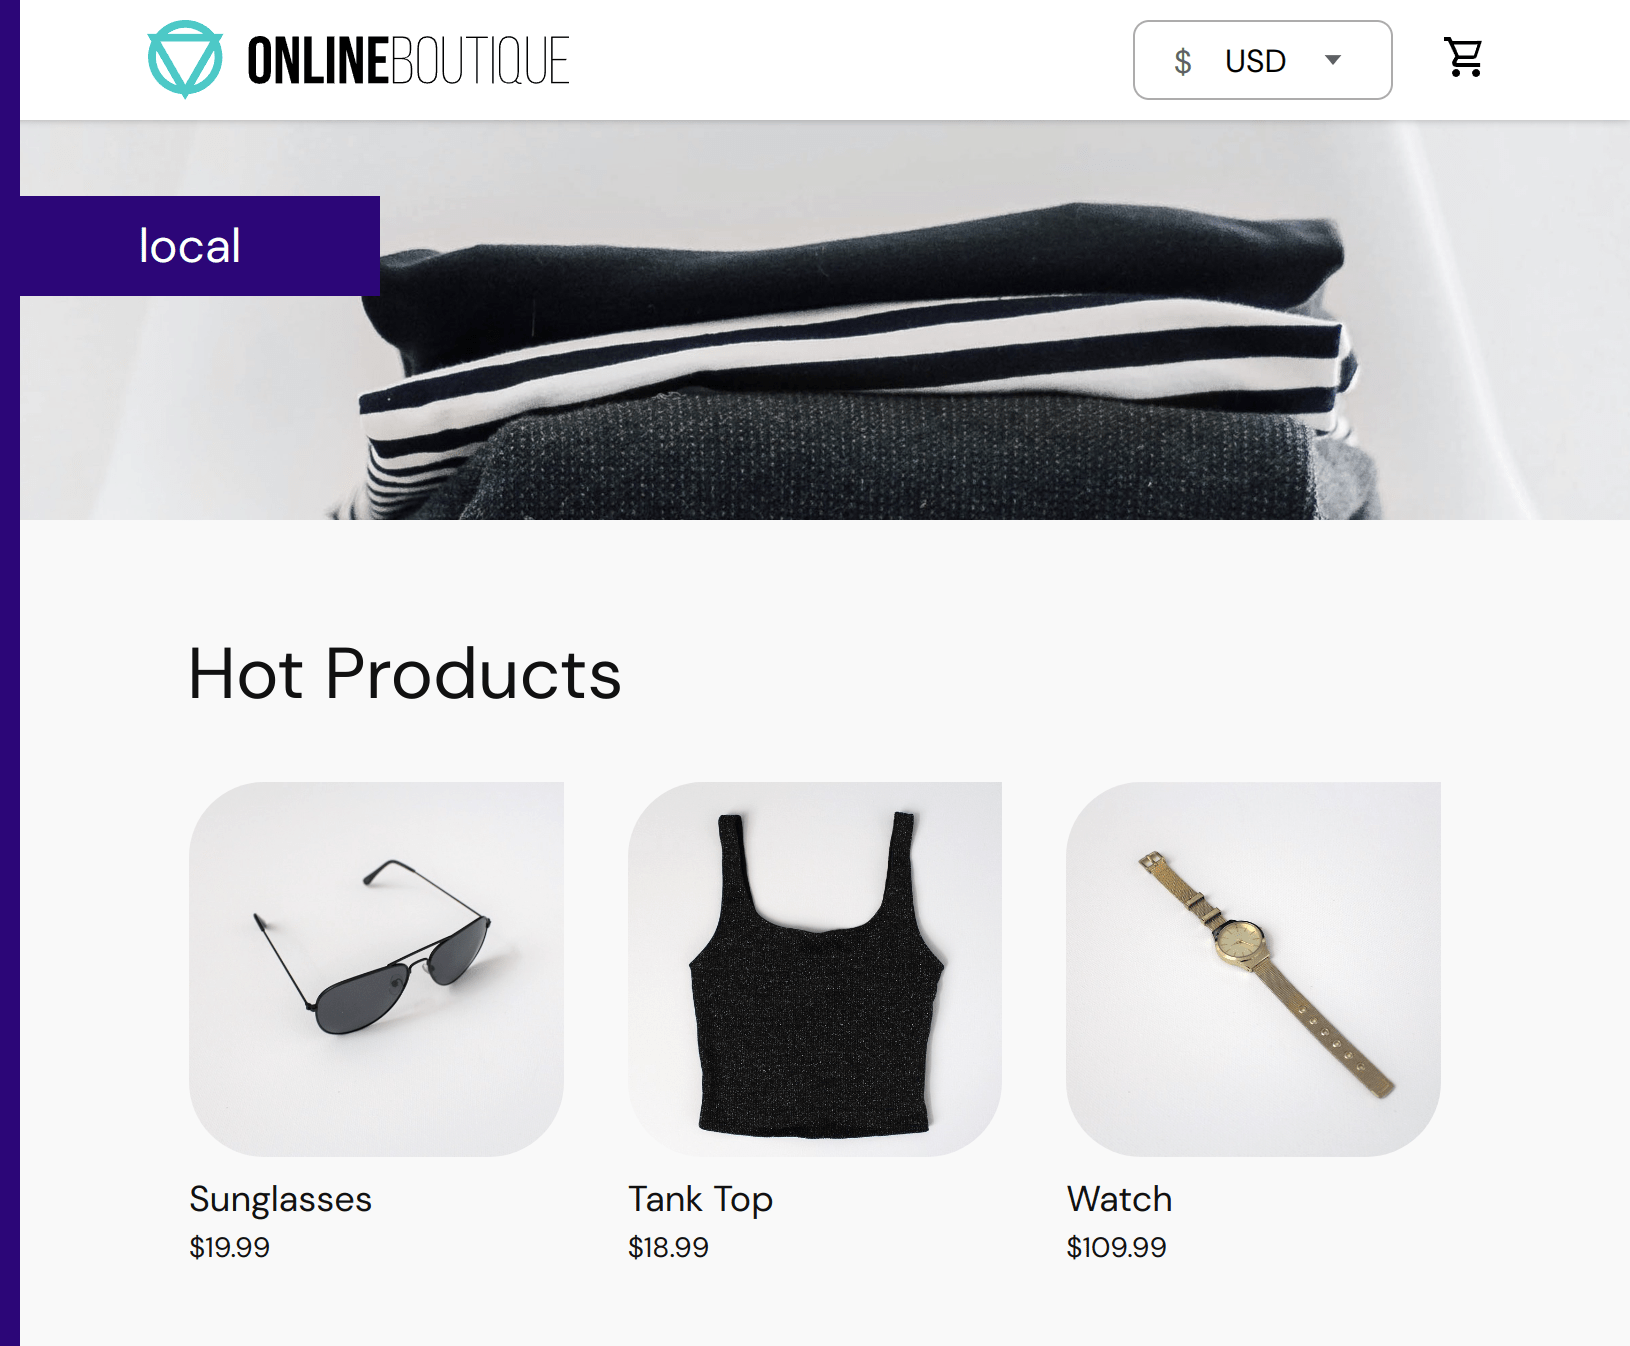
Note: Depending on your environment, you can either use NodePort (local cluster) or EXTERNAL-IP (cloud provider) to access the demo webpage.
Automatic sidecar injection
Now that everything is configured, we need to enable sidecar injection for workloads before the policies can be applied to them.
Use the following command to add istio-injection label to the default namespace:
kubectl label namespace default istio-injection=enabled
Since our frontend pods were created before the injection label, we need to re-deploy them for the new config to take effect.
Use the following command to restart the frontend deployment.
kubectl rollout restart deployment/frontend
If you take a look at the frontend pods you will see that there are three containers now running as part of the frontend pod deployment.
Calico Security Policy
Calico security policies are unique CRDs that can manipulate the flow of traffic. Each policy can be associated with workloads by using selectors and affect their traffic’s ingress or egress flow. For example, the frontend microservice is a deployment that is used by the Google microservices demo to provide an endpoint to clients.
Note: By default, in the absence of security policies, all traffic is permitted, but after adding a policy, this behavior changes to deny everything unless explicitly permitted.
Use the following command to create a cluster-wide security policy to target workloads with the app==frontend label:
kubectl apply -f -<<EOF
apiVersion: projectcalico.org/v3
kind: GlobalNetworkPolicy
metadata:
  name: frontend-deny
spec:
  order: 20
  selector: app == 'frontend'
  types:
  - Ingress
EOF
Let’s head back to the browser and refresh the page.
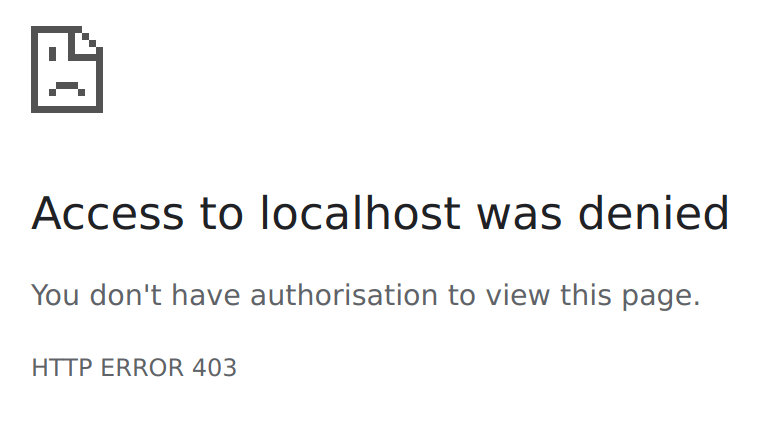
As expected, our new policy denies access to the webpage.
Application layer policy
Since we have enabled the Calico integration with Istio, we can expand our security resources and add unique HTTP criteria to be included in our security policies. Calico ALP supports every standard HTTP method that the HTTP protocol offers and provides two powerful ways to interact with the URL paths.
Note: More information about ALP policies can be viewed here.
Use the following command to create an HTTP policy:
kubectl apply -f -<<EOF
apiVersion: projectcalico.org/v3
kind: GlobalNetworkPolicy
metadata:
  name: frontend-allow-homepage
spec:
  order: 10
  selector: app == 'frontend'
  ingress:
   - action: Allow
     http:
       methods: ["GET"]
       paths:
         - exact: "/"
         - prefix: "/static"
         - prefix: "/product"
EOF
Let’s head back to the browser and refresh the page.
Perfect, everything is working!
Conclusion
In this blog post on integrating Istio and Calico to create a service mesh, we talked about the Calico ALP and how you can add it to your security arsenal. Calico ALP allows you to write security policies targeting HTTP protocol communication. These security rules can interact with HTTP methods and paths to establish security at the application layer of the OSI model.
Ready to become a Calico-certified operator? Try our free, self-paced certification courses today.