The surge of cloud-native applications has propelled Kubernetes into the forefront, revolutionizing how we manage and deploy workloads. However, this exponential growth has also increased the security challenges, and attack surface, DevOps and Security teams must address.
As we discussed in a previous blog post, traditional network security measures fall short when presented with Kubernetes’ dynamic nature, demanding a paradigm shift towards more adaptable solutions. Enter “Calicio Network Policies” – the indispensable shield in the Kubernetes arsenal. Calico Network policies enable the access controls required to secure traffic within your cluster, which is vital for safeguarding against the evolving threat landscape.
However, crafting robust network policies does demand some finesse so, in this blog post, we will explore 5 tips to empower administrators in fortifying their cloud-native applications.
Tip 1: Scope your policies correctly
When we create a Calico Policy our first task is to decide, who will be protected by the rules in this policy? This is the act of Scoping a policy and it is key to determining how wide of a net we will cast with our policy. Will we be scoping an entire cluster? Multiple namespaces? Or maybe just one workload? To explore what a well-scoped policy looks like, let us take an example deployment with two namespaces and application pods deployed to them:
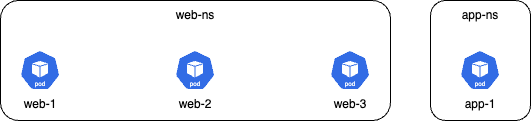
The goal of the policy will be to only allow web-1 to communicate with app-1.
Let’s first take a look at a poorly scoped policy:
apiVersion: projectcalico.org/v3
kind: NetworkPolicy
metadata:
  name: application.poorly-scoped-policy
  namespace: web-ns
spec:
  tier: application
  order: 100
  types:
    - Egress
  egress:
    - action: Allow
      source:
        selector: app == "web-1"
      destination:
        namespaceSelector: projectcalico.org/name == "app-ns"
This policy scopes the entire web-ns namespace and then uses the egress rule to filter down to the pod that is allowed to send traffic, in this case, pod web-1.
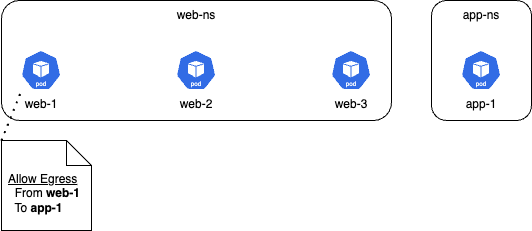
To find out why this policy is poorly scoped, we need to think of what is happening at the dataplane. At the dataplane each pod scoped by this policy, which is all of the pods in the web-ns namespace, will get this egress rule attached to their interfaces like the below:

Notice that all pods in the web-ns namespace have a policy rule that states: Egress traffic is allowed to app-1, as long as it is coming from web-1. This makes sense for pod web-1, but it does not make sense for pods web-2 or web-3 as they will never match this rule.
This example shows how a badly scoped policy adds unnecessary in relation to pods in a single namespace, but of course, this type of problem could also affect multiple namespaces, or the entire cluster, depending on the type of policy created, with a Calico global policy having the farthest reach and impact.
For completeness, let us look at a more elegantly scoped policy:
apiVersion: projectcalico.org/v3
kind: NetworkPolicy
metadata:
  name: application.well-scoped-policy
  namespace: web-ns
spec:
  tier: application
  order: 100
  selector: app == "web-1"
  types:
    - Egress
  egress:
    - action: Allow
      destination:
        namespaceSelector: projectcalico.org/name == "app-ns"
Here we scope the policy to the web-ns namespace, but then we further scope the policy down to the web-1 pod using the app=web-1 label. Now the policy rule will only apply to this pod like below:
Tip 2: Think about your Tier design
In a previous blog post we discussed how calico policies are processed over multiple tiers and how we recommend a Security, Platform, DevOps and Application tier approach to designing these tiers. This approach allows for funneling of traffic where the Security tier policies will address more general traffic to comply with organizational infosec requirements, and policies in subsequent tiers will address more specific flow to protect.
This is a design pattern that is in use in real-world clusters spanning from single cluster to 10,000 cluster deployment, promotes performance at scale, and so it is the recommended approach, however, every customer has the option to deploy their own vision of a Tiering system.
However even with custom tiering architectures, it is still recommended to think of how traffic will flow through your Tiers so that more general flows can be actioned as early as possible.
Take this custom tiering architecture for example:
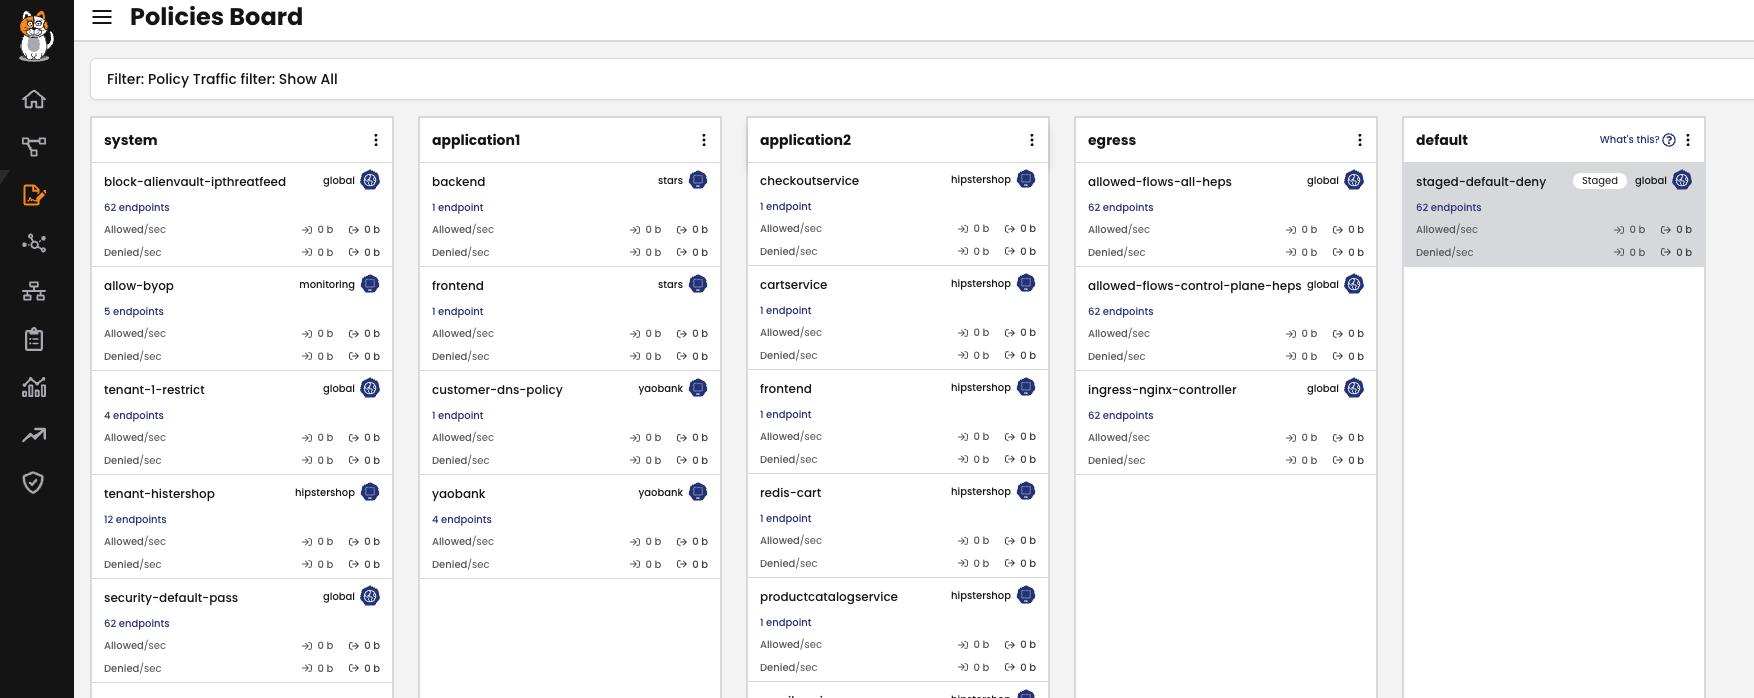
In this example, the first three tiers secure traffic to and from system and application workloads, with the last tier dealing with more general egress traffic in the cluster.
Depending on how the policies are scoped, this type of Tiering architecture could lead to egress flows being processed by multiple policies and tiers before they are finally actioned by policies in the last tier.
A more effective design would be something like this:
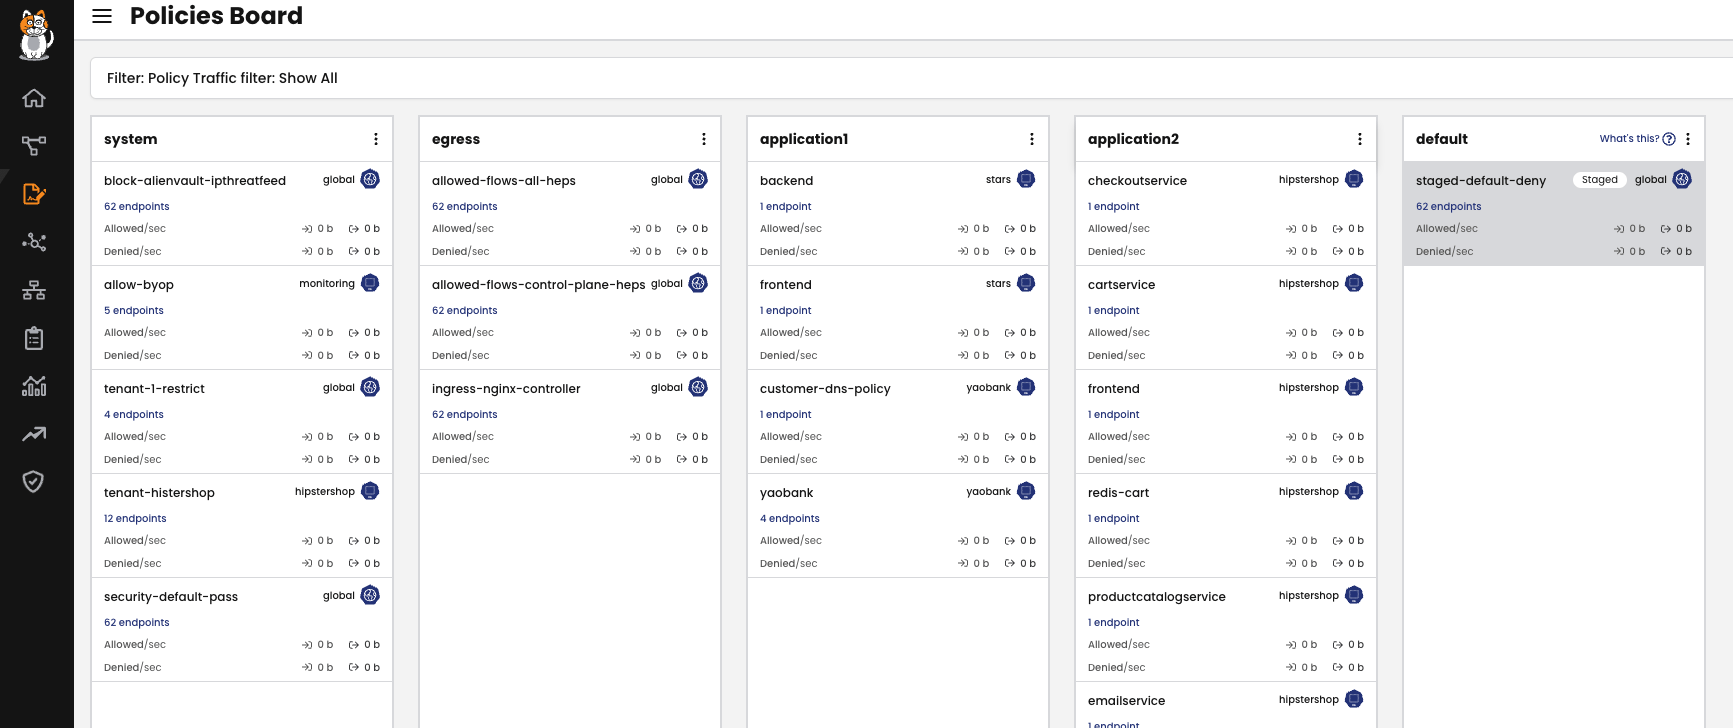
This way, general egress traffic is dealt with up-front and more specific, application related egress flows, can be addressed in the subsequent tiers.
Tip 3: Use networksets whenever possible
Calico networksets are a means to group IPs and DNS entries into a single object that can be then referenced in Calico Policies. When creating Calico Policies you have two options to address IP address and FQDNs. You can bake these objects in to the policy rules:
  types:
    - Egress
  egress:
    - action: Allow
      destination:
        nets:
          - 8.8.8.8/32
          - 1.1.1.1/32
        domains:
          - tigera.io
          - kubernetes.io
Or we can create a Calico networkset:
 kind: GlobalNetworkSet
  apiVersion: projectcalico.org/v3
  metadata:
    name: external-objects
    labels:
      gns-external: 'true'
  spec:
    nets:
      - 8.8.8.8/32
      - 1.1.1.1/32
    allowedEgressDomains:
      - tigera.io
      - kubernetes.io
And then reference this networkset in our policy using the networksets label, gns-external: ‘true’
  types:
    - Egress
  egress:
    - action: Allow
      destination:
        selector: gns-external == "true"
The most obvious benefit to Calico networksets is that, if you need to add, change or remove an IP or FQDN from policies, you only need to make this change to the networkset and it is propagated to all policies that reference the networkset.
While this certainly holds true, and allows for more efficient use of an administrator’s time, there are also benefits to using networksets at the iptables dataplane level.
In the first example, where we baked the IP and FQDNs into the policy, in iptables, this will create a rule for every object. So if we had 100 IP addresses and 100 FQDNs, that would result in 200 rules. With a Calico networkset, that would only create 1 rule referencing an ipset that contains all 400 IP addresses.
Additionally, if we were to update the policy with baked-in IPs and FQDNs, that would trigger iptables-save and iptables-restore operations. With a networkset there would be no operations to iptables, only to the specific ipset. This may sound trivial, but in large scale deployments, minimizing iptables operations is a key consideration.
Tip 4: Watch out for Unused Policies
When creating policies in a large, dynamic cluster it is very possible to make mistakes and create unused policies. But what do we mean by an unused policy?
An unused policy is one that is applied to the dataplane, but does not scope, or select, any endpoints.
If we took our previous example with our web and app namespaces and further filtered this to scope only web-4 pods, we would create an unused policy since web-4 pods do not currently exist.
spec:
  tier: application
  order: 100
  selector: app == "web-4"
Now, unused policies may be intentional, where you expect pods with a certain label to be deployed in the future, and in that case this is perfectly fine practice.
Even so it is still a good idea to be mindful of misconfigurations that may lead to unused policies.
But how do we do that? How can we tell if a policy is in use or not?
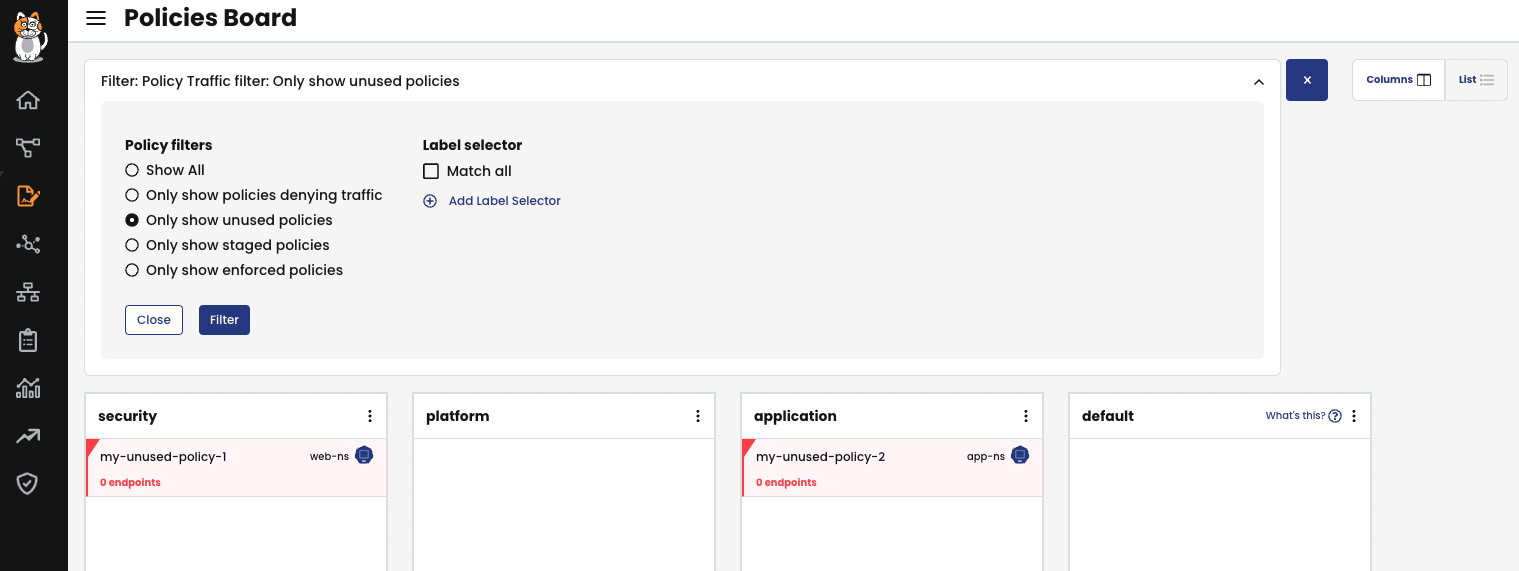
The quickest option would be to check the Policy Board in the Tigera Manager UI which will highlight unused policies in red and state that they are scoping 0 Endpoints. And for clusters with too many policies to quickly spot these policies, you can also apply a filter to Only Show Unused Policies:
Additionally, a more CLI driven approach would be use the calicoq utility to check unused policies by using the following syntax query:
calicoq policy <namespace>/<tier-name>.<policy-name> -rs
Example of a Used Policy:
calicoq policy web-ns/application.poorly-scoped-policy -rs
Tier "application" Policy "web-ns/application.poorly-scoped-policy" applies to these endpoints:
  Workload endpoint ip-10-0-1-31.ca-central-1.compute.internal/k8s/web-ns.web-1/eth0
Example of an Unused Policy:
calicoq policy web-ns/security.my-unused-policy-1 -rs
Tier "security" Policy "web-ns/security.my-unused-policy-1" applies to these endpoints:
Tip 5: Observe, Observe, Observe!
The last, and certainly not least, tip would be to actually observe your policies in action
- Are connections flowing through your policies and tiers the way you would expect?
- Are connections being actioned as you would expect?
- Are connections being actioned by the policies you would expect?
These are just some example questions you could use to ensure that your policy, and tiering strategy, has been implemented correctly.
Answering these questions can be done using any of the observability tools that Calico provides (FlowViz, Service-Graph, Kibana) but for this blog post we will use one of the in-built kibana dashboards to confirm our policies are working as expected.
To get this observational data we’ll first open up the Tigera Flow Logs dashboard in Kibana in Calico Cloud and Enterprise:
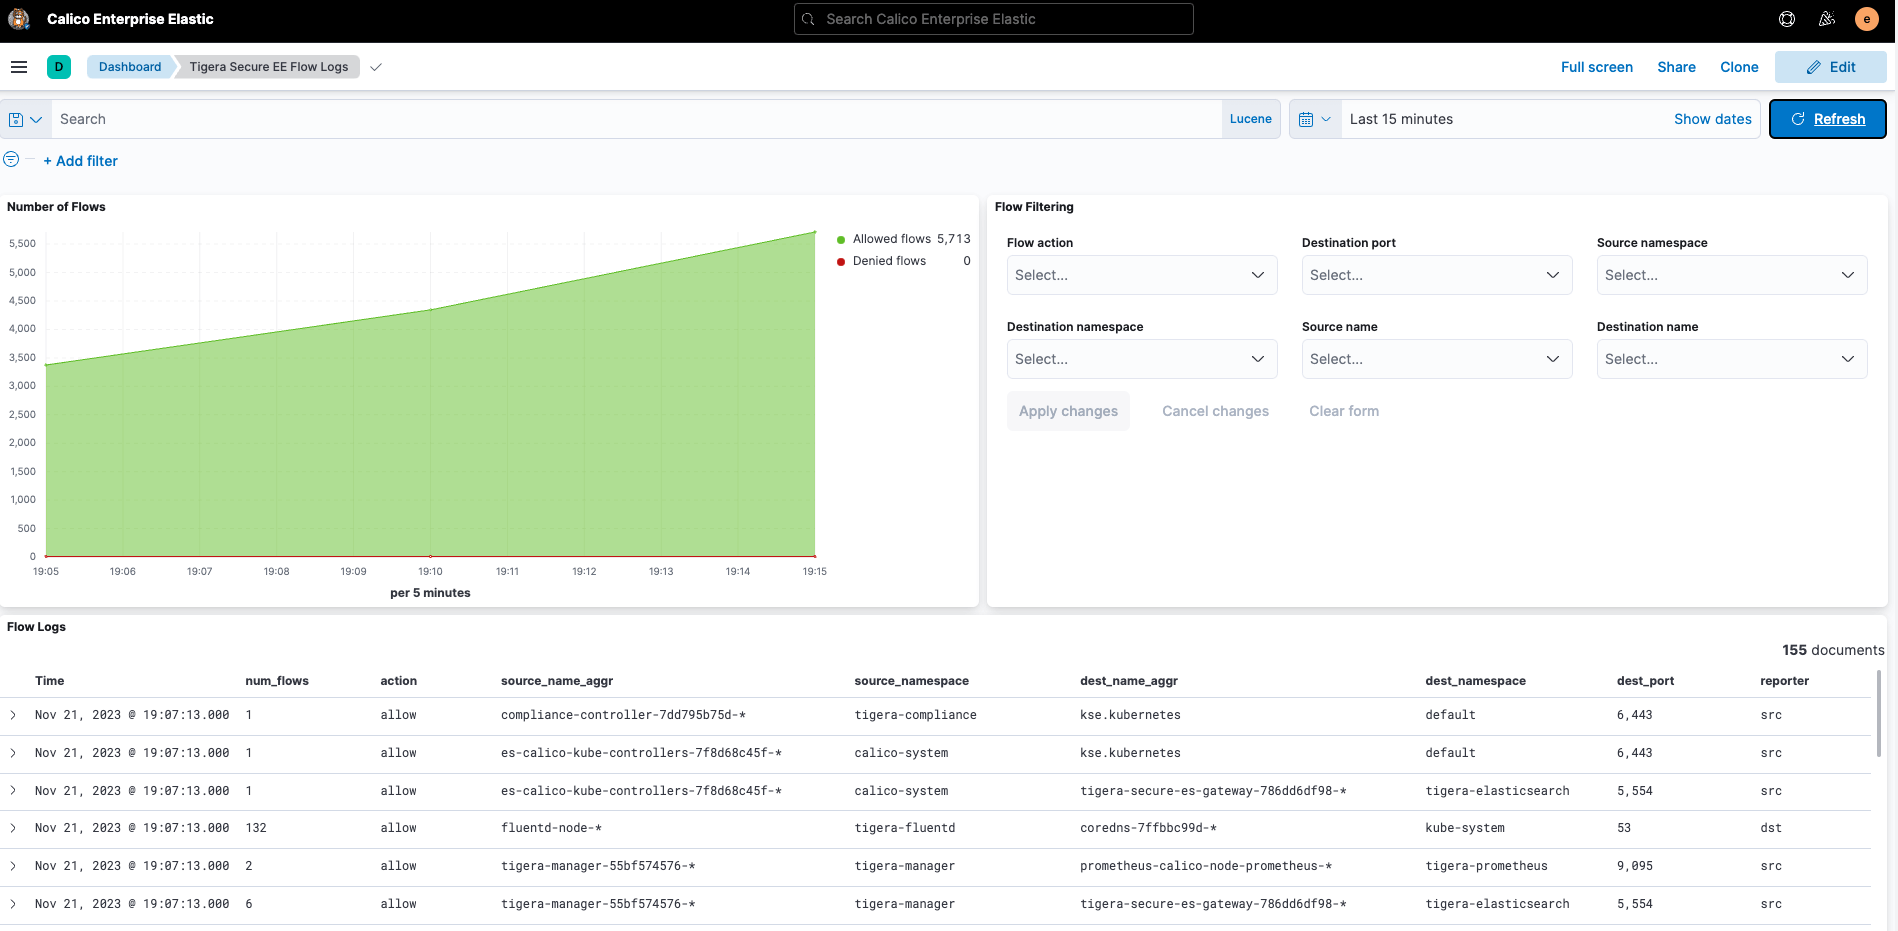
We’ll then filter to include only traffic hitting our well-scoped-policy.
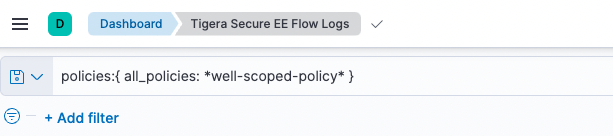
As a reminder, this policy allows egress traffic from the web-1 pod to DNS and the app-1 pod in the app-ns namespace only. All other traffic is denied.

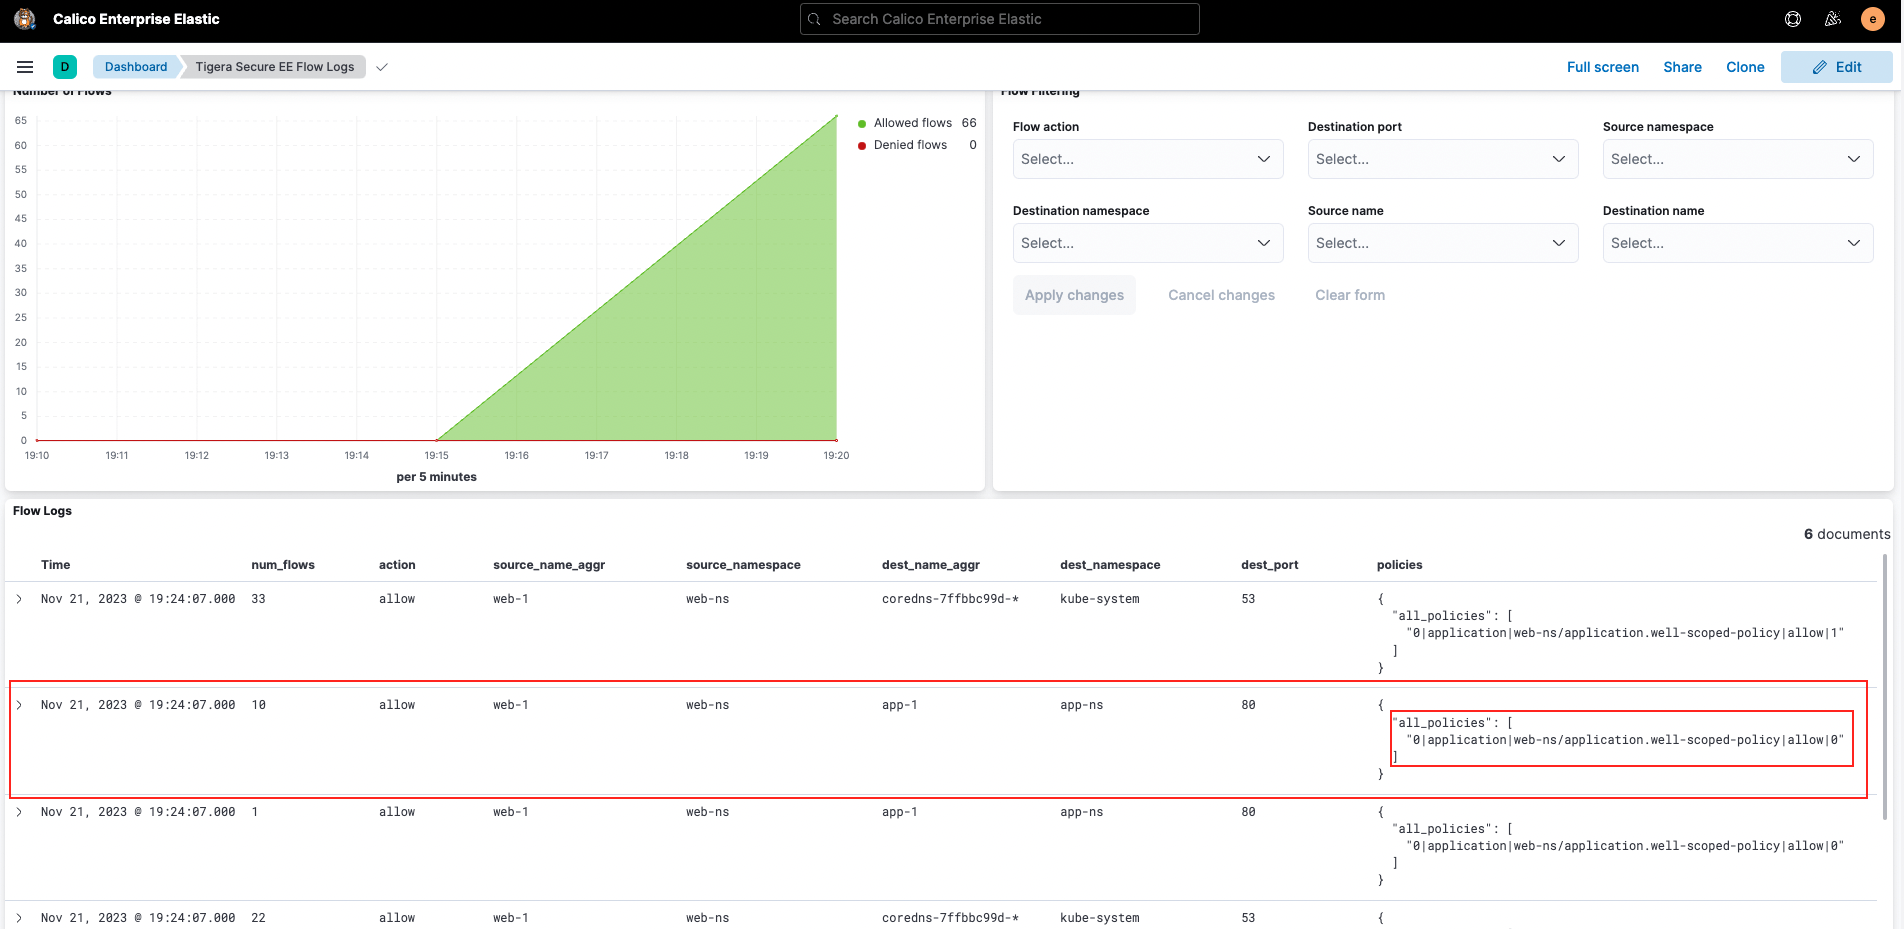
When web-1 communicate to app-1 we see allow hits on the policy:
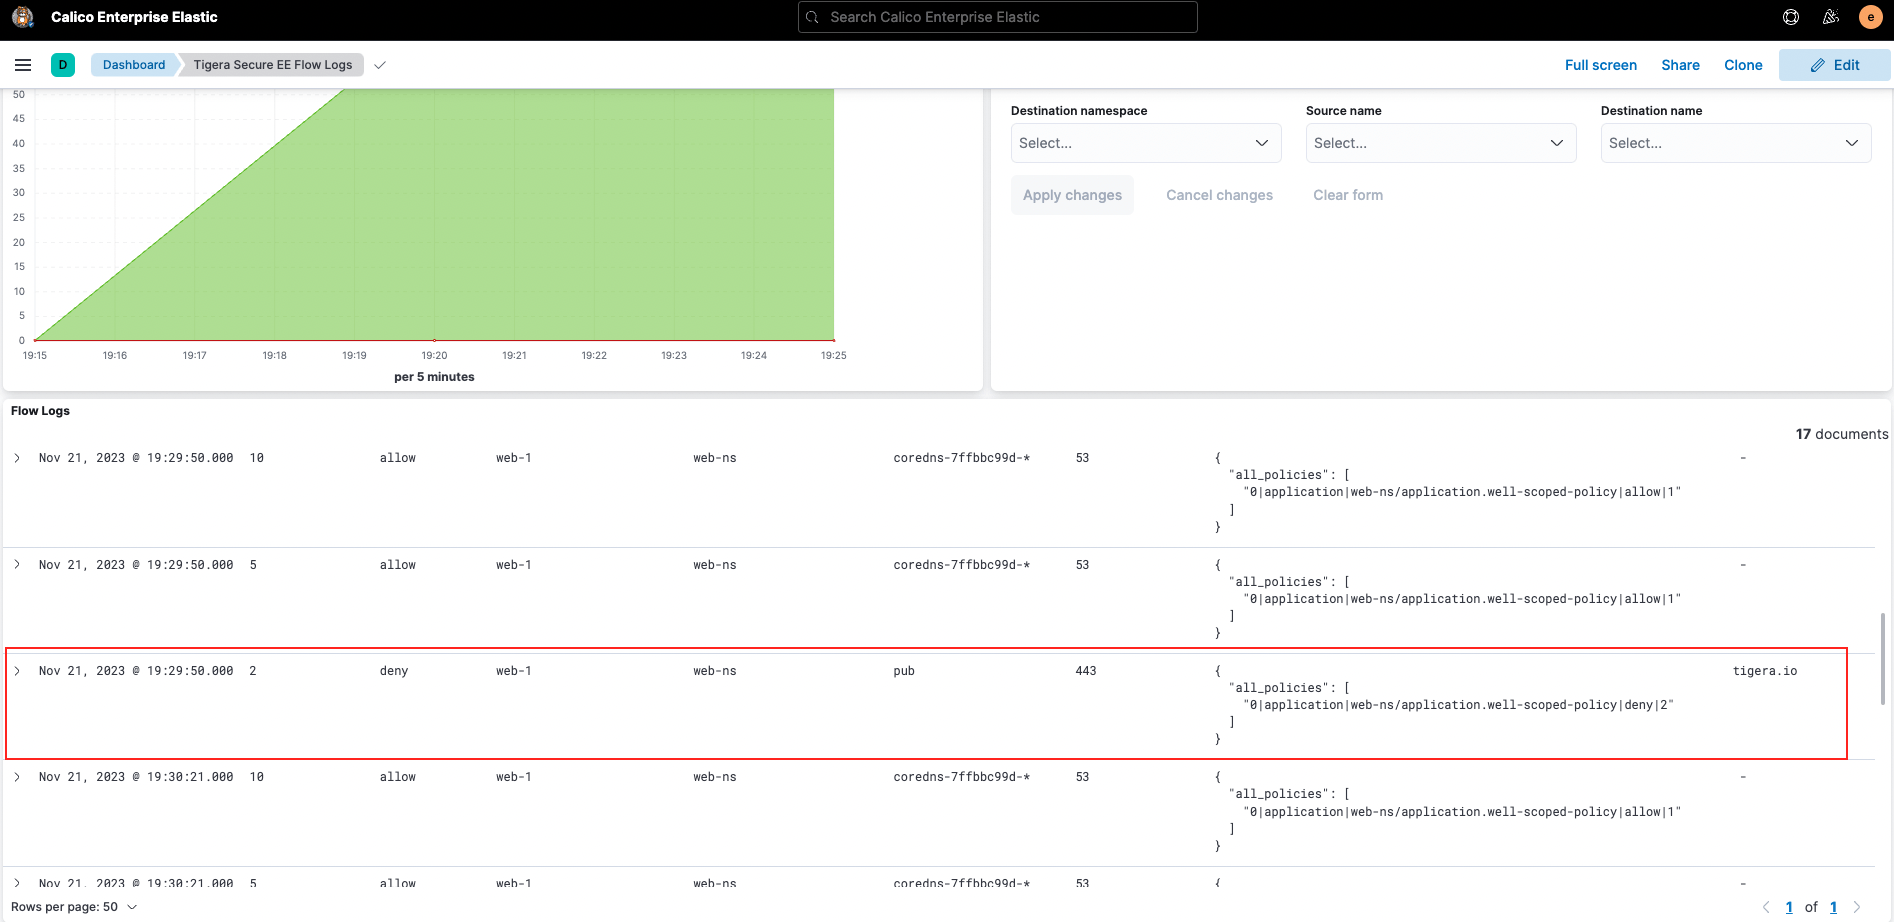
Conversely, if web-1 tries to connect to tigera.io we see deny hits on the policy:
Conclusion
When securing cloud-native applications, crafting a robust network security policy design stands as a fundamental task that, if done well, ensures optimal resource allocation, smooth dataplane performance, and simplified troubleshooting. Hopefully, these tips will help you to initiate and refine your network policy design, fostering a secure and efficient environment within your Kubernetes infrastructure.
Ready to try Calico node-specific policies? Sign up for a free trial of Calico Cloud
Join our mailing list
Get updates on blog posts, workshops, certification programs, new releases, and more!