In cloud-native software development, ensuring the supply chain security of containerized applications in Kubernetes (K8s) environments is of utmost importance. With the continuous evolution of threats, safeguarding your containerized applications at every stage is not a choice anymore; it is an absolute necessity. With Calico’s vulnerability management, you can scan container images across three pivotal application lifecycle stages:
- During the CI/CD build time
- Within image repositories at rest, and
- Scanning images for CVEs within the K8s clusters during runtime.
Let’s break down the scanning guardrails offered by Calico:
- CI/CD Build Time: The scanner integrates seamlessly into your application build pipeline, scanning custom-built images, local images, and third-party images from public registries (for example ECR, ACR) along with libraries (for example, python, ruby gems, jars, and go), packages, and image layers. This stage is crucial to identify vulnerabilities early, before they make their way into production.
- Image Repositories: Calico also scans images at rest in repositories like Azure ACR or Amazon ECR, etc. This step adds an extra layer of defense, ensuring images that might have bypassed scanning during the build phase don’t carry vulnerabilities into deployment.
- In-Cluster Scanning: Perhaps the most critical, this stage involves scanning images running inside K8s clusters. This not only helps in identifying but also in blocking compromised images in your running environment.
Each scanning option brings its unique benefits. For instance, in-cluster scanning in the Kubernetes environment is automated, accessible through the Manager UI, and offers an intuitive Image Assurance dashboard and removes the need to build or integrate a complex scanning solution from scratch. The CLI scanner for CI/CD pipelines, on the other hand, is a lightweight, downloadable binary, perfect for offline and on-demand scans, including emergency patching.
We have covered the in-cluster and at-rest static image scanning in other detailed blog posts, so we’ll focus on Integrating the Calico Image Assurance at the build time with your CI/CD pipeline. As discussed before, each stage offers its own benefits, but doing it at build time has some distinct advantages.
Why build-time scanning matters?
- Early Vulnerability Detection: Scanning at build time means catching security issues as early as possible in the development lifecycle. This is often referred to as “shifting left” in security. By identifying vulnerabilities early, you can address them before they become deeply embedded in your code, making them less costly and time-consuming to fix.
- Continuous Security Feedback Loop: Build-time scanning provides continuous feedback to developers about the security health of their code. This ongoing feedback helps inculcate a security-focused mindset and improves the overall security culture within the development team. This is another best-practice in the shift-left security process.
- Faster and More Efficient Remediation: Identifying and addressing vulnerabilities during the build phase is generally quicker and more straightforward than after deployment. This efficiency is critical in agile development environments where time-to-market is a key factor.
- Cost-Effective Security: It’s often more cost-effective to fix issues early in the development cycle. The later a vulnerability is discovered (especially if it’s in a running production environment), the more expensive it becomes to address.
- Improved Compliance and Governance: Many regulatory frameworks emphasize the importance of early and continuous security assessments. Scanning at build time aligns with these requirements, helping ensure compliance with industry standards and regulations.
In the upcoming sections, we’ll delve into the specifics of how you can leverage these features within Azure DevOps to craft a CI/CD pipeline that’s not just efficient and agile but also robustly secure. Whether you are a DevOps veteran or a newcomer to the field, this arms you with the necessary insights and tools to integrate top-tier security practices into your Kubernetes deployments.
The choice of platform in this blog would be Azure DevOps Pipeline, but the same can be implemented across the board for different platforms and vendors.
What You Need Before Setting Up Calico Image Assurance Scanner
Getting ready to enhance your CI/CD pipeline with Calico Image Assurance? Great! Before diving in, there are a few key requirements you’ll need to meet. Let’s walk through what you need to ensure a smooth setup.
For Your Images:
- Docker-ready: Make sure you’ve got Docker container runtime installed. This is essential because the Calico scanner works within this environment.
- Local Image availability: Your container images need to be accessible locally via the Docker environment. This means the images you want to scan should be present right there on the system where you’re running the Image Assurance scanner.
For the Scanner:
- Internet Connectivity: The scanner isn’t a lone wolf; it needs to connect to the internet. Why? Well, it regularly downloads and updates its vulnerability database from online sources, keeping your security checks up-to-date.
- External API Communication: Want to view the scan results in the Manager UI? For that, your scanner needs the ability to reach out and communicate with an external API endpoint. This is important for transmitting scan data out of your local environment to the Manager UI for a comprehensive view.
Note: Remember, ticking these boxes is crucial for a successful deployment of the Calico Image Assurance scanner in your environment. It ensures not only the functionality of the scanner but also the relevance and accuracy of your security scans.
Let’s get Started
We will first quickly setup a Build Pipeline in Azure as follows (assuming you already have a project created):
- Log in to your Azure DevOps console and create a repository. For example, I’ve created a private repo named
calico-image-assurance-buildtime-integrationfor testing purposes here. - Create a Pipeline:
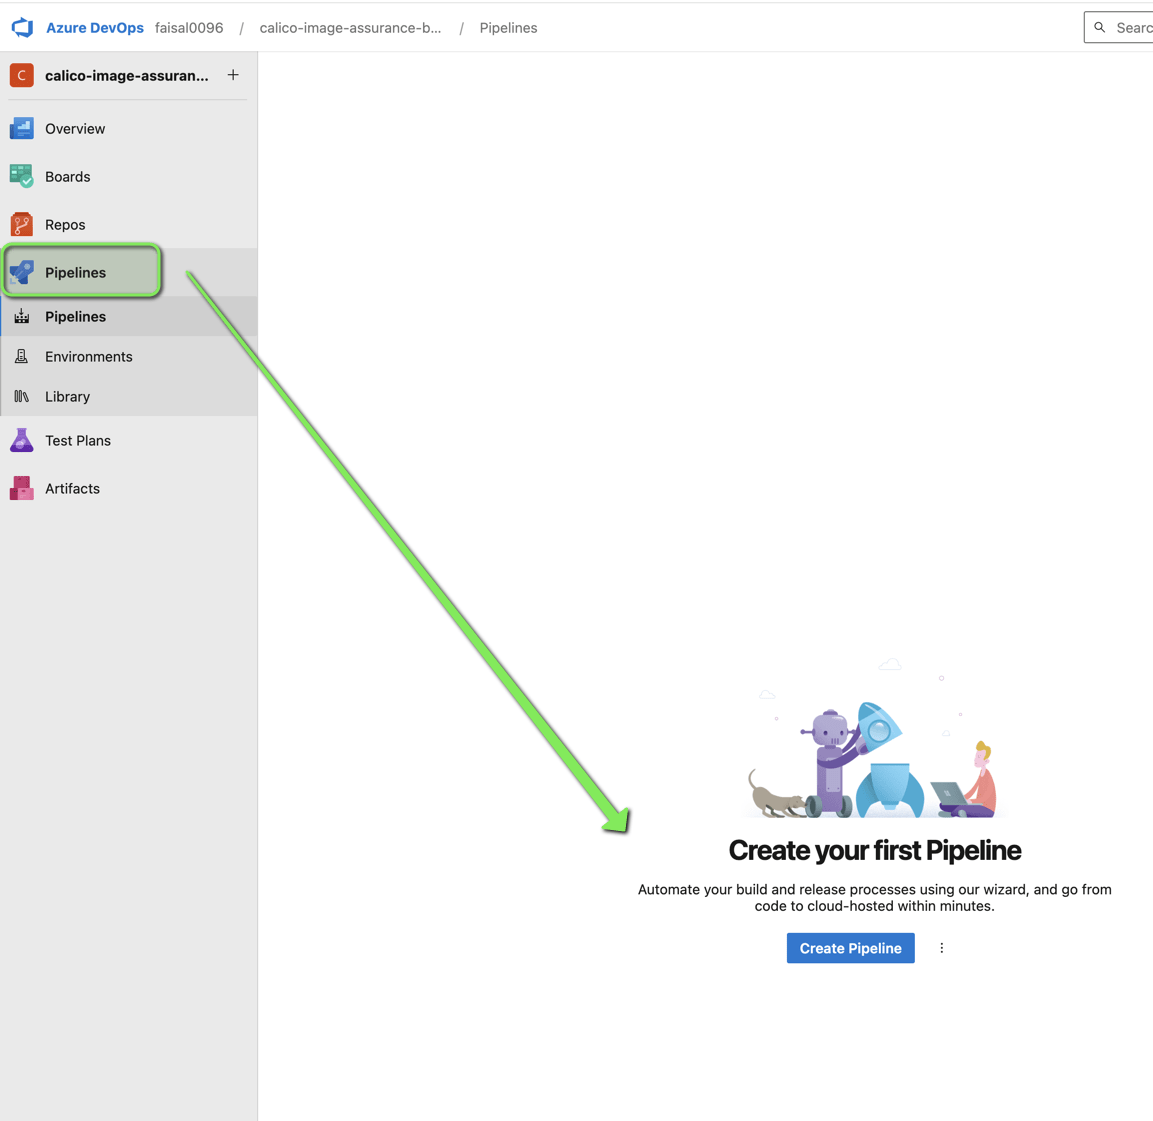
- Navigate to Pipelines: In Azure DevOps, go to the Pipelines section and create a new pipeline.
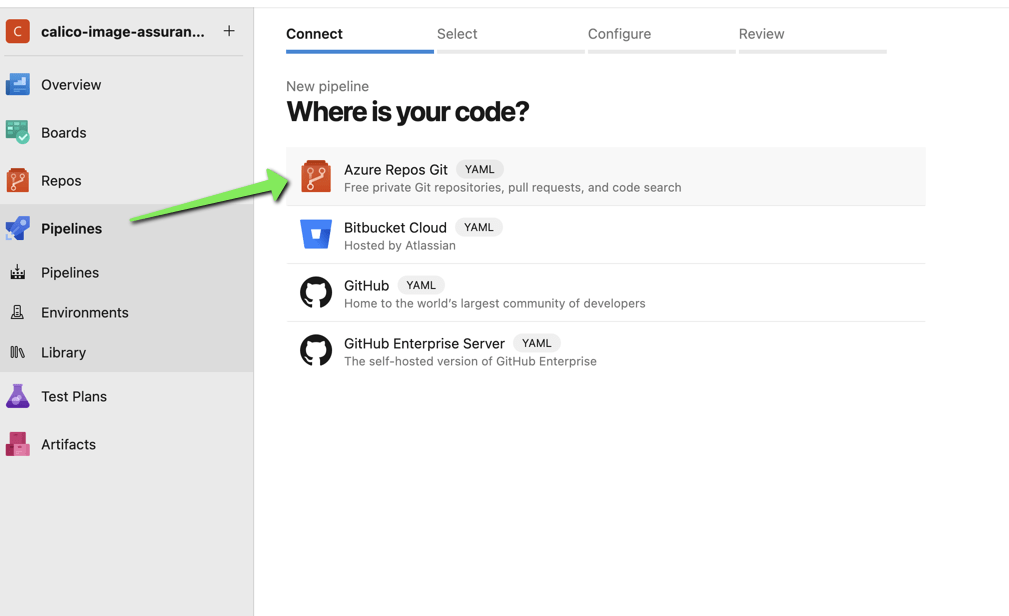
- Connect Your Repo: Connect the pipeline to the repository where your code resides.
- Define Build Steps: Define the steps needed to build your application. This typically involves:
- Restoring dependencies
- Building the application
- Running tests
- Creating a Docker image
- Pushing the Docker image to Azure Container Registry (ACR) or another container registry
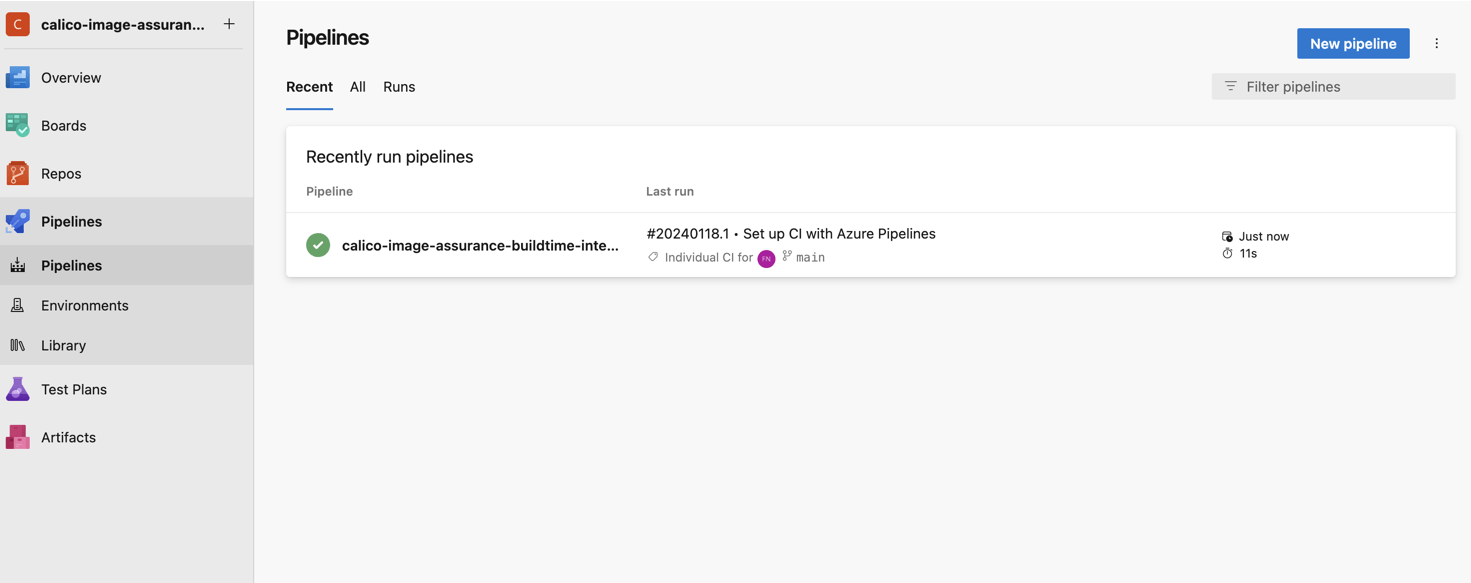
The below screenshots will help you understand the above steps:
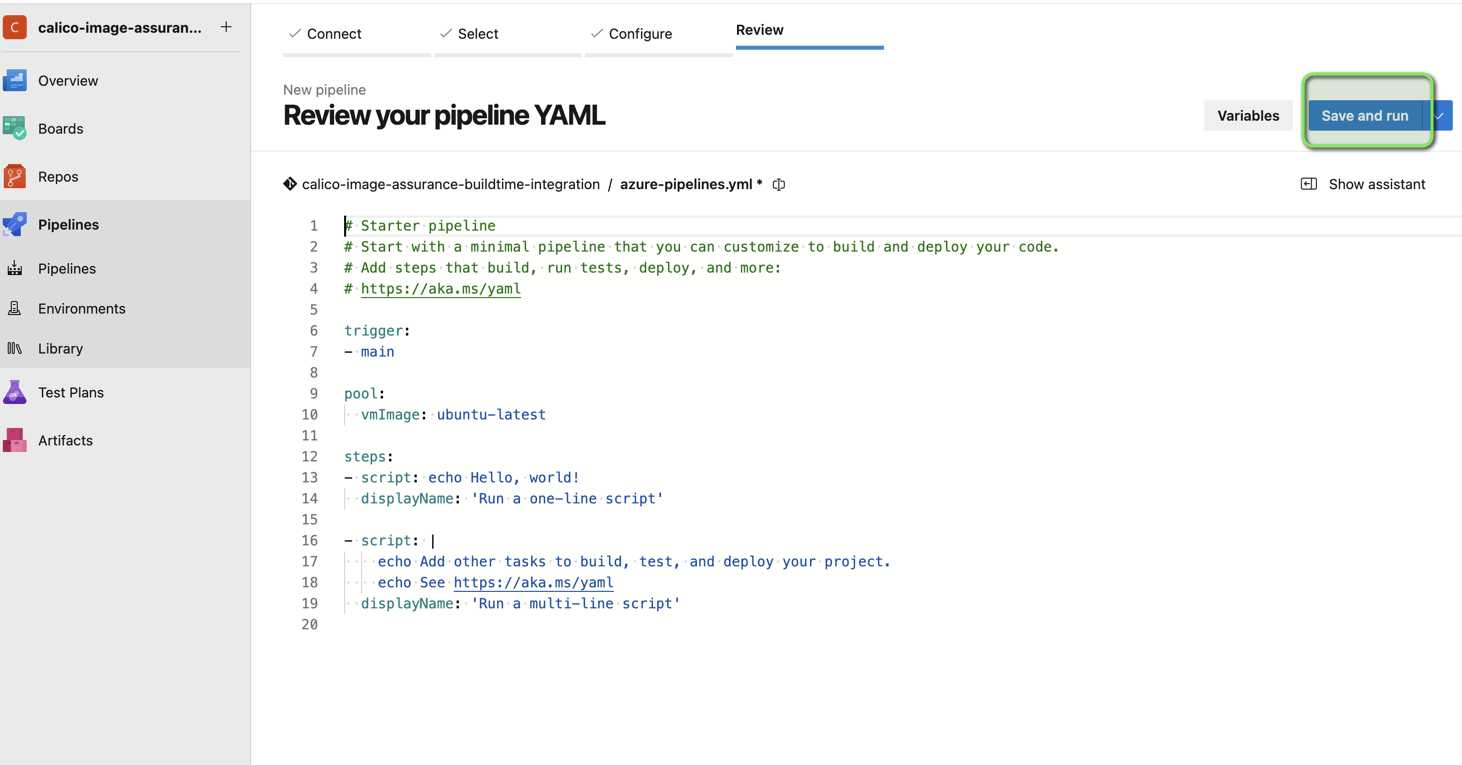
You can select a starter pipeline for now, which we will tweak later on to integrate the scanner with the build.
Let’s just do a quick run of the new pipeline to test its setup and verify everything is working as expected:
Now that we’re sorted with our initial build pipeline, let’s move through to the next step of building an image with a dockerfile containing a vulnerable alpine:3.16.1 base image. It’s a simple Dockerfile for testing purposes:
# Use Alpine Linux version 3.16.1
FROM alpine:3.16.1

# Install busybox-extras to get the httpd command
RUN apk add --no-cache busybox-extras

# Set the working directory in the container
WORKDIR /usr/share/web

# Copy the local files to the container's working directory
# Assuming you have a 'www' directory with static files to serve
COPY www .

# Expose port 8080 for the web server
EXPOSE 8080

# Start the simple http server on port 8080
CMD ["httpd", "-f", "-p", "8080"]
Here’s the new azure-pipelines.yaml building from the dockerfile:
trigger:
- main


pool:
 vmImage: ubuntu-latest


steps:
# Build Docker Image
- task: Docker@2
 displayName: 'Build Docker image'
 inputs:
   command: build
   Dockerfile: '**/Dockerfile'
   tags: |
     my-image:$(Build.BuildId)


# Optionally, push the image to a Docker registry
# Uncomment the lines below and configure as needed
# - task: Docker@2
#   displayName: 'Push Docker Image'
#   inputs:
#     command: push
#     repository: myrepository/my-image
#     tags: |
#       $(Build.BuildId)
Let’s push this new pipeline to our repo and have the first custom build.
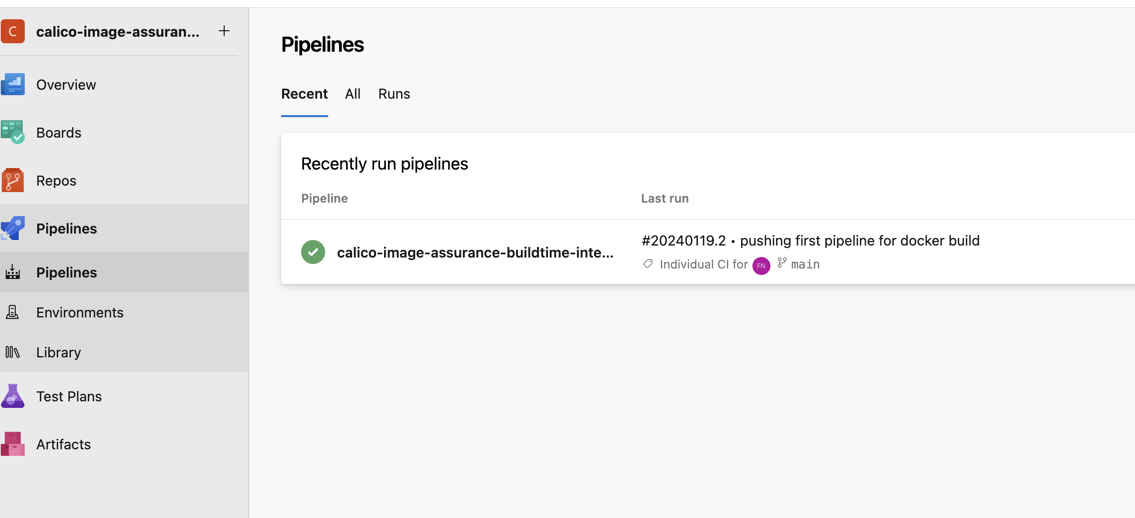
Now we have tested the custom build with our Dockerfile containing the vulnerable alpine image, we can next integrate the scanner into our Azure pipeline and build again with this vulnerable image to see the effect.
Integrating the Scanner into Azure DevOps Pipeline
Now, let’s integrate the scanner into your Azure DevOps pipeline:
- Download the Image Assurance CLI scanner binary onto your CI runner.
- In cases of an ephemeral environment, include steps in your pipeline to download and update the scanner for every execution.
- Create a secret in your pipeline with the API token and URL (obtained from the Manager UI, under Image Assurance settings). This is crucial for authenticating your scanning process with Calico Cloud.
- Add the Image Assurance CLI scanner command to your pipeline. The basic format is: ./tigera-scanner scan –apiurl <api_url> –token <api_token> <image_name>:<tag>. Replace the placeholders with your specific details.
To accommodate the steps mentioned above, we will tweak the azure-pipelines.yaml as below:
trigger:
- main

resources:
- repo: self

variables:
  dockerRegistryServiceConnection: 'xxxxxxxxxxxxxxxxxxxx'
  imageRepository: 'test'
  containerRegistry: 'faisal-xxxxx-xxx-vms.azurecr.io'
  dockerfilePath: 'Dockerfile'
  tag: '$(Build.BuildId)'
  vmImageName: 'ubuntu-latest'

stages:
- stage: Build
  displayName: Build and push stage
  jobs:
  - job: Build
    displayName: Build
    pool:
      vmImage: $(vmImageName)
    steps:
    - task: Docker@1
      displayName: Build Docker Image
      inputs:
        command: build
        repository: $(imageRepository)
        dockerfile: $(dockerfilePath)
        tags: |
          $(tag)

    - script: |
        docker images
      displayName: List Docker Images


    - script: |
        curl -Lo tigera-scanner https://installer.calicocloud.io/tigera-scanner/v3.18.0-1.1-1/image-assurance-scanner-cli-linux-amd64
        chmod +x ./tigera-scanner
      displayName: Download and Prepare Calico Scanner

    - script: |
        echo "Scanning Image: calico-buildtime-integration:$(tag)"
        ./tigera-scanner scan --apiurl <API-URL> --token $(SECURE_API_TOKEN) $(imageRepository):$(tag)
      displayName: Scan Docker Image - image-assurance-scanner
      env:
        SECURE_API_TOKEN: $(SecureApiToken)

    - task: Docker@2
      displayName: Push Docker Image to Registry
      inputs:
        command: push
        repository: $(imageRepository)
        containerRegistry: $(dockerRegistryServiceConnection)
        tags: |
          $(tag)
Let’s go through the above azure-pipelines.yaml step by step and try to break it down for easy understanding:
Trigger
trigger:
  - main
As evident, this section specifies the branch that will trigger the pipeline. Here, any push to the main branch will initiate the pipeline process.
Resources
resources:
  - repo: self
This indicates that the pipeline uses resources from the current repository (self).
variables:
  dockerRegistryServiceConnection: <service-connection-id>
  imageRepository: test
  containerRegistry: <your-container-registry>
  dockerfilePath: Dockerfile
  tag: $(Build.BuildId)
  vmImageName: ubuntu-latest
This section declares several variables used in the pipeline:
- dockerRegistryServiceConnection: A unique identifier for your Docker registry service connection in Azure DevOps.
- imageRepository: The name of the repository where your image is stored.
- containerRegistry: The URL of your container registry (e.g., Azure Container Registry).
- dockerfilePath: The path to your Dockerfile.
- tag: The tag for your Docker image, here set to the build ID.
- vmImageName: The VM image used for the build, in this case, ubuntu-latest.
Stages – Build
stages:
  - stage: Build
    displayName: Build and push stage
    jobs:
      - job: Build
        displayName: Build
        pool:
          vmImage: $(vmImageName)
        steps:
Defines a stage named ‘Build’, which includes jobs and steps to build the Docker image. It specifies the VM image to be used for the build job (ubuntu-latest).
Docker Build Step
- task: Docker@1
  displayName: Build Docker Image
  inputs:
    command: build
    repository: $(imageRepository)
    dockerfile: $(dockerfilePath)
    tags: |
      $(tag)
This step uses the Docker task to build the Docker image. It specifies the command build, the repository, the Dockerfile, and the image tag.
List Docker Images Step
- script: |
    docker images
  displayName: List Docker Images
Executes a script to list all Docker images available on the build agent, primarily for logging and verification purposes.
Download and prepare Calico Scanner Step
- script: |
        curl -Lo tigera-scanner https://installer.calicocloud.io/tigera-scanner/v3.18.0-1.1-1/image-assurance-scanner-cli-linux-amd64
        chmod +x ./tigera-scanner
      displayName: Download and Prepare Calico Scanner
Download the Calico Image Assurance scanner and make it executable.
Scan Docker Image Step
- script: |
        echo "Scanning Image: calico-buildtime-integration:$(tag)"
        ./tigera-scanner scan --apiurl <API-URL> --token $(SECURE_API_TOKEN) $(imageRepository):$(tag)
      displayName: Scan Docker Image - image-assurance-scanner
      env:
        SECURE_API_TOKEN: $(SecureApiToken)
This step scans the built Docker image using the Calico scanner. Replace <api-url>, and <api-token> with your specific details. The SECURE_API_TOKEN environment variable is used for secure token storage.
You’ll need the api-url and api-token if you want to upload the scan results to your calico-cloud console (UI). To get the api-url and api-token, you’ll first need to login to your calico cloud console and go to the image assurance tab. Click on the settings (gear icon on the top right) and it will display the api-url and api-token information to you. Copy that and use it in the above pipeline script.
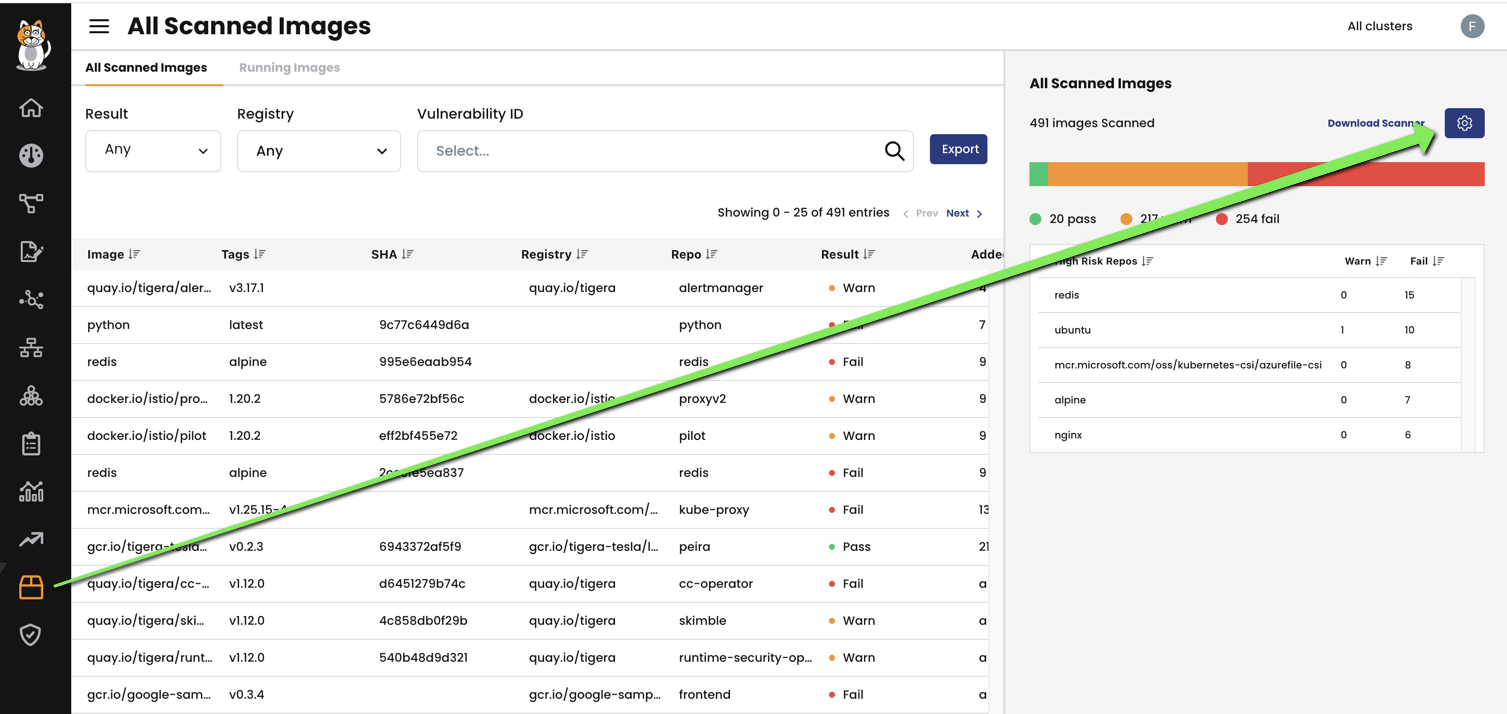
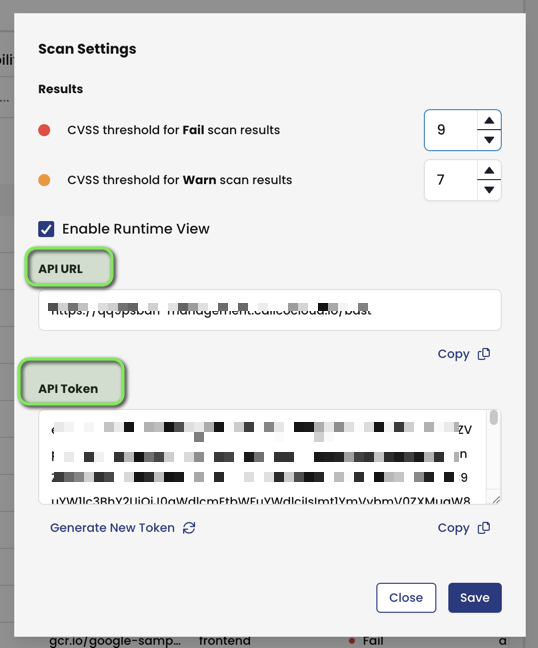
Here you can also set the threshold to fail the scan results.
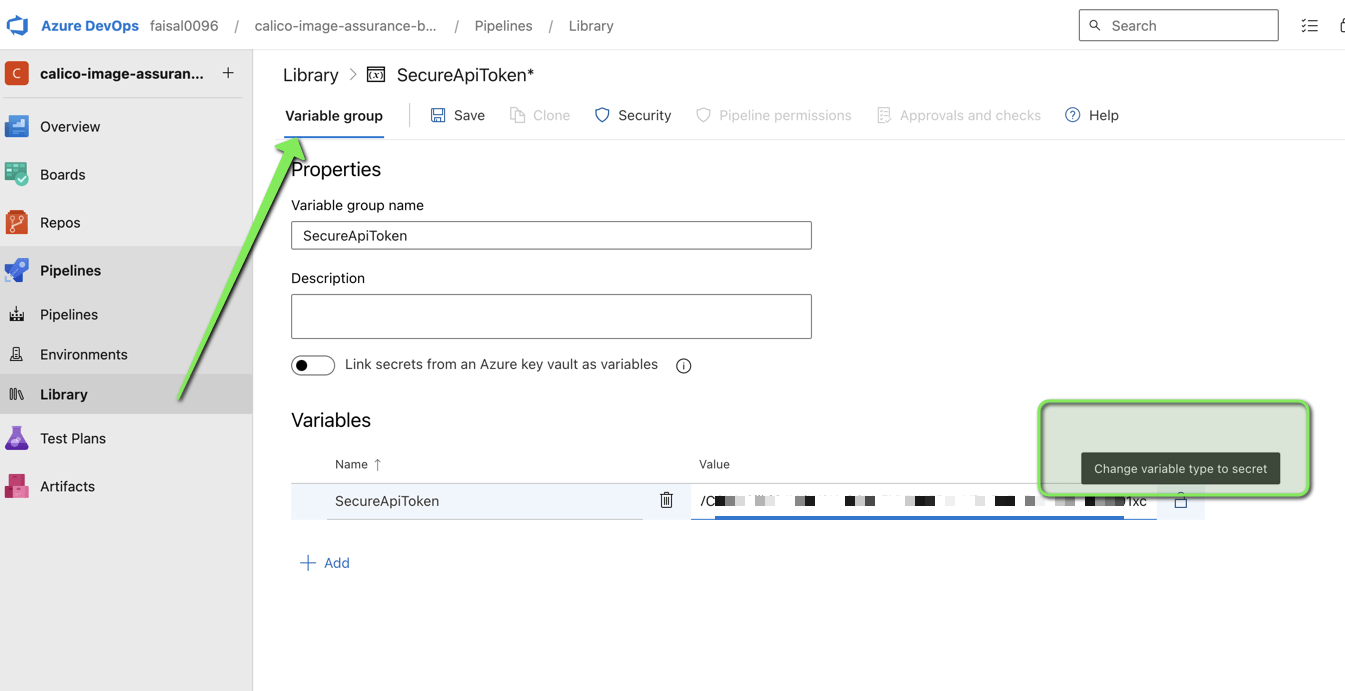
The api-token can be set as a variable-type secret in your pipeline. For example, in our Azure pipeline, we can set it as variable named “SecureApiToken” and set the value as a secret as shown below:
Aside, in Azure, you will also need to create a service-connection to connect to your registry.

Push Docker Image to Registry Step
- task: Docker@2
  displayName: Push Docker Image to Registry
  inputs:
    command: push
    repository: $(imageRepository)
    containerRegistry: $(dockerRegistryServiceConnection)
    tags: |
      $(tag)
Finally, this step pushes the built and scanned Docker image to the specified container registry.
Now that we have the new customized azure-pipelines.yaml ready with the Calico Image Assurance integrated into it, we can now push the new pipeline manifest and observe the new build process to have the scanner scan our images and libraries for vulnerabilities and fail the build if it finds critical vulnerabilities in the Dockerfile.
faisalnaseem@Faisals-MBP calico-image-assurance-buildtime-integration % git add .
faisalnaseem@Faisals-MBP calico-image-assurance-buildtime-integration % git commit -m "pushing the calico integrated pipeline for docker build"
[main a873e3c] pushing the calico integrated pipeline for docker build
 1 file changed, 47 insertions(+), 23 deletions(-)
faisalnaseem@Faisals-MBP calico-image-assurance-buildtime-integration % git push origin
Enumerating objects: 5, done.
Counting objects: 100% (5/5), done.
Delta compression using up to 10 threads
Compressing objects: 100% (3/3), done.
Writing objects: 100% (3/3), 1.61 KiB | 1.61 MiB/s, done.
If everything works fine, we should see a build failure this time as the scanner detects the critical vulnerabilities in the image and fails the build.
As can be seen in the logs below from the build logs, we can see the following output:
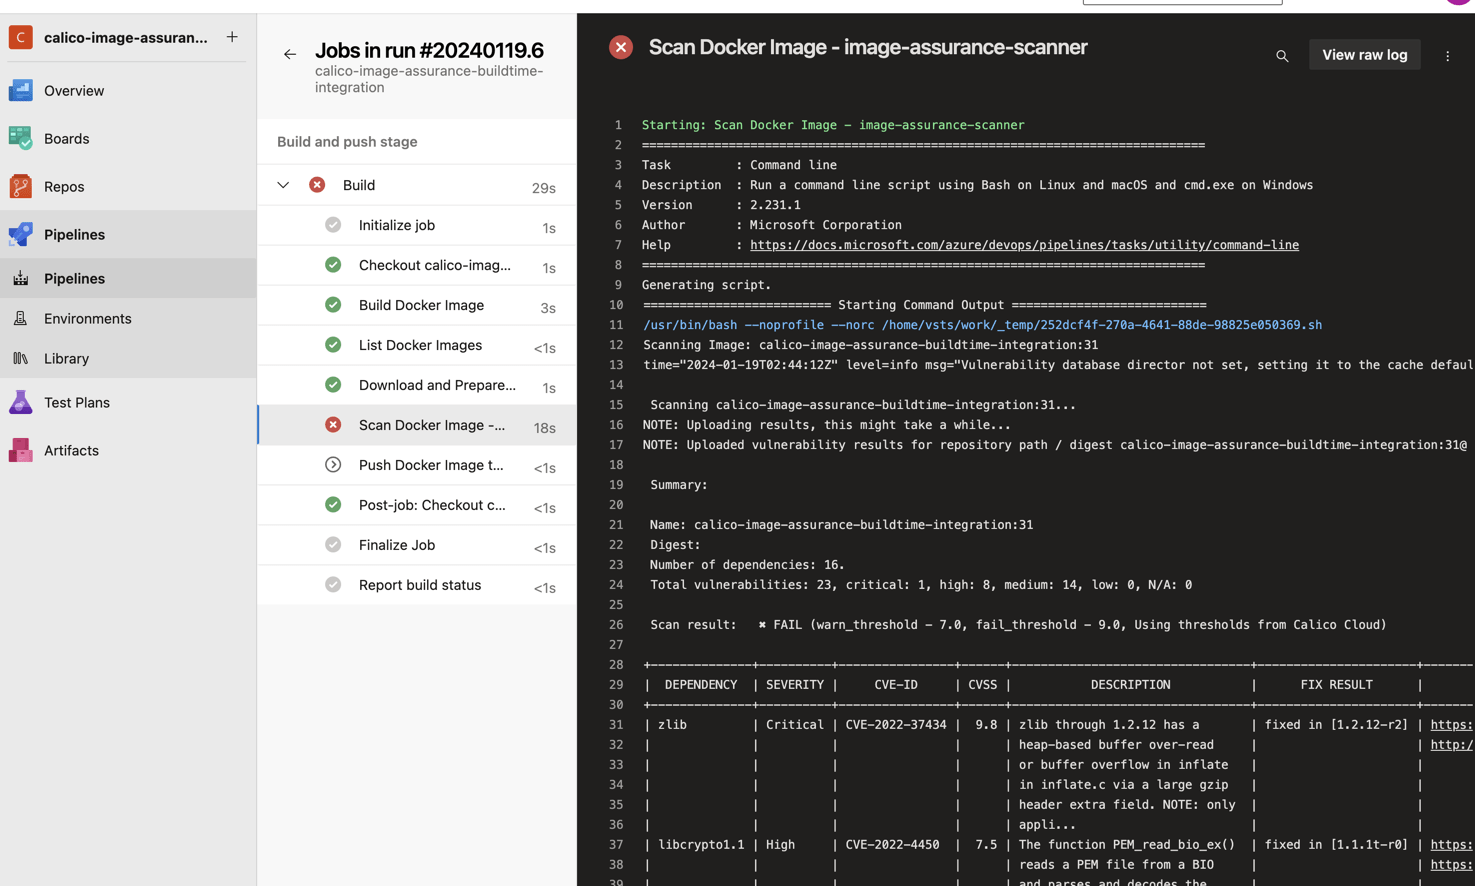
Here’s the excerpt from the build failure logs with details of fail threshold used by the Calico Image Scanner.
Starting: Scan Docker Image - image-assurance-scanner
==============================================================================
Task         : Command line
Description  : Run a command line script using Bash on Linux and macOS and cmd.exe on Windows
Version      : 2.231.1
Author       : Microsoft Corporation
Help         : https://docs.microsoft.com/azure/devops/pipelines/tasks/utility/command-line
==============================================================================
Generating script.
========================== Starting Command Output ===========================
/usr/bin/bash --noprofile --norc /home/vsts/work/_temp/252dcf4f-270a-4641-88de-98825e050369.sh
Scanning Image: calico-image-assurance-buildtime-integration:31
time="2024-01-19T02:44:12Z" level=info msg="Vulnerability database director not set, setting it to the cache default direct /home/vsts/.cache."

 Scanning calico-image-assurance-buildtime-integration:31...
NOTE: Uploading results, this might take a while...
NOTE: Uploaded vulnerability results for repository path / digest calico-image-assurance-buildtime-integration:31@

 Summary:

 Name: calico-image-assurance-buildtime-integration:31
 Digest:
 Number of dependencies: 16.
 Total vulnerabilities: 23, critical: 1, high: 8, medium: 14, low: 0, N/A: 0

 Scan result:   ✖ FAIL (warn_threshold - 7.0, fail_threshold - 9.0, Using thresholds from Calico Cloud)
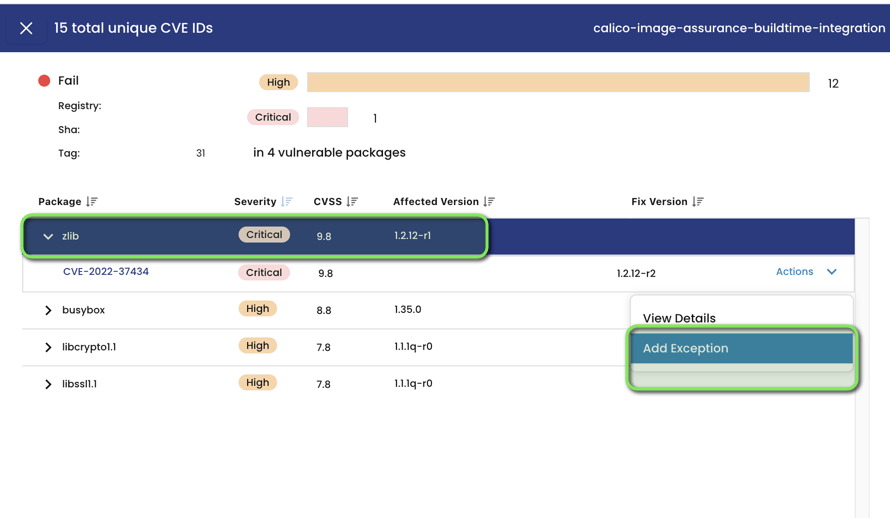
We can see the scan results in Calico Cloud UI as well.

Adding Exceptions to known Vulnerabilities or tweaking the failure thresholds
You can add exceptions to the known vulnerability in the Calico Cloud console under the image assurance scan results pushed by the build pipeline.
Similarly, we can tweak the warn and failure threshold values for our scan either via the console or by passing the warn and fail threshold flags in the build script. For example:
--fail_threshold 9.5 --warn_threshold 7.0
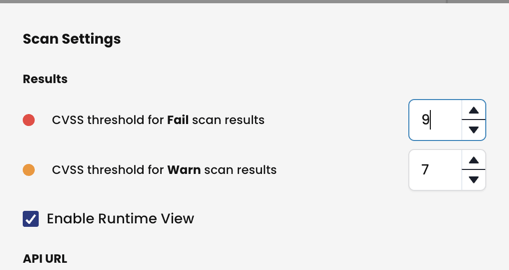
NOTE: The threshold values provided via the CLI will override the threshold values set in the Calico Cloud Console (UI).
For example, the threshold value in the UI as shown below is set to fail at 9.0 and warn at 7.0 whereas we are manually providing the fail and warn threshold values to be 9.9 and 7.0 so this will take precedence over the value set in the UI.
- script: |
        echo "Scanning Image: calico-image-assurance-buildtime-integration:$(tag)"
        ./tigera-scanner scan --apiurl https://qq9psbdn-management.calicocloud.io/bast --token $(SECURE_API_TOKEN)
 calico-image-assurance-buildtime-integration:$(tag) --fail_threshold 9.9 --warn_threshold 7.0
      displayName: Scan Docker Image - image-assurance-scanner
      env:
        SECURE_API_TOKEN: $(SecureApiToken)
Conclusion
As we have seen in the above example, the Calico Image Assurance integration offers a robust and flexible solution for enhancing the security of container images in CI/CD pipelines. By automating the scanning process and providing detailed insights through its dashboard, it plays a crucial role in maintaining the integrity and security of containerized applications.
Ready to try Calico image scanner? Sign up for a free trial of Calico Cloud
Join our mailing list
Get updates on blog posts, workshops, certification programs, new releases, and more!