Efficient connectivity for stateful workloads such as databases across multiple Kubernetes clusters is crucial for effective multi-cluster deployments. The challenge lies in providing seamless communication between services deployed across these clusters.
Calico Cluster mesh enhances Kubernetes’ native service discovery, allowing it to function across multiple Kubernetes clusters. This capability facilitates the discovery and connection of Kubernetes services, including headless services, without needing an additional control plane like Service mesh.
When connecting workloads across Kubernetes clusters with Cluster mesh, you don’t have to route packets outside the cluster to then redirect them back inside via external load balancers, Service mesh proxies, or ingress controllers. Cluster mesh optimizes the routing paths for cross-cluster workloads, making sure data travels directly between workloads and removing extraneous network hops, ensuring low latency communication.
Cross Cluster Network Connectivity
Cluster mesh optimizes routing for stateful workloads across clusters, ensuring they follow the most direct route and reducing unnecessary network hops to enhance performance. Calico Cloud and Enterprise extend overlay networking to establish pod IP routes across clusters, with VXLAN as the supported mode for encapsulated routing.
This setup avoids needing an external routing mechanism, as Calico establishes direct pod connections via VXLAN tunnels, streamlining network configuration in multi-cluster environments. It reduces the reliance of the platform team on networking teams responsible for the underlying network infrastructure. For unencapsulated routing, configurations use BGP or VPC routing.
apiVersion: projectcalico.org/v3
kind: RemoteClusterConfiguration
metadata:
  name: stateful-workload-cluster-b
spec:
  clusterAccessSecret:
    name: stateful-workload-cluster-b-secret
    namespace: calico-system
    kind: Secret
  syncOptions:
    overlayRoutingMode: Enabled
Cross Cluster Service Discovery
Calico Cluster mesh enables Kubernetes services to find and interact across clusters. It uses native Kubernetes service discovery, allowing workloads to locate each other by DNS names, which map to the IP addresses in different clusters, streamlining inter-cluster communication.
It enables cross-cluster service discovery for Kubernetes services, including headless services, allowing database workloads to locate each other across clusters using a DNS name that resolves to the workload’s IP in the remote cluster.
For instance, consider a headless service configured on the IAD cluster to enable its interaction with the remote PDX cluster through Cluster mesh.
---
apiVersion: v1
kind: Service
metadata:
  name: multi-cluster-rs-pdx
  annotations:
    federation.tigera.io/serviceSelector:
      app == "multi-cluster-rs-pdx"
spec:
  ports:
  - port: 27017
    name: db
    protocol: TCP
  clusterIP: None
When you apply a federated service annotation to select a service in a remote cluster, the service is registered with the local DNS. This registration lets the service name resolve to the ClusterIP or, for headless services, to the IPs of the backing pods in the remote cluster. Traffic is then routed to the remote cluster over Calico Cluster mesh VXLAN tunnels, removing the need for external routing mechanisms.
Support For Headless Services
Headless services in Kubernetes are services without a cluster IP. They allow direct network traffic to the pods they select through DNS without load balancing or proxying. Using a headless service in Kubernetes is particularly beneficial for applications that need to directly connect to individual pods, such as stateful workloads like databases hosted on Kubernetes, for several reasons:
- Stable Network Identity: Headless services provide stable network identities for pods. Each pod gets a DNS entry, which remains stable regardless of pod restarts or rescheduling. This stable identity is vital for stateful applications like databases.
- Direct Pod Access: A headless service allows clients to discover and connect directly to the pods backing the service. This is crucial for database applications where clients might need to connect to a specific database instance for operations like read/write, replication, or sharding.
- Discovery and Configuration: Headless services enable each backing pod to be discovered and communicated with individually without load balancing. This is essential for distributed databases or clustered applications that require peer discovery for tasks like leader election, replication, and scaling.
Solution Overview
Calico Cluster mesh extends Kubernetes’ inherent capabilities, providing seamless service discovery across multiple Kubernetes clusters. This advanced feature allows Kubernetes services, including headless services, to discover and connect with each other across cluster boundaries without the need for an additional control plane, such as a Service mesh.
This example outlines the setup of two AWS EKS clusters with cross-region connectivity. Each cluster is placed within its own Virtual Private Cloud (VPC), and these VPCs are connected to allow direct network communication between the clusters using VPC peering. The configuration ensures that EKS cluster nodes in one VPC can communicate with cluster nodes in the other VPC.
The EKS clusters are configured with Calico Cluster mesh, enabling direct, low-latency communication between clusters. This allows services in different clusters to discover and connect seamlessly, simplifying cross-cluster interactions and enhancing network efficiency without the need for additional networking layers or external routing mechanisms.
Walk Through
Prerequisites
First, ensure that you have installed the following tools locally.
This walkthrough assumes you’ve set up your AWS cli credentials.
Step 1: Checkout and Deploy the Terraform Blueprint
1. Clone the Terraform Blueprint
Make sure you have completed the prerequisites and then clone the Terraform blueprint:
git clone https://github.com/tigera-solutions/multi-cluster-stateful-workloads-with-cluster-mesh.git
2. Navigate to the AWS Directory
Switch to the aws subdirectory:
cd aws
3. Customize Terraform Configuration
Optional: Edit the terraform.tfvars file to customize the configuration.
Examine terraform.tfvars.
region1         = "us-east-1"
region2         = "us-west-2"
vpc1_cidr       = "10.0.0.0/16"
vpc2_cidr       = "10.1.0.0/16"
cluster1_name   = "iad"
cluster2_name   = "pdx"
cluster_version = "1.27"
instance_type   = "m5.xlarge"
desired_size    = 3
ssh_keyname     = "your-ssh-keyname"
pod_cidr1       = "192.168.1.0/24"
pod_cidr2       = "192.168.2.0/24"
calico_version  = "v3.26.4"
calico_encap    = "VXLAN"
4. Deploy the Infrastructure
Initialize and apply the Terraform configurations:
terraform init
terraform apply
Enter yes at command prompt to apply.
5. Update Kubernetes Configuration
aws eks --region <REGION1> update-kubeconfig --name <CLUSTER_NAME1> --alias <CLUSTER_NAME1>
aws eks --region <REGION2> update-kubeconfig --name <CLUSTER_NAME2> --alias <CLUSTER_NAME2>
6. Verify Calico Installation
Check the status of Calico in your EKS cluster:
kubectl get tigerastatus
Step 2: Link Your EKS Cluster to Calico Cloud
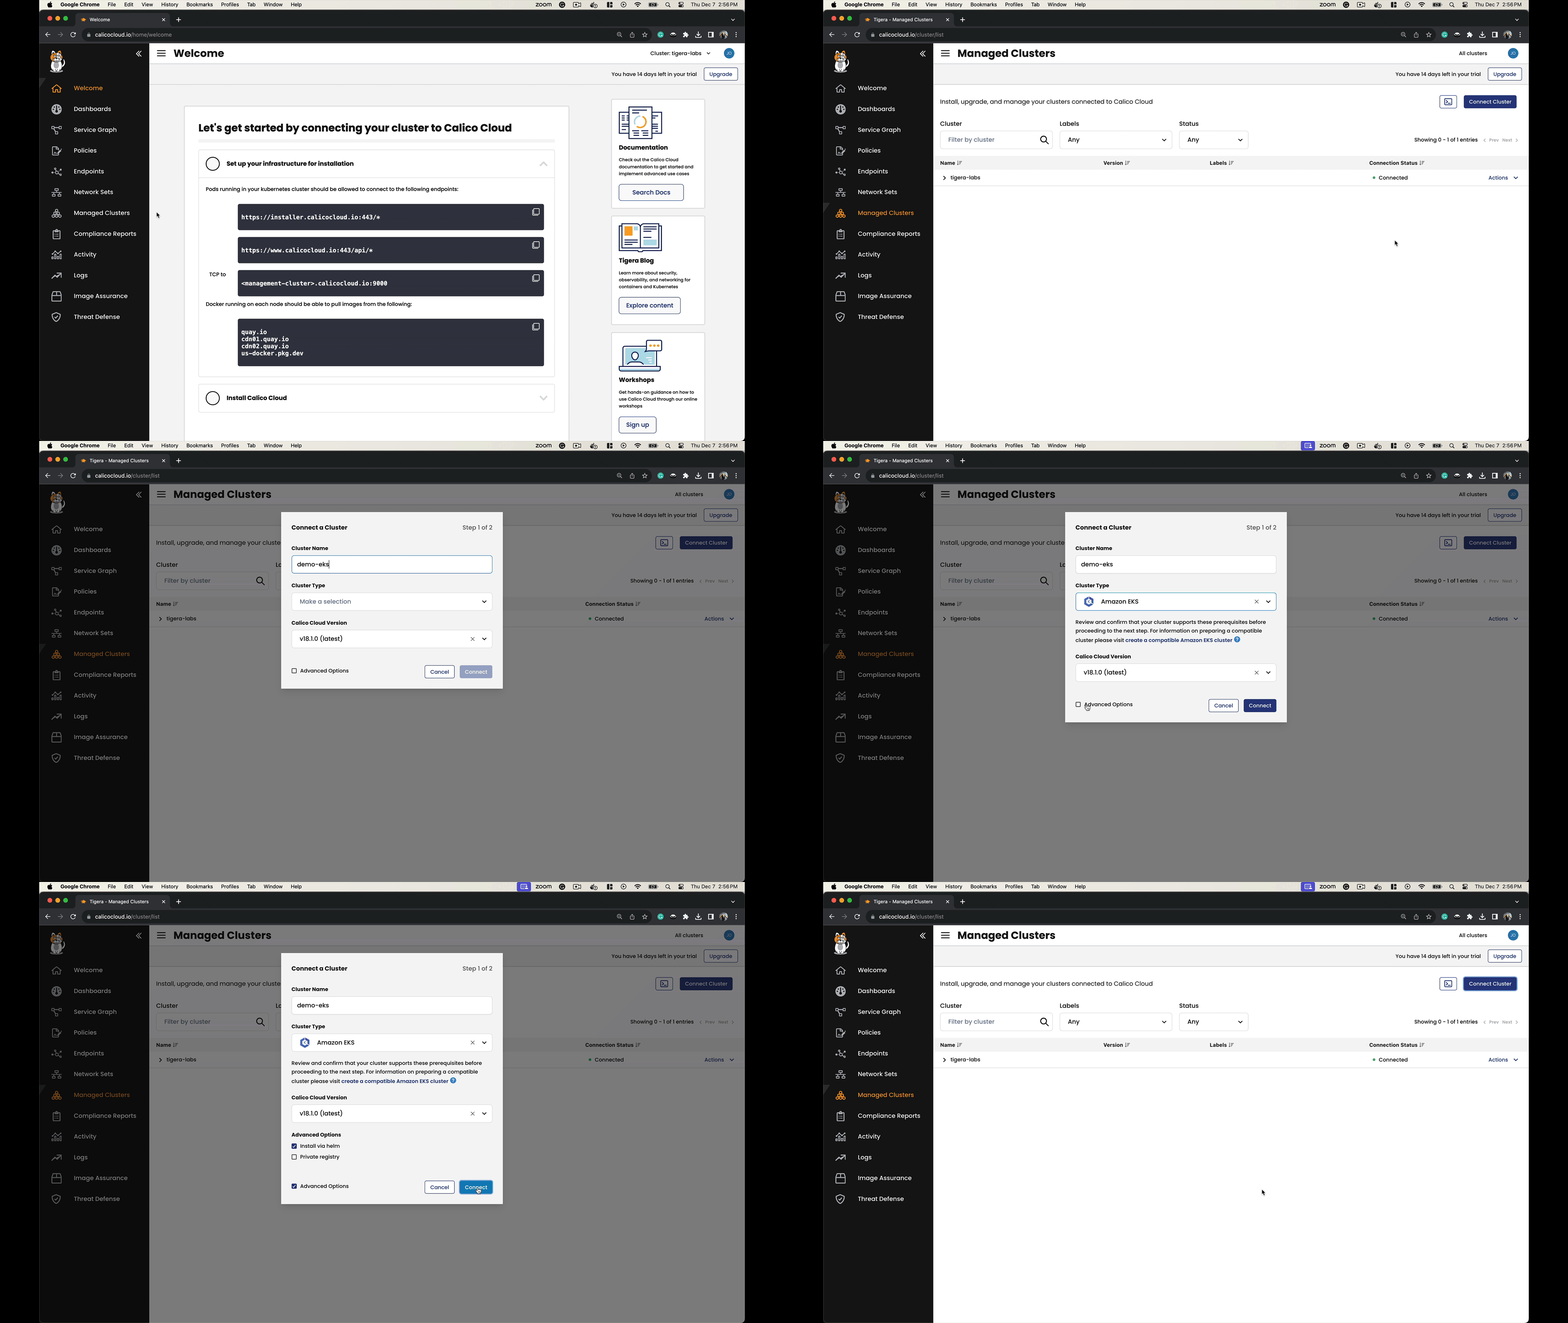
1. Join the EKS Clusters to Calico Cloud
Join your EKS clusters to Calico Cloud as illustrated:
2. Verify the Cluster Status
Check the cluster status:
kubectl get tigerastatus


NAME                            AVAILABLE   PROGRESSING   DEGRADED   SINCE
apiserver                       True        False         False      50m
calico                          True        False         False      49m
cloud-core                      True        False         False      50m
compliance                      True        False         False      49m
image-assurance                 True        False         False      49m
intrusion-detection             True        False         False      49m
log-collector                   True        False         False      50m
management-cluster-connection   True        False         False      49m
monitor                         True        False         False      49m
3. Update the Felix Configuration
Set the flow log flush interval:
kubectl --context iad patch felixconfiguration default --type='merge' -p '{
  "spec": {
    "dnsLogsFlushInterval": "15s",
    "l7LogsFlushInterval": "15s",
    "flowLogsFlushInterval": "15s",
    "flowLogsFileAggregationKindForAllowed": 1
  }
}'
kubectl --context pdx patch felixconfiguration default --type='merge' -p '{
  "spec": {
    "dnsLogsFlushInterval": "15s",
    "l7LogsFlushInterval": "15s",
    "flowLogsFlushInterval": "15s",
    "flowLogsFileAggregationKindForAllowed": 1
  }
}'
Step 3: Cluster Mesh for AWS Elastic Kubernetes Service
1. Create the Cluster Mesh
Run the setup-mesh.sh script:
cd ..
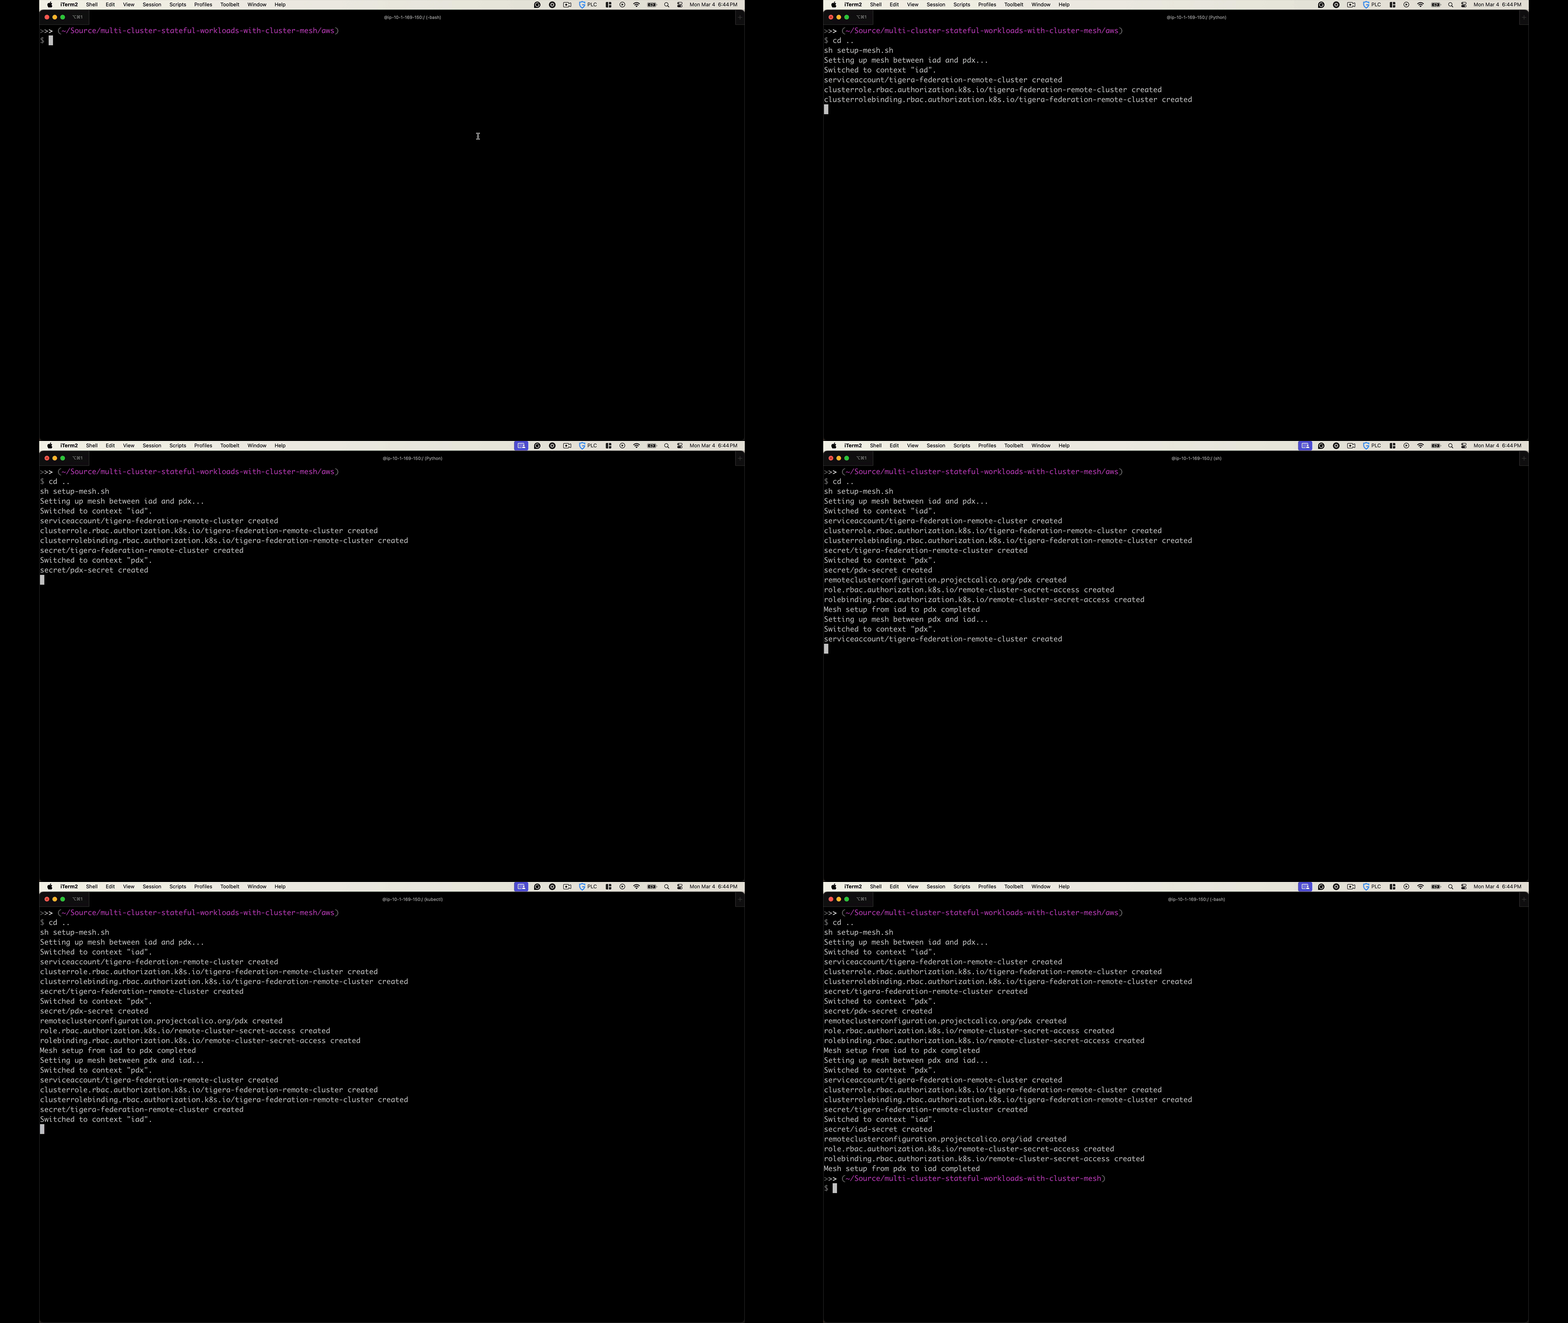
sh setup-mesh.sh
The setup-mesh.sh script automates the creation of a Calico Cluster mesh as outlined in the Tigera documentation, enabling secure and efficient connections between multiple Kubernetes clusters. Below is a breakdown of the specific Kubernetes resources it creates and configures:
2. In the source cluster, it:
- Applies Calico federation manifests to install federation roles, rolebindings, and a service account needed for cross-cluster communication.
- Creates a secret that stores the service account token. This token ensures secure connections between clusters by providing authentication and authorization.
3. Generates a kubeconfig file using the service account token. This file contains all the necessary details (like the cluster API server address and credentials) for secure access to the source cluster.
4. In the destination cluster, it:
- Creates a secret that includes the kubeconfig from the source cluster. This enables the destination cluster to communicate with the source cluster securely.
- Configures a
RemoteClusterConfigurationresource, which is used to manage the mesh connection settings and policies. - Applies RBAC roles and role bindings to allow designated components access to the secret, ensuring they can establish and maintain secure cross-cluster communication.
Validate the Deployment and Review the Results
1. Confirm Calico Cluster mesh-enabled clusters are in-sync
Check logs for remote cluster connection status:
kubectl --context iad logs deployment/calico-typha -n calico-system | grep "Sending in-sync update"
kubectl --context pdx logs deployment/calico-typha -n calico-system | grep "Sending in-sync update"
2024-02-27 01:51:06.156 [INFO][13] wrappedcallbacks.go 487: Sending in-sync update for RemoteClusterConfiguration(pdx)
2024-02-27 01:51:03.300 [INFO][13] wrappedcallbacks.go 487: Sending in-sync update for RemoteClusterConfiguration(iad)
You should see similar messages for each of the clusters in your Cluster mesh.
2. Deploy Statefulsets and Headless Services
Return to the project root and apply the manifests:
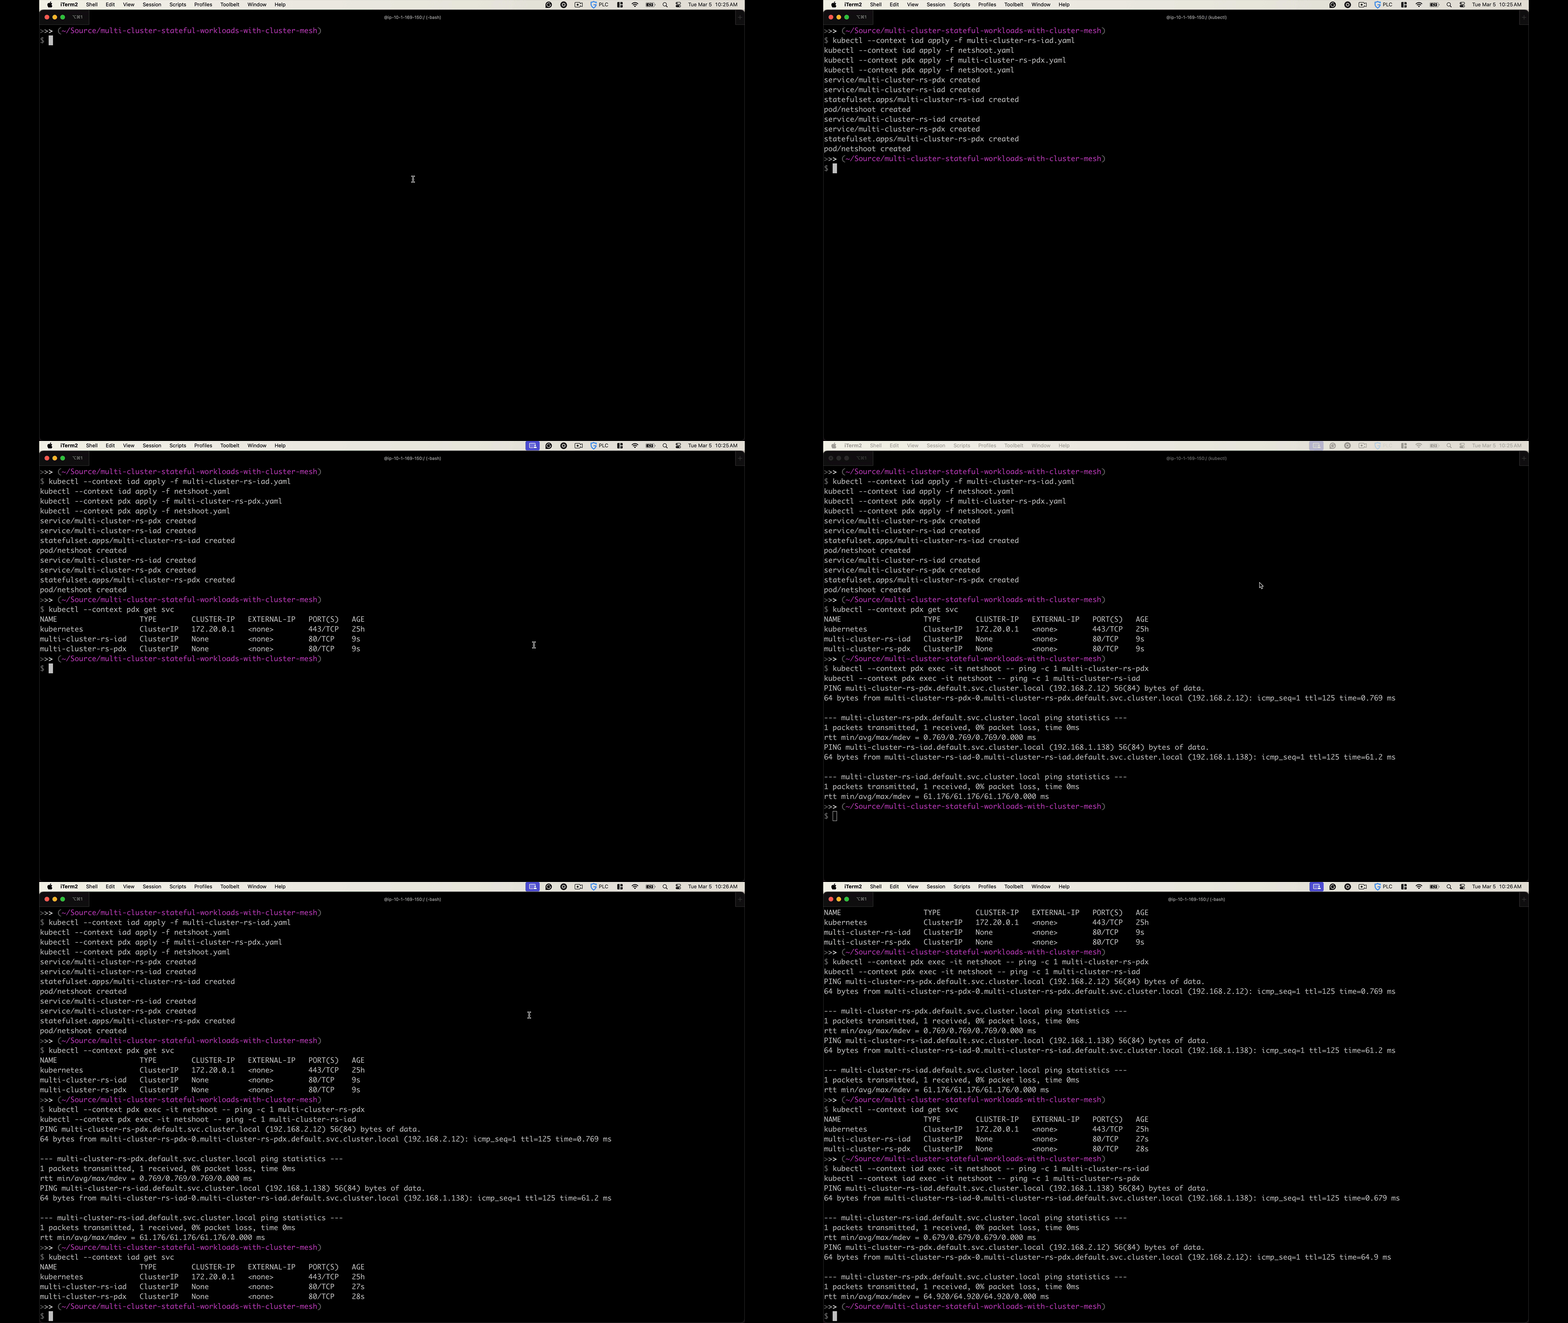
kubectl --context iad apply -f multi-cluster-rs-iad.yaml
kubectl --context iad apply -f netshoot.yaml
kubectl --context pdx apply -f multi-cluster-rs-pdx.yaml
kubectl --context pdx apply -f netshoot.yaml
3. Implement Calico Federated Services for Calico cluster mesh
Test the configuration of each Service:
kubectl --context pdx get svc
kubectl --context pdx exec -it netshoot -- ping -c 1 multi-cluster-rs-pdx
kubectl --context pdx exec -it netshoot -- ping -c 1 multi-cluster-rs-iad
kubectl --context iad get svc
kubectl --context iad exec -it netshoot -- ping -c 1 multi-cluster-rs-iad
kubectl --context iad exec -it netshoot -- ping -c 1 multi-cluster-rs-pdx
By accessing the headless service names within each cluster, we can observe how they resolve to endpoint addresses in both the local and the remote clusters. We can confirm that there is service discovery and connectivity across the clusters.
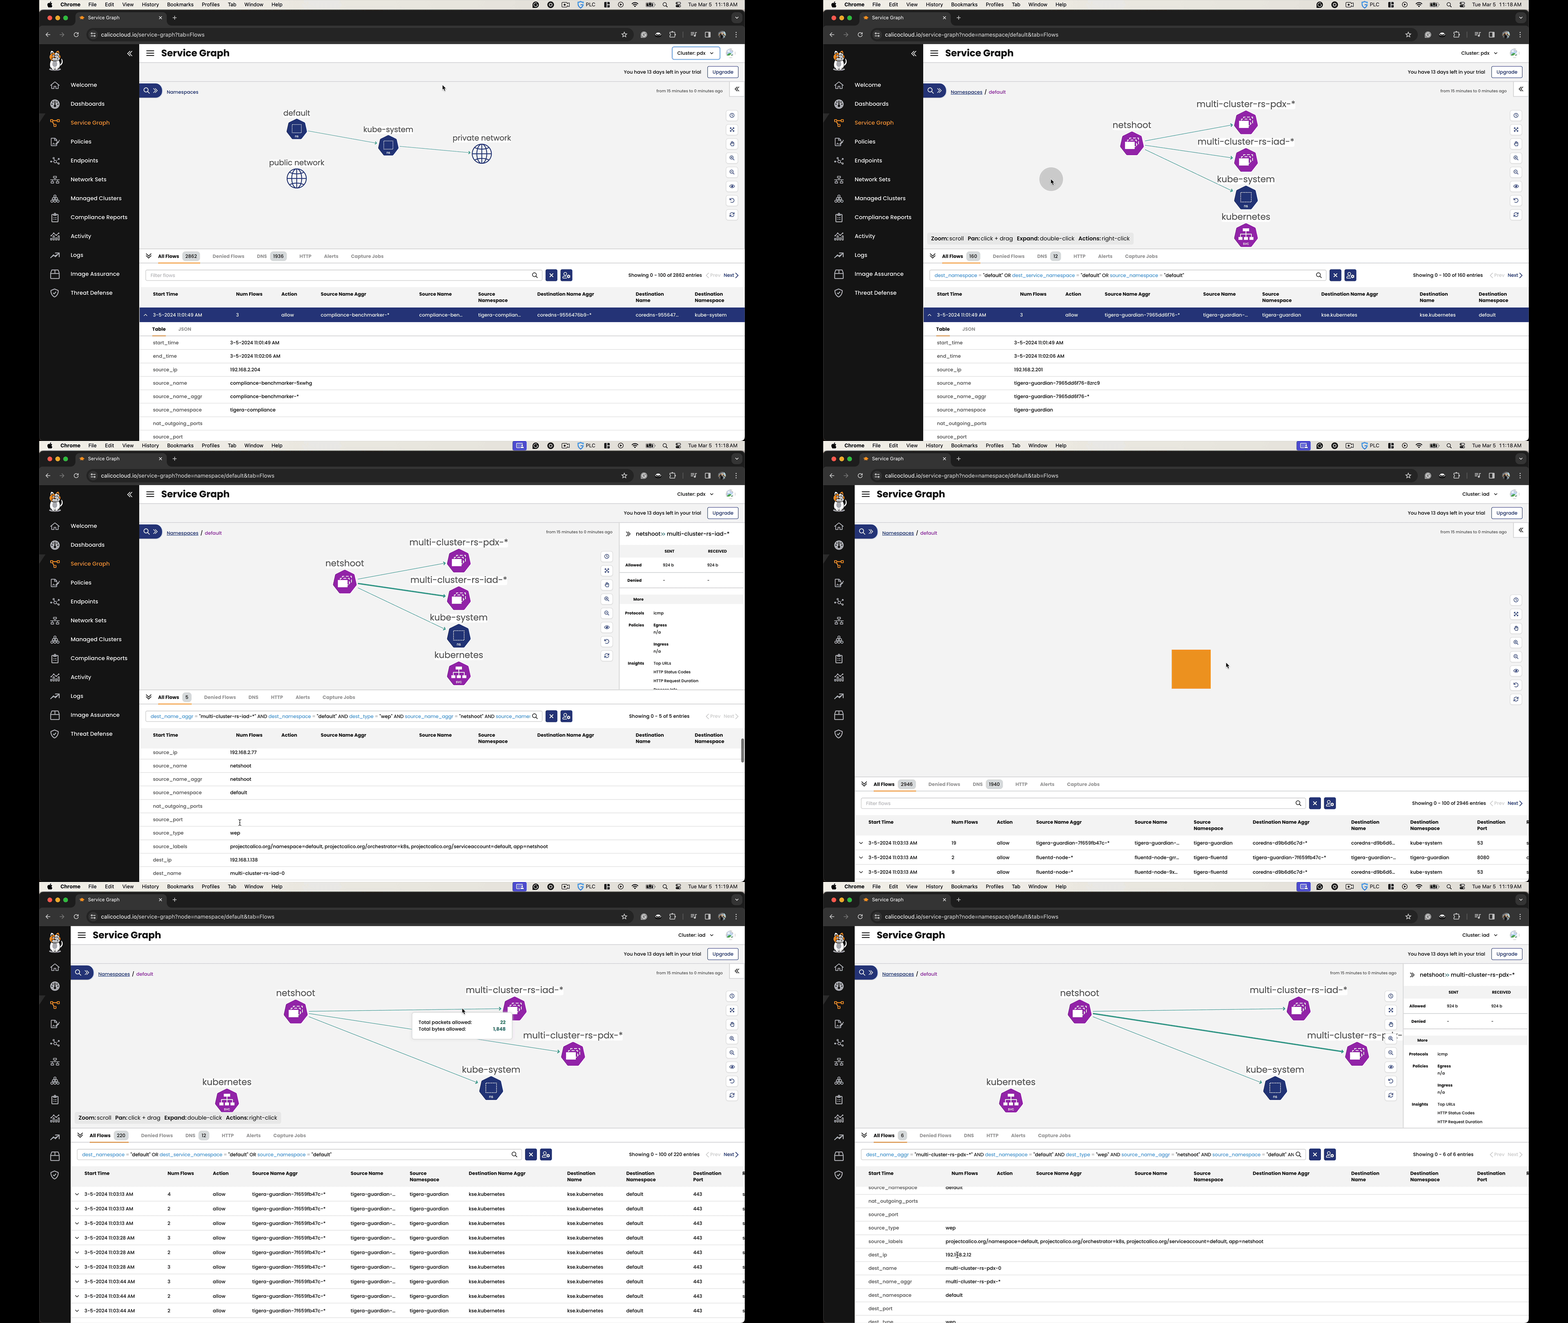
In the Calico Cloud Service Graph, you can observe cross-cluster communication by visualizing the network traffic flows between different clusters. The Service Graph not only shows the existence of cross-cluster connectivity but also allows you to analyze the efficiency and behavior of the data flows, facilitating a deeper understanding of the network dynamics in a multi-cluster environment.
Conclusion
Calico Cluster mesh enables efficient connectivity for stateful workloads between Kubernetes clusters, which is essential for multi-cluster deployments. By enhancing Kubernetes’ native service discovery to function seamlessly across clusters, Calico Cluster mesh facilitates the discovery and connection of services, including headless services, thus removing the need for additional control planes like a service mesh. Its ability to optimize routing paths makes sure that data is transmitted directly between workloads, bypassing the need for external routing and reducing network hops to guarantee low-latency communication. This makes Cluster mesh an indispensable tool in the toolbox for deploying stateful workloads on Kubernetes, streamlining cross-cluster interactions, and bolstering the performance and reliability of your multi-cluster environments.
Ready to try Calico for yourself? Sign up for a free trial of Calico Cloud
Join our mailing list
Get updates on blog posts, workshops, certification programs, new releases, and more!
